-1.webp?width=150&height=63&name=vfairs-logo-landscape-gradient-5%20(2)-1.webp)
-
Log in to the event backend.
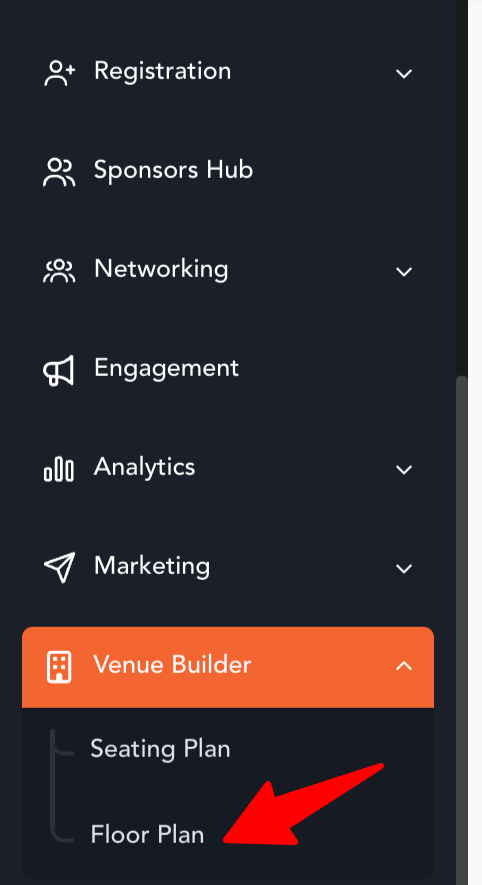
- Open Venue Builder from the left navigation menu.
- Select Floor Plans.
The Floor Plans listing page displays all halls created for the event and the floors associated with each hall.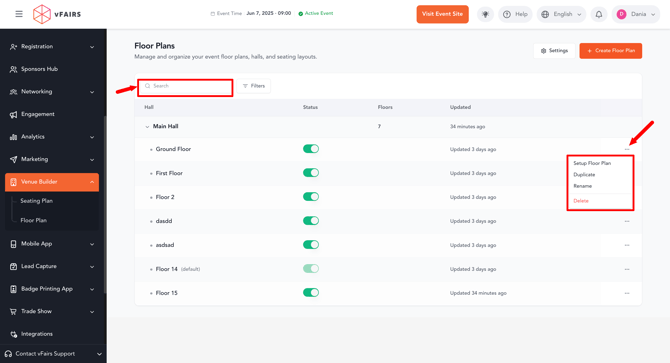
From this page, you can:
- Search for a hall or floor plan.
- Apply filters to the listing.
- Expand or collapse a hall to view its floors.
-
View the number of floors created under each hall.
- Enable or disable individual floors using the Status toggle.
- View when a floor was last updated.
- Access additional floor actions from the three-dot menu.
- Open the floor plan settings.
- Create a new floor plan.
To create a floor plan:
-
Click Create Floor Plan in the upper-right corner of the listing page.
-
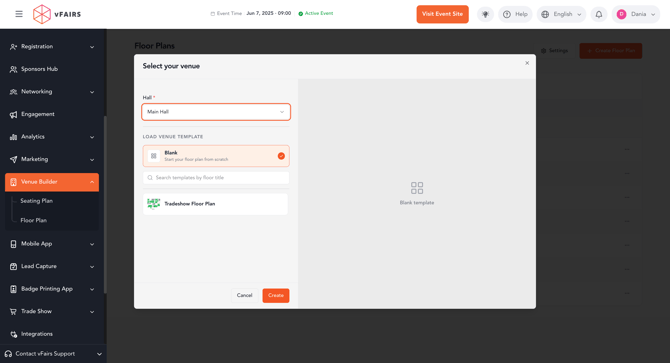
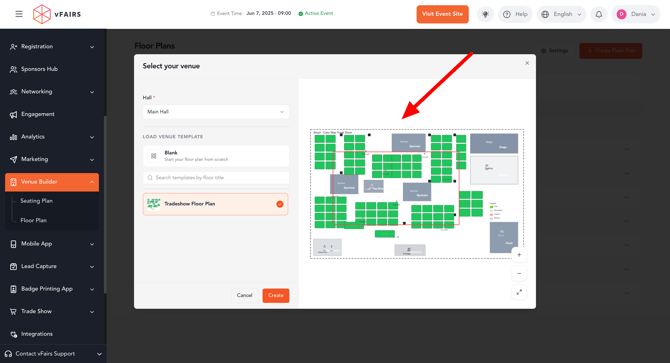
The Select your venue window will open.
-
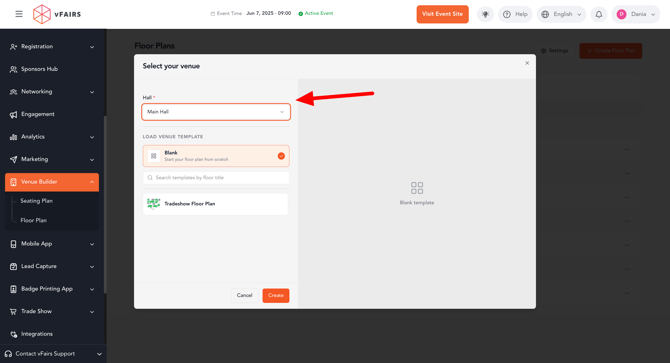
Select the hall in which the floor plan should be created.
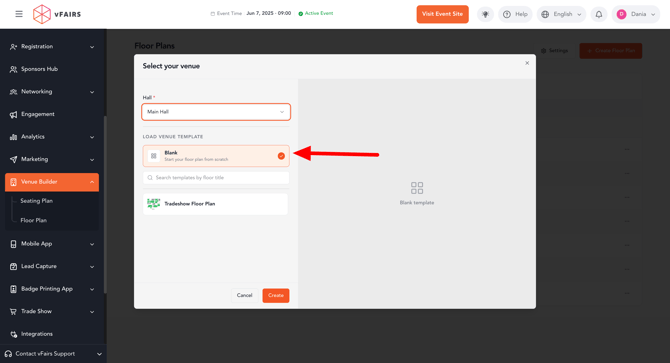
- Choose how you want to create the floor plan:
- Select Blank to create the layout from scratch.
-
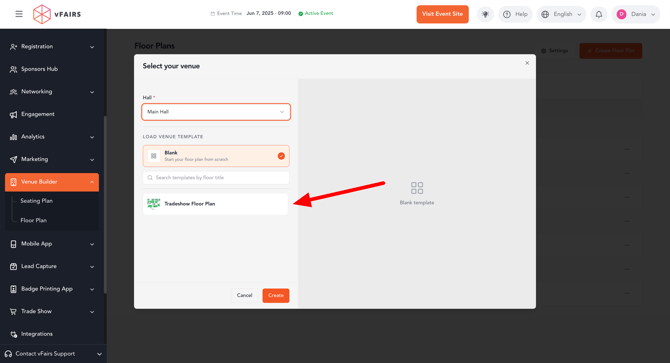
Select an existing venue template to begin with a predefined layout.
-
If required, use the search field to find a saved template by its floor title.
-
Review the selected template in the preview area.
-
Click Create.
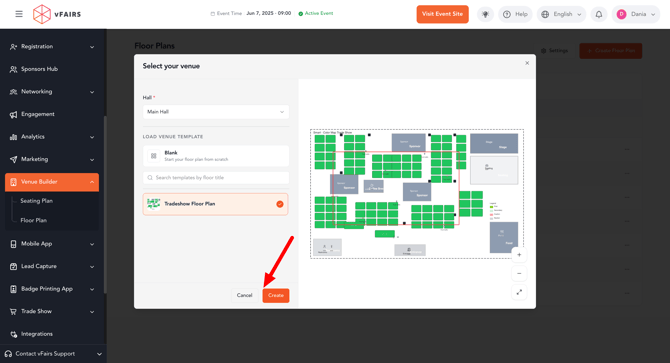
- You will be redirected to the Floor Plan Builder.
You can create and manage multiple halls within the same event. Each hall can contain one or more floors.
The venue structure works as follows:
Event → Multiple Halls → Multiple Floors within each Hall
Managing halls
From the Floor Plan Builder:
- Open the Hall dropdown above the canvas.
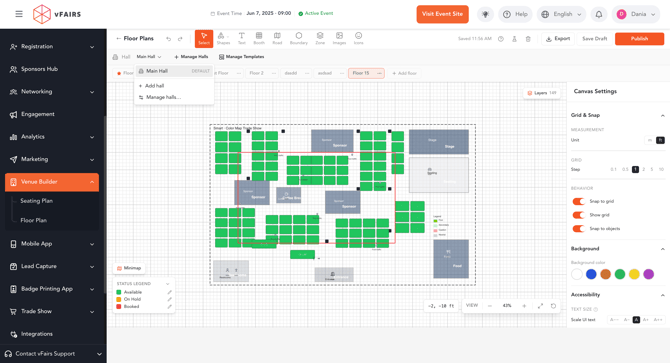
- Select a hall to view and manage its associated floors.
- Click Manage Halls to create, edit, or manage the event’s halls.
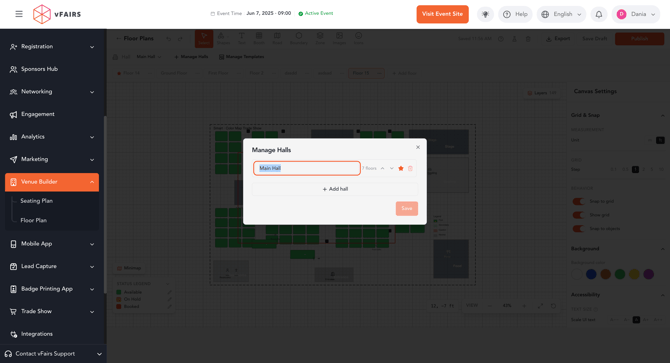
Each hall maintains its own set of floors. Changes made to a floor in one hall do not affect floors belonging to another hall.
Managing floors
Floors belonging to the selected hall appear as tabs above the canvas.
You can:
- Select a floor tab to open that floor.
- Click Add floor to create another floor under the selected hall.
- Use the three-dot menu on a floor tab to access additional actions.
- Identify the default floor by the star displayed beside its name.
- Enable or disable each floor from the Floor Plans listing page.
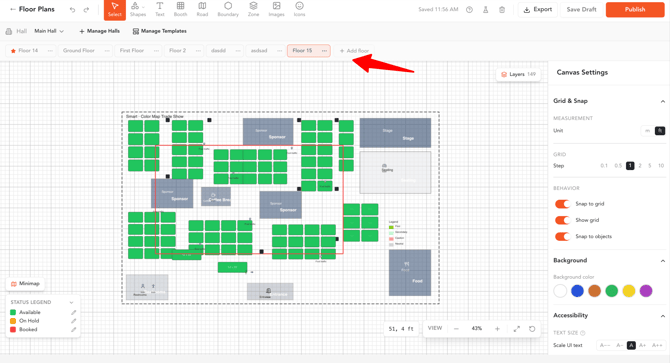
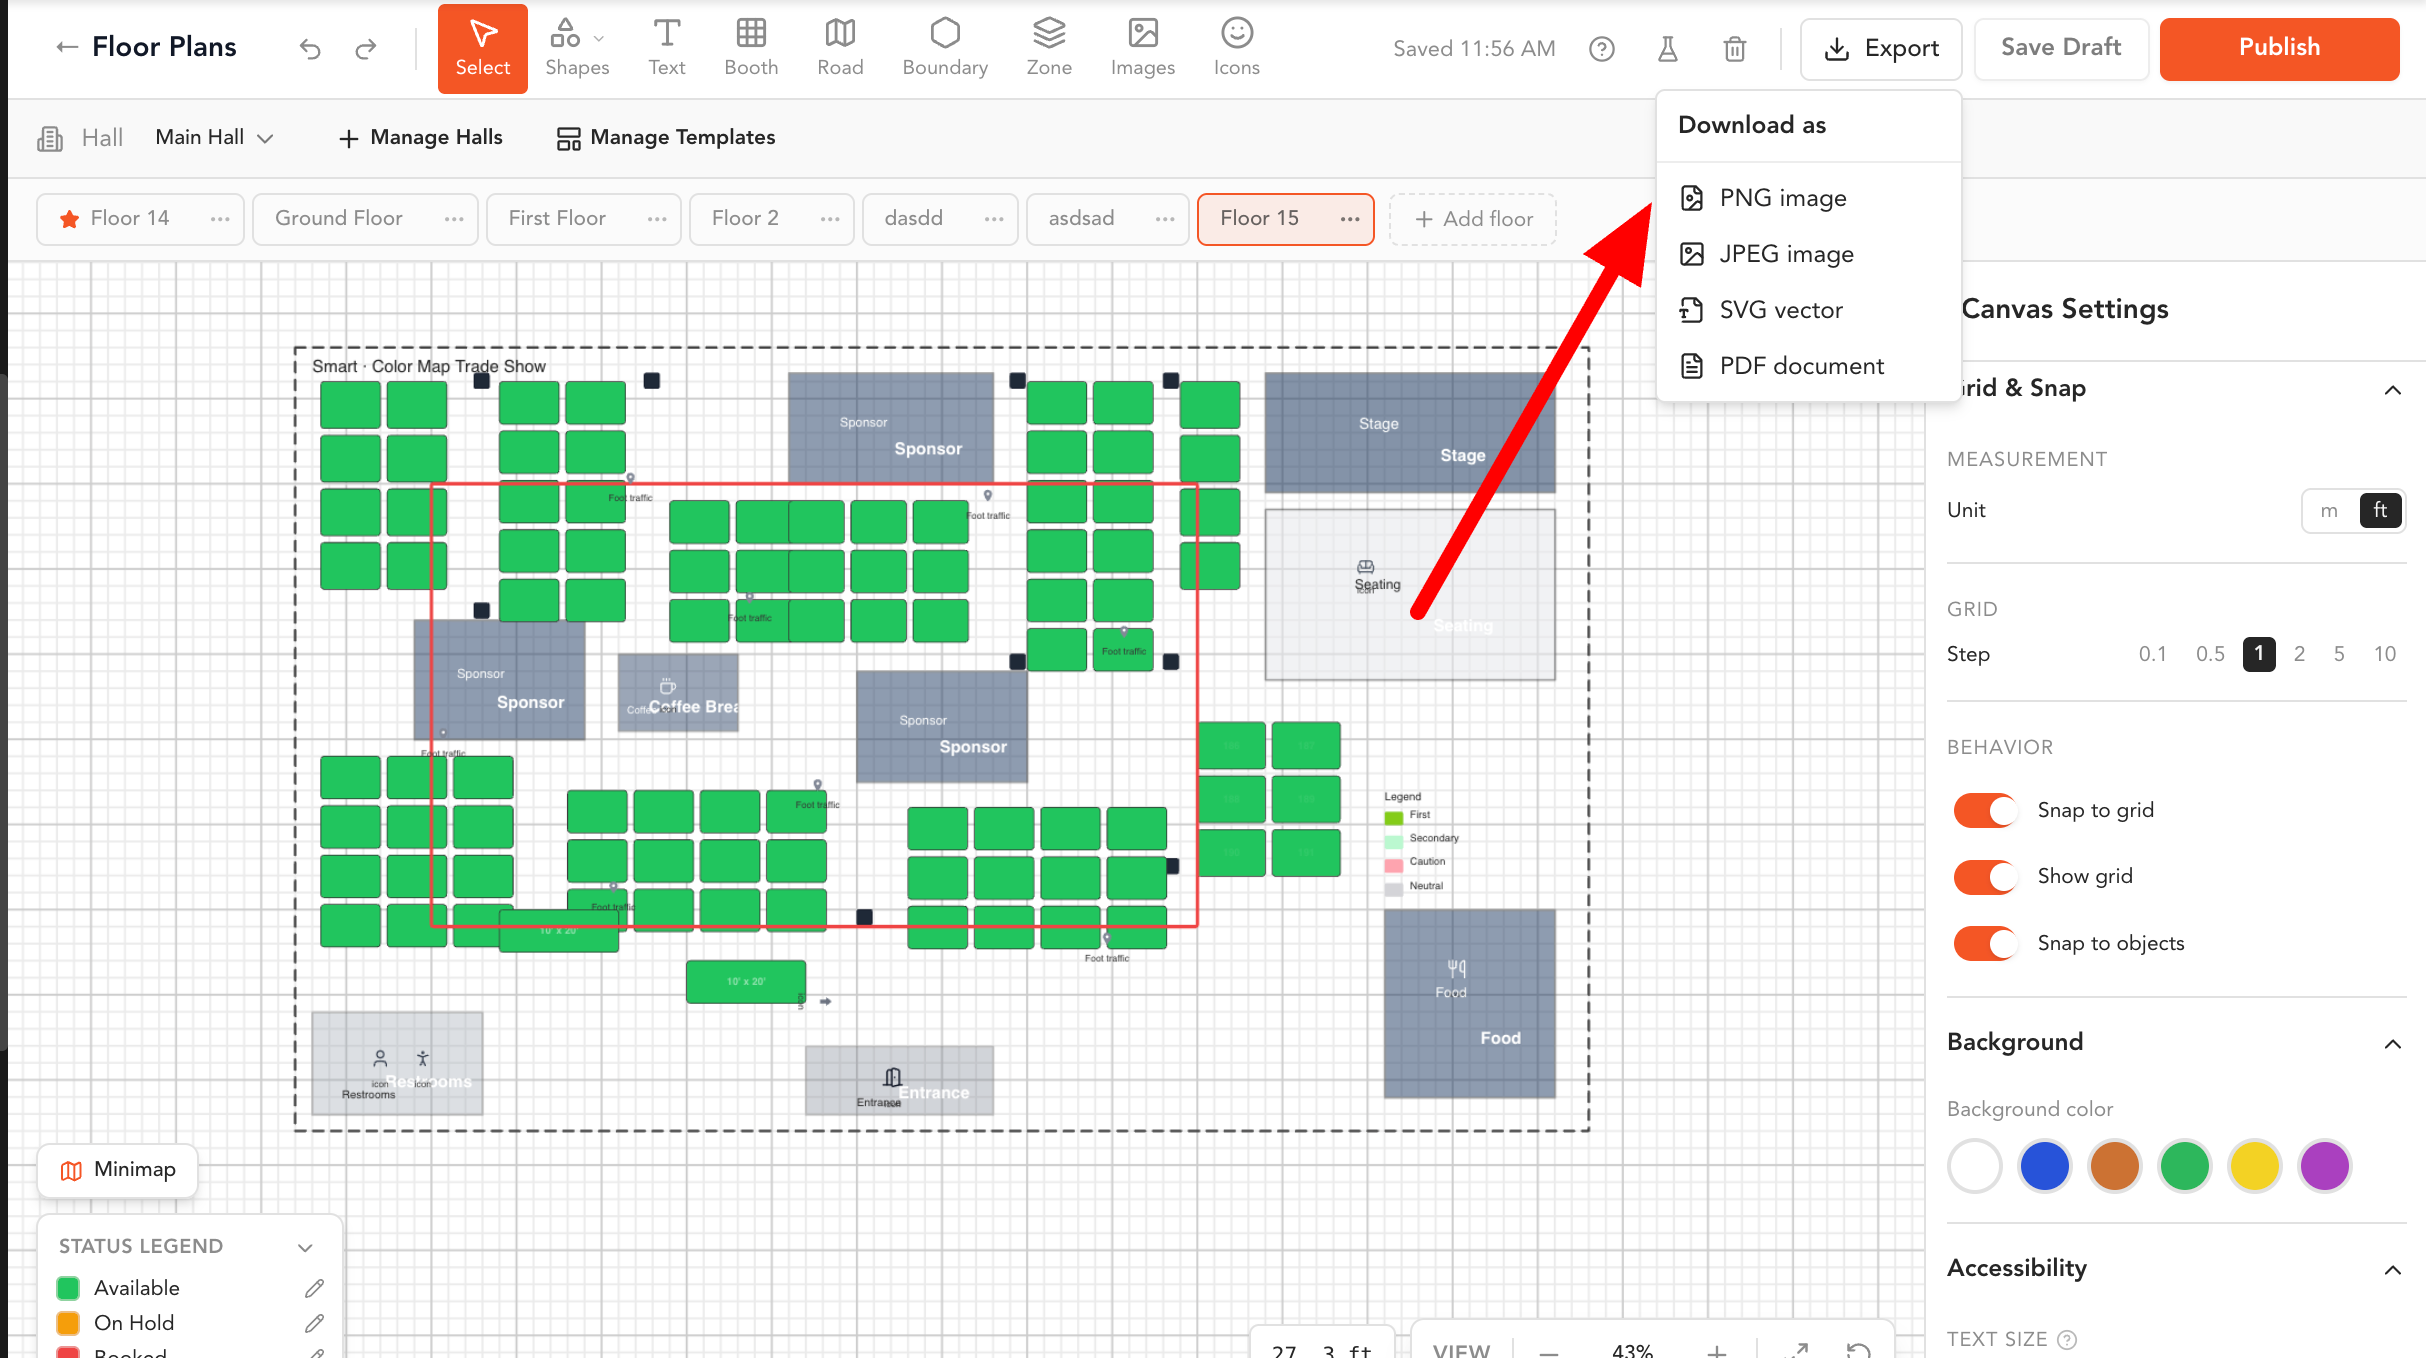
The Floor Plan Builder contains the design toolbar, floor controls, canvas, overview map, legends, layers, and configuration panels.
Using the Design ToolbarThe toolbar at the top of the builder allows you to add and manage different elements on the floor plan.
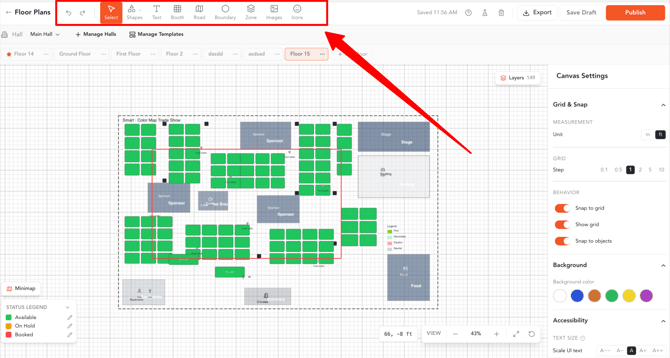
The following tools are available:
- Select: Select, move, resize, or edit existing elements.
- Shapes: Add visual shapes to the canvas.
- Text: Add titles, labels, directions, or other text.
- Booth: Add exhibitor booths to the floor plan.
- Road: Add walkways or directional routes.
- Boundary: Define the limits of a particular space.
- Zone: Create areas such as stages, seating sections, sponsor spaces, or food areas.
- Images: Upload and position images on the canvas.
- Icons: Add visual indicators for entrances, restrooms, food areas, and other facilities.
Use the Undo and Redo controls to reverse or restore recent changes.
Configuring ElementsWhen you select an element on the canvas, its configuration panel—also called an inspector—opens on the right side of the builder.
The settings displayed in the inspector depend on the selected element.
Configuring text
For example Selecting a text element opens the Text Inspector.
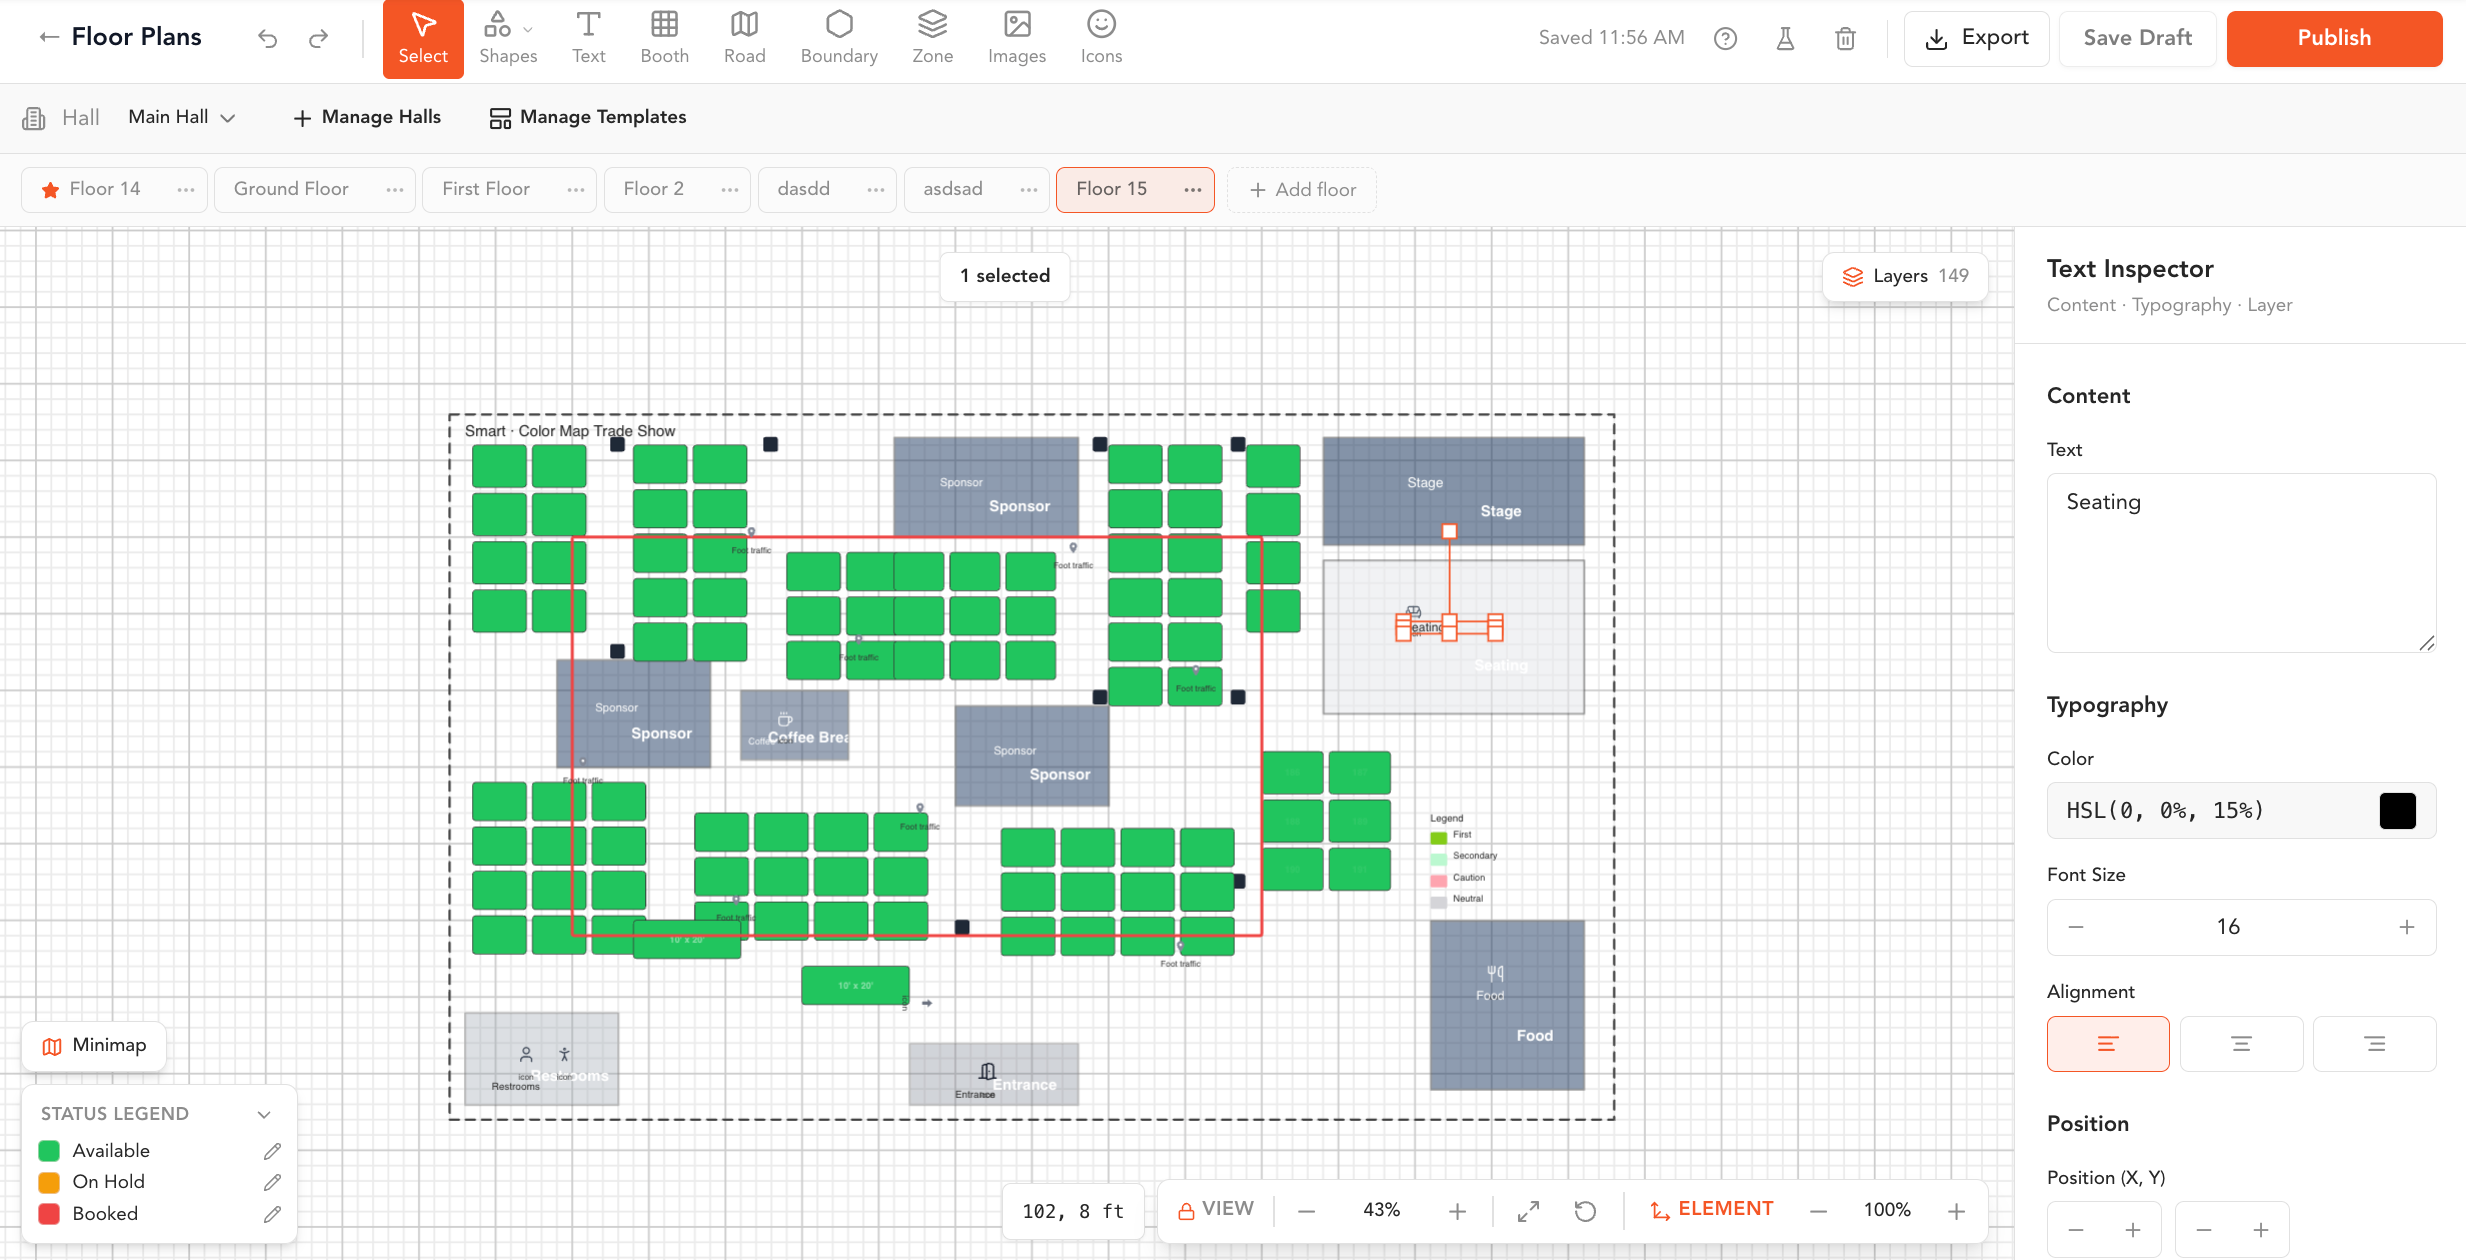
From the Text Inspector, you can manage:
- Text content
- Text color
- Font size
- Alignment
- Position
- Rotation
- Layer settings
Configuring booths
Selecting a booth opens the Booth Inspector.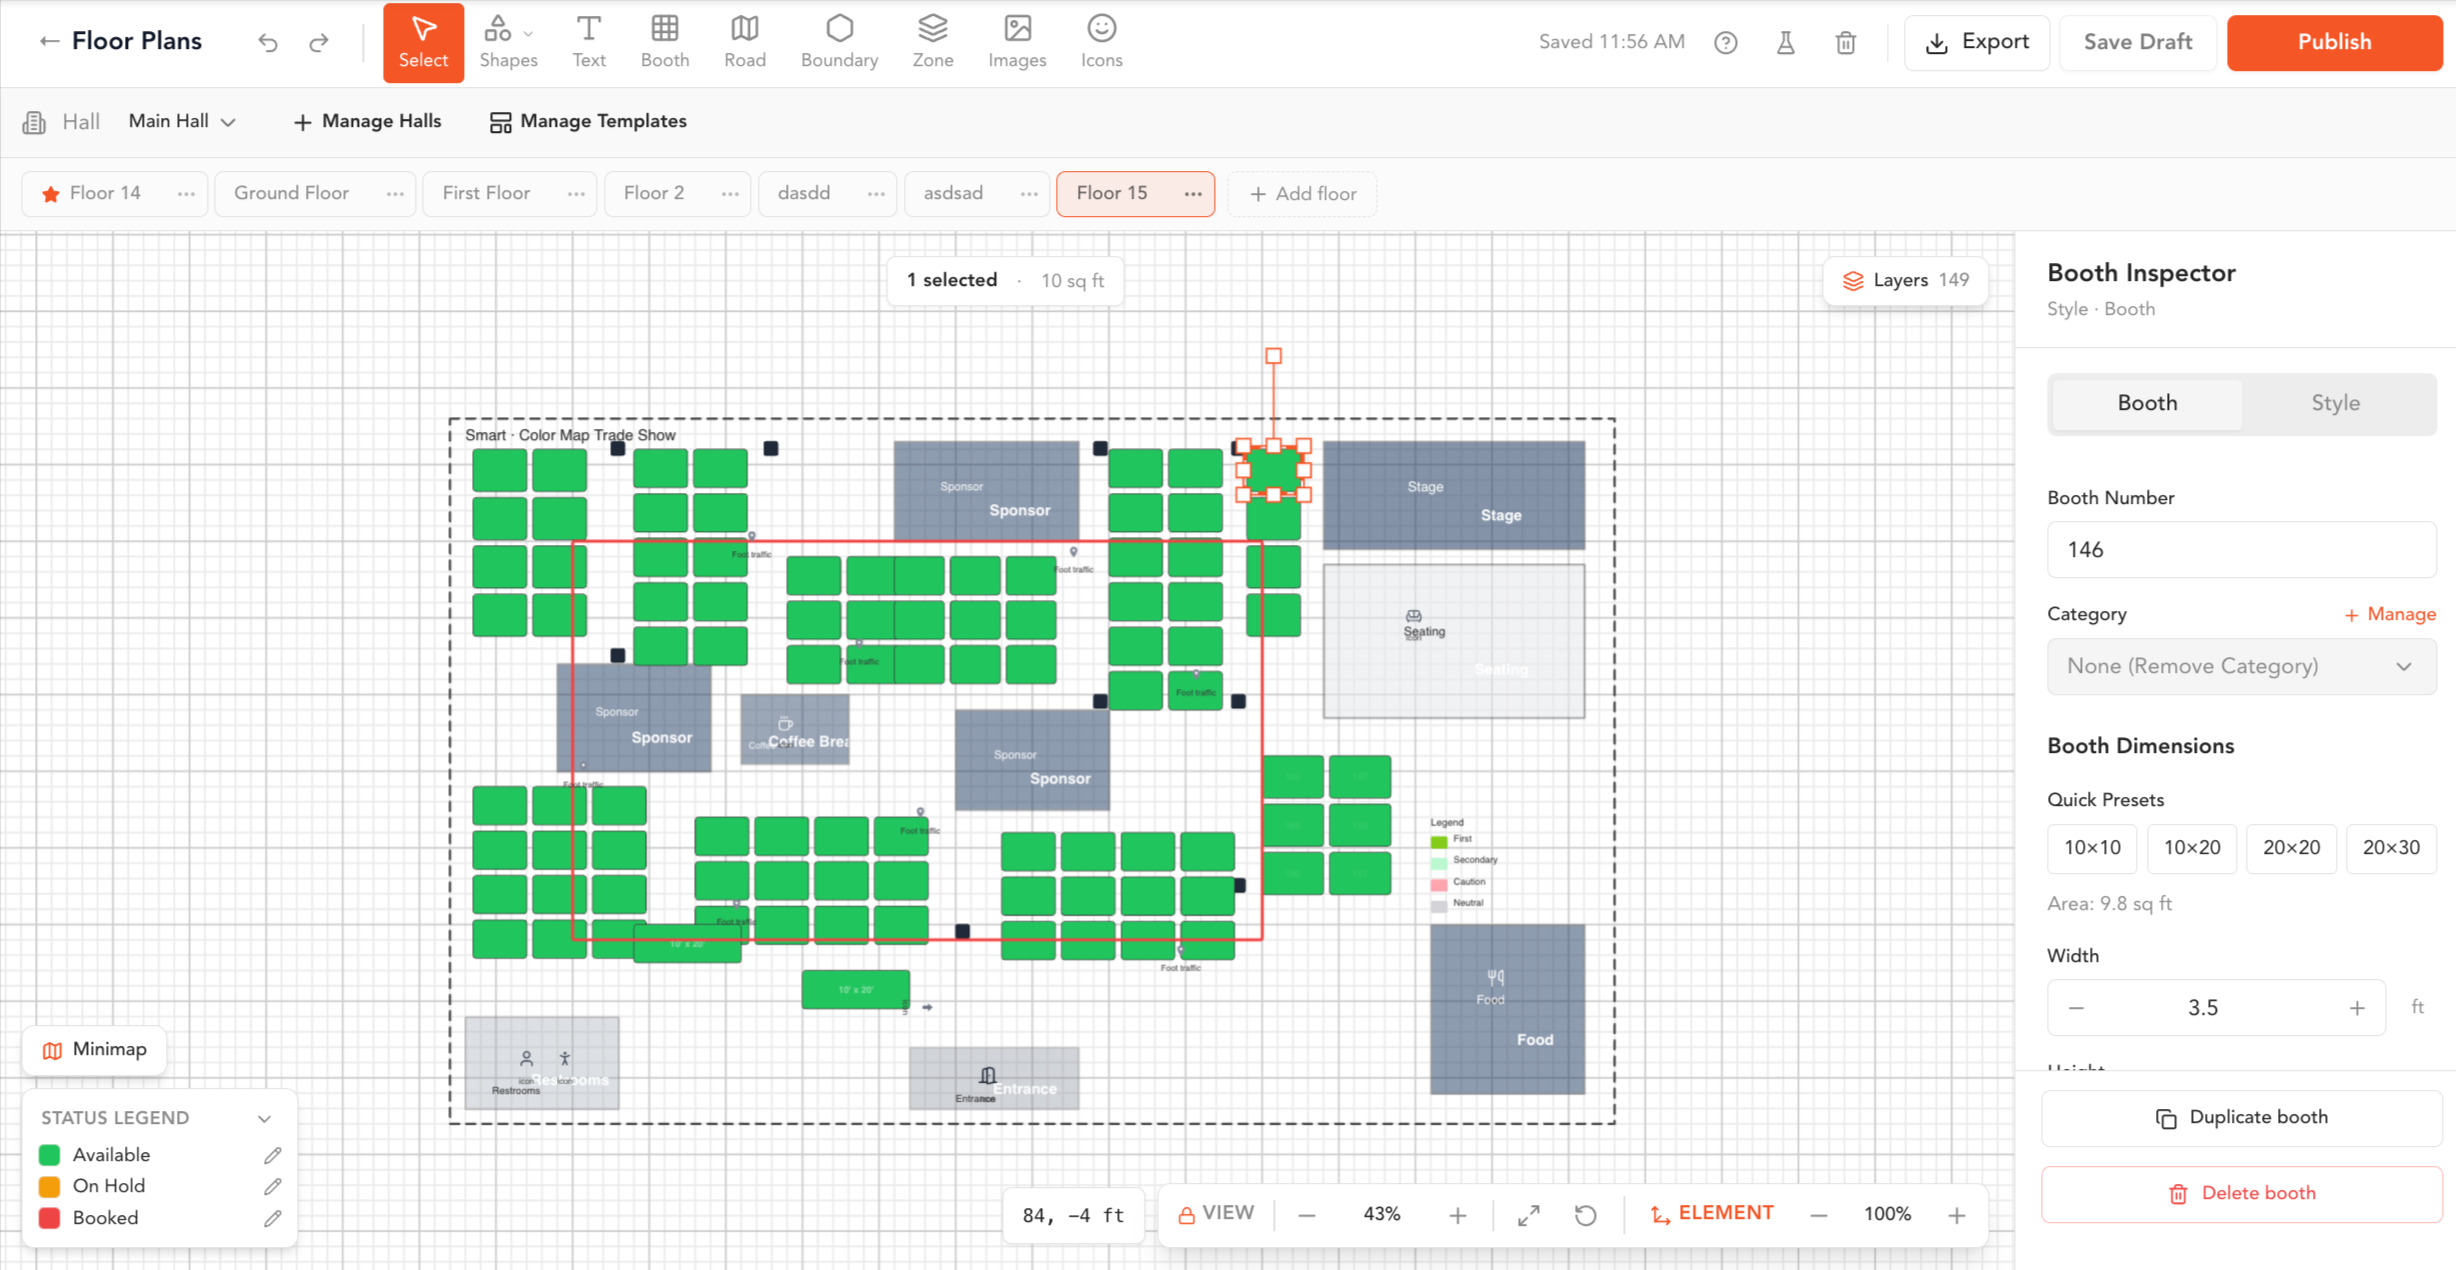
From the Booth Inspector, you can manage:
- Booth number
- Booth category
- Booth dimensions
- Width and height
- Booth styling
- Booth duplication
- Booth deletion
Other canvas elements provide their own inspector settings when selected.
Managing TemplatesClick Manage Templates above the canvas to manage reusable floor plan templates.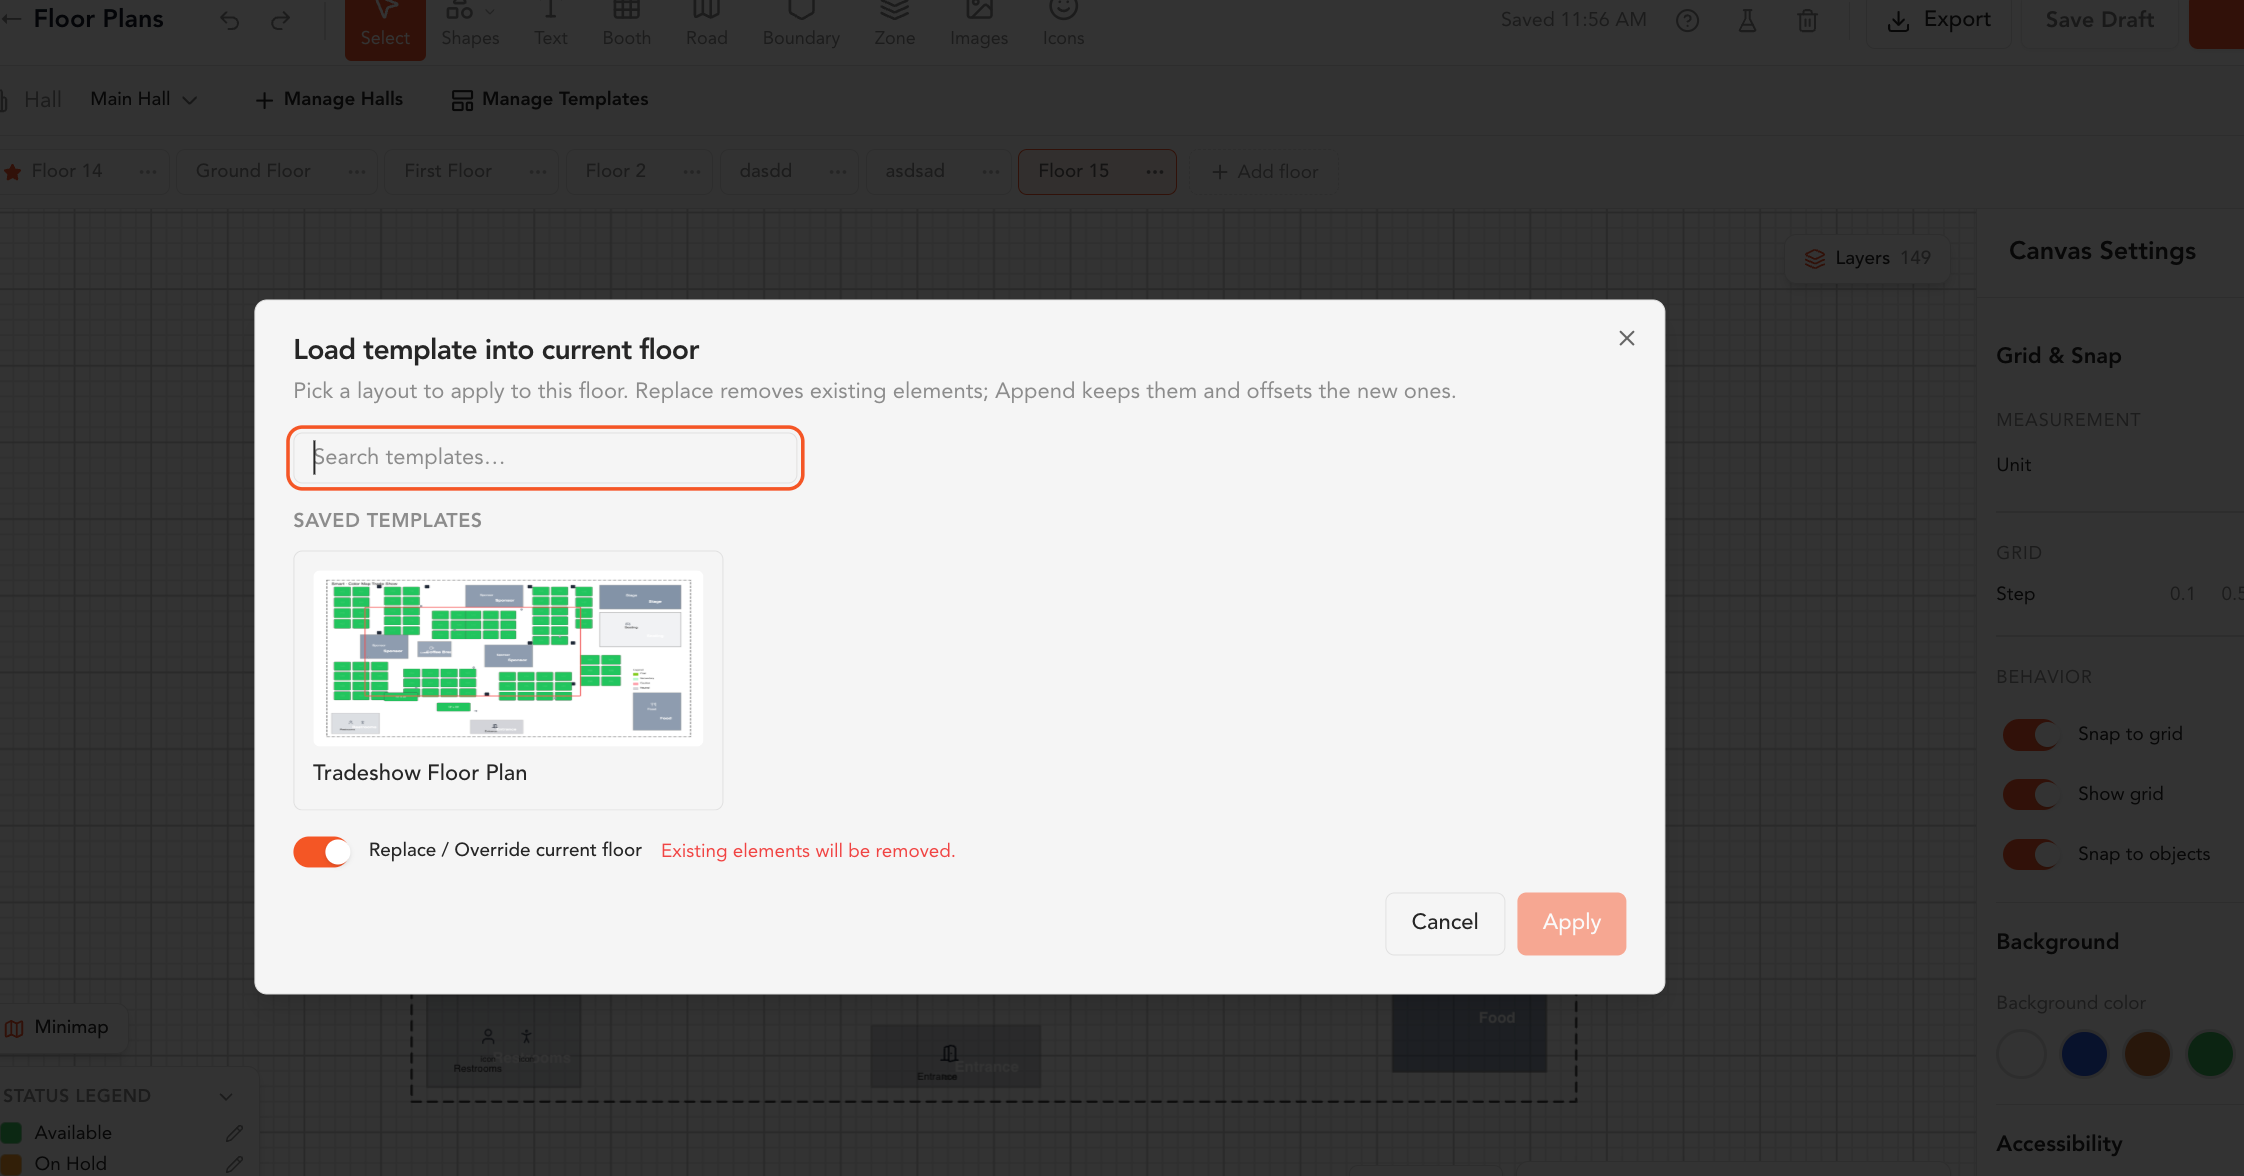
Templates allow you to reuse an existing layout when creating another floor plan. When creating a floor plan, saved templates appear in the Select your venue window and can be searched by floor title.
Select Blank if you do not want to use a template and prefer to build the floor plan from scratch.
Configuring the CanvasWhen an individual element is not selected, the right-side panel displays the Canvas Settings.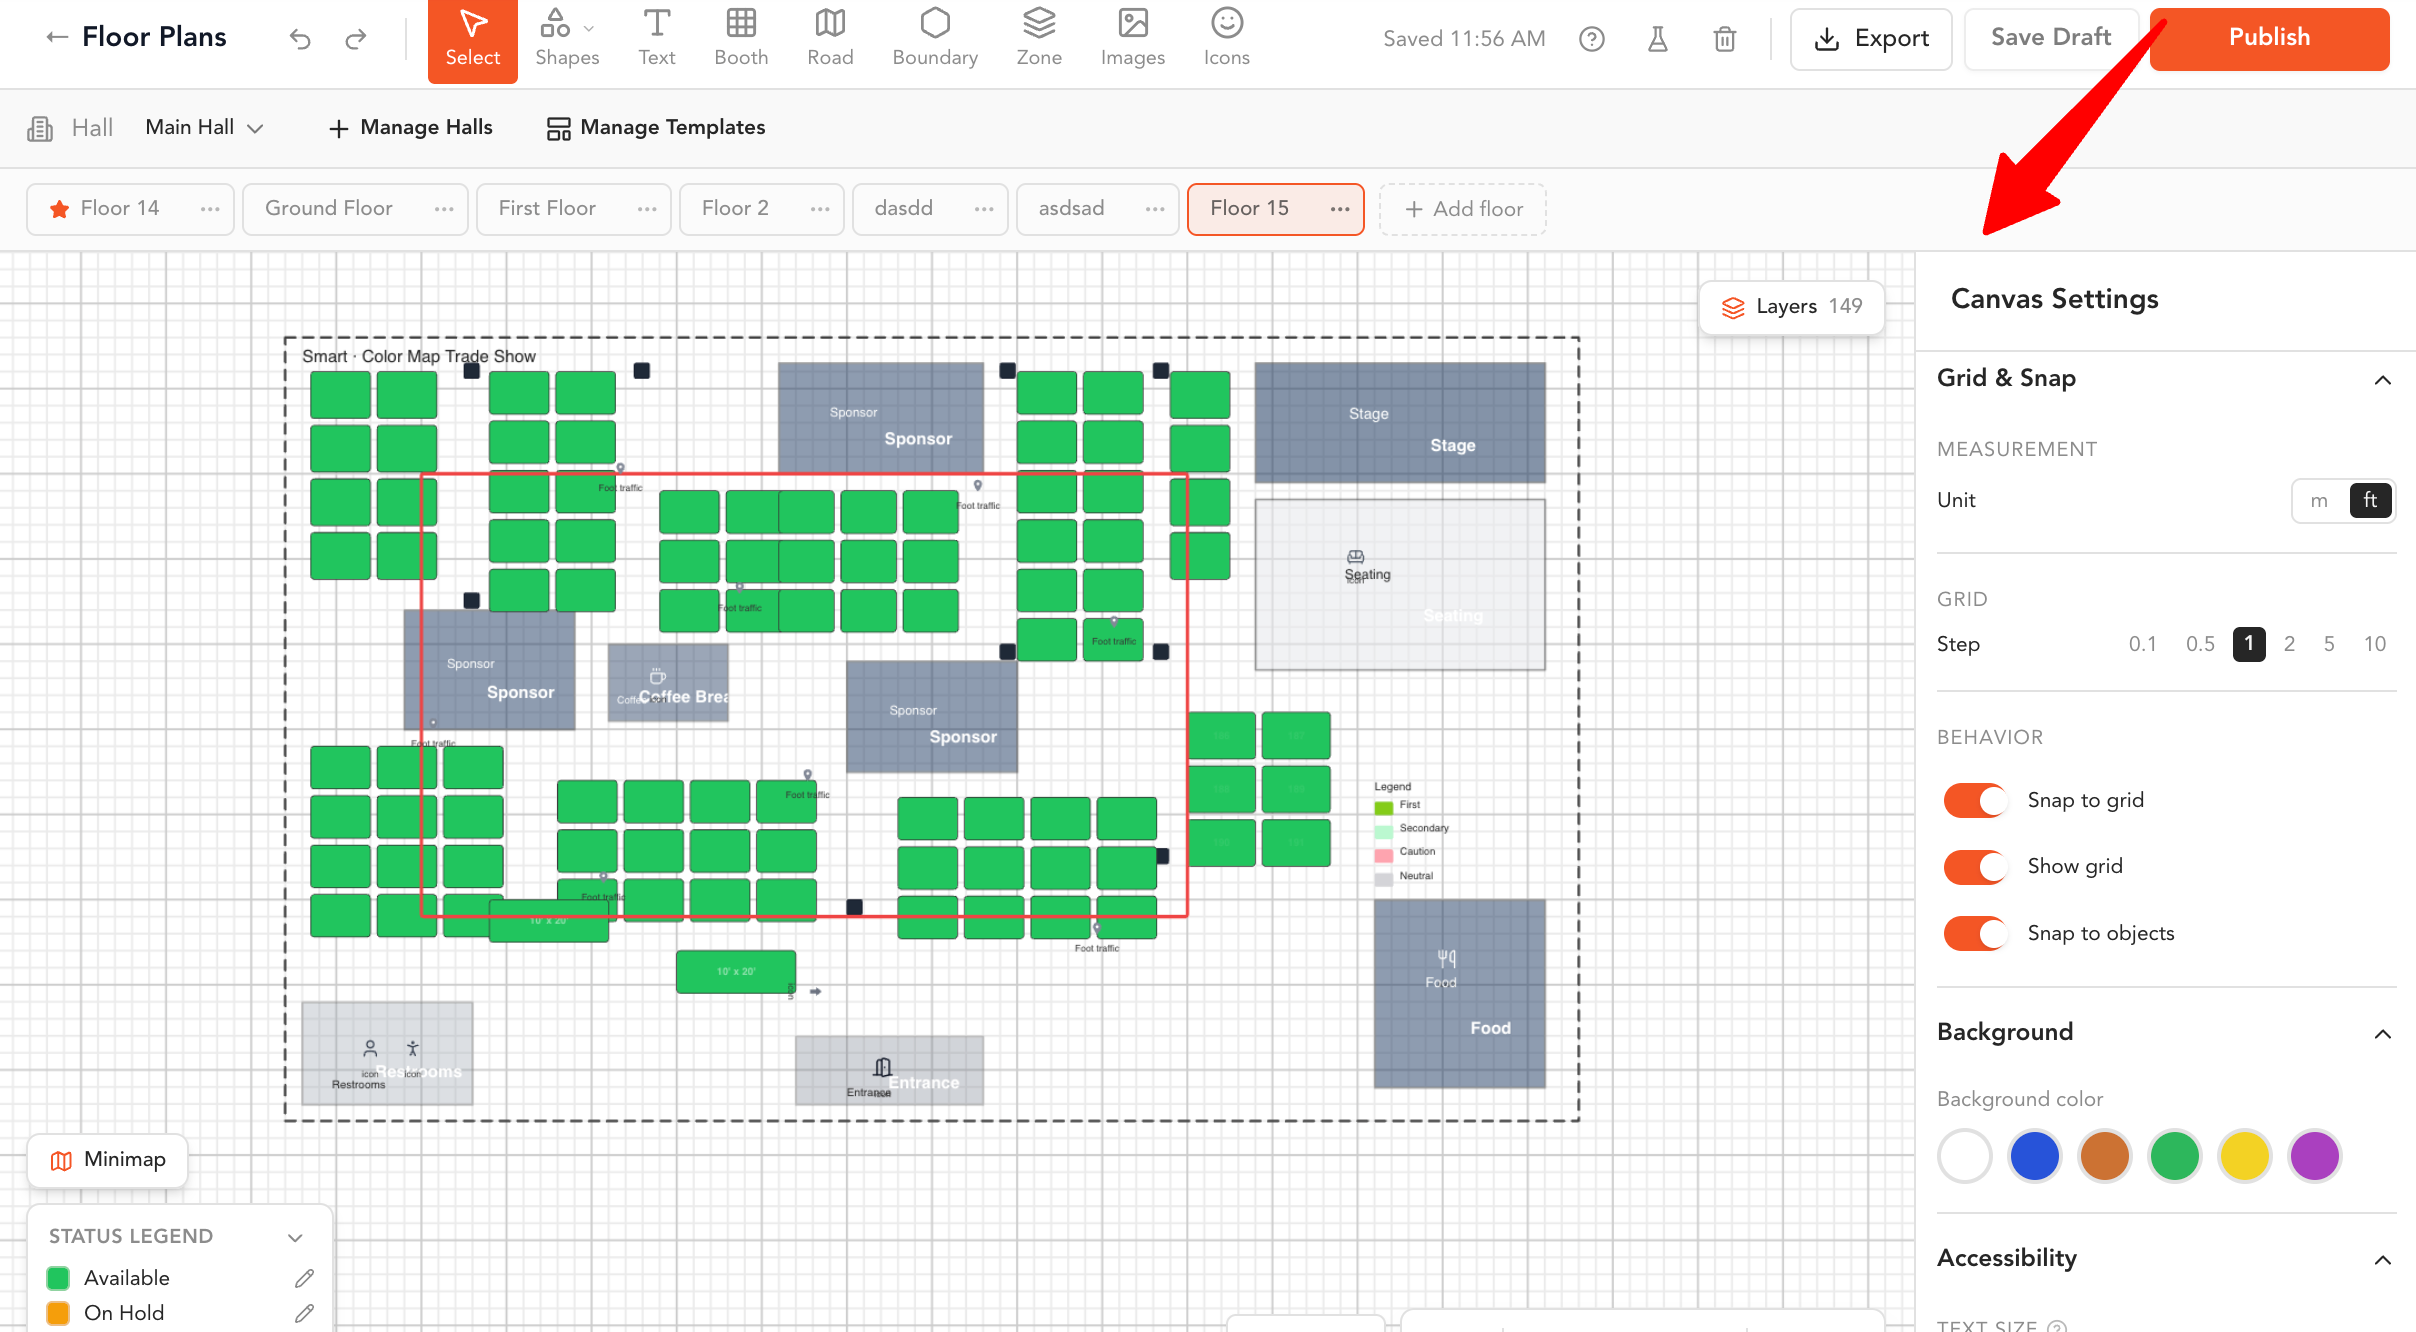
From this panel, you can:
- Select the measurement unit.
- Configure the grid step.
- Show or hide the grid.
- Enable or disable snapping to the grid.
- Enable or disable snapping to other objects.
- Change the background color.
- Adjust the interface text size for accessibility.
The Overview panel in the lower-left corner displays a miniature version of the complete floor plan. You can use it to navigate large layouts and identify which section of the canvas is currently visible.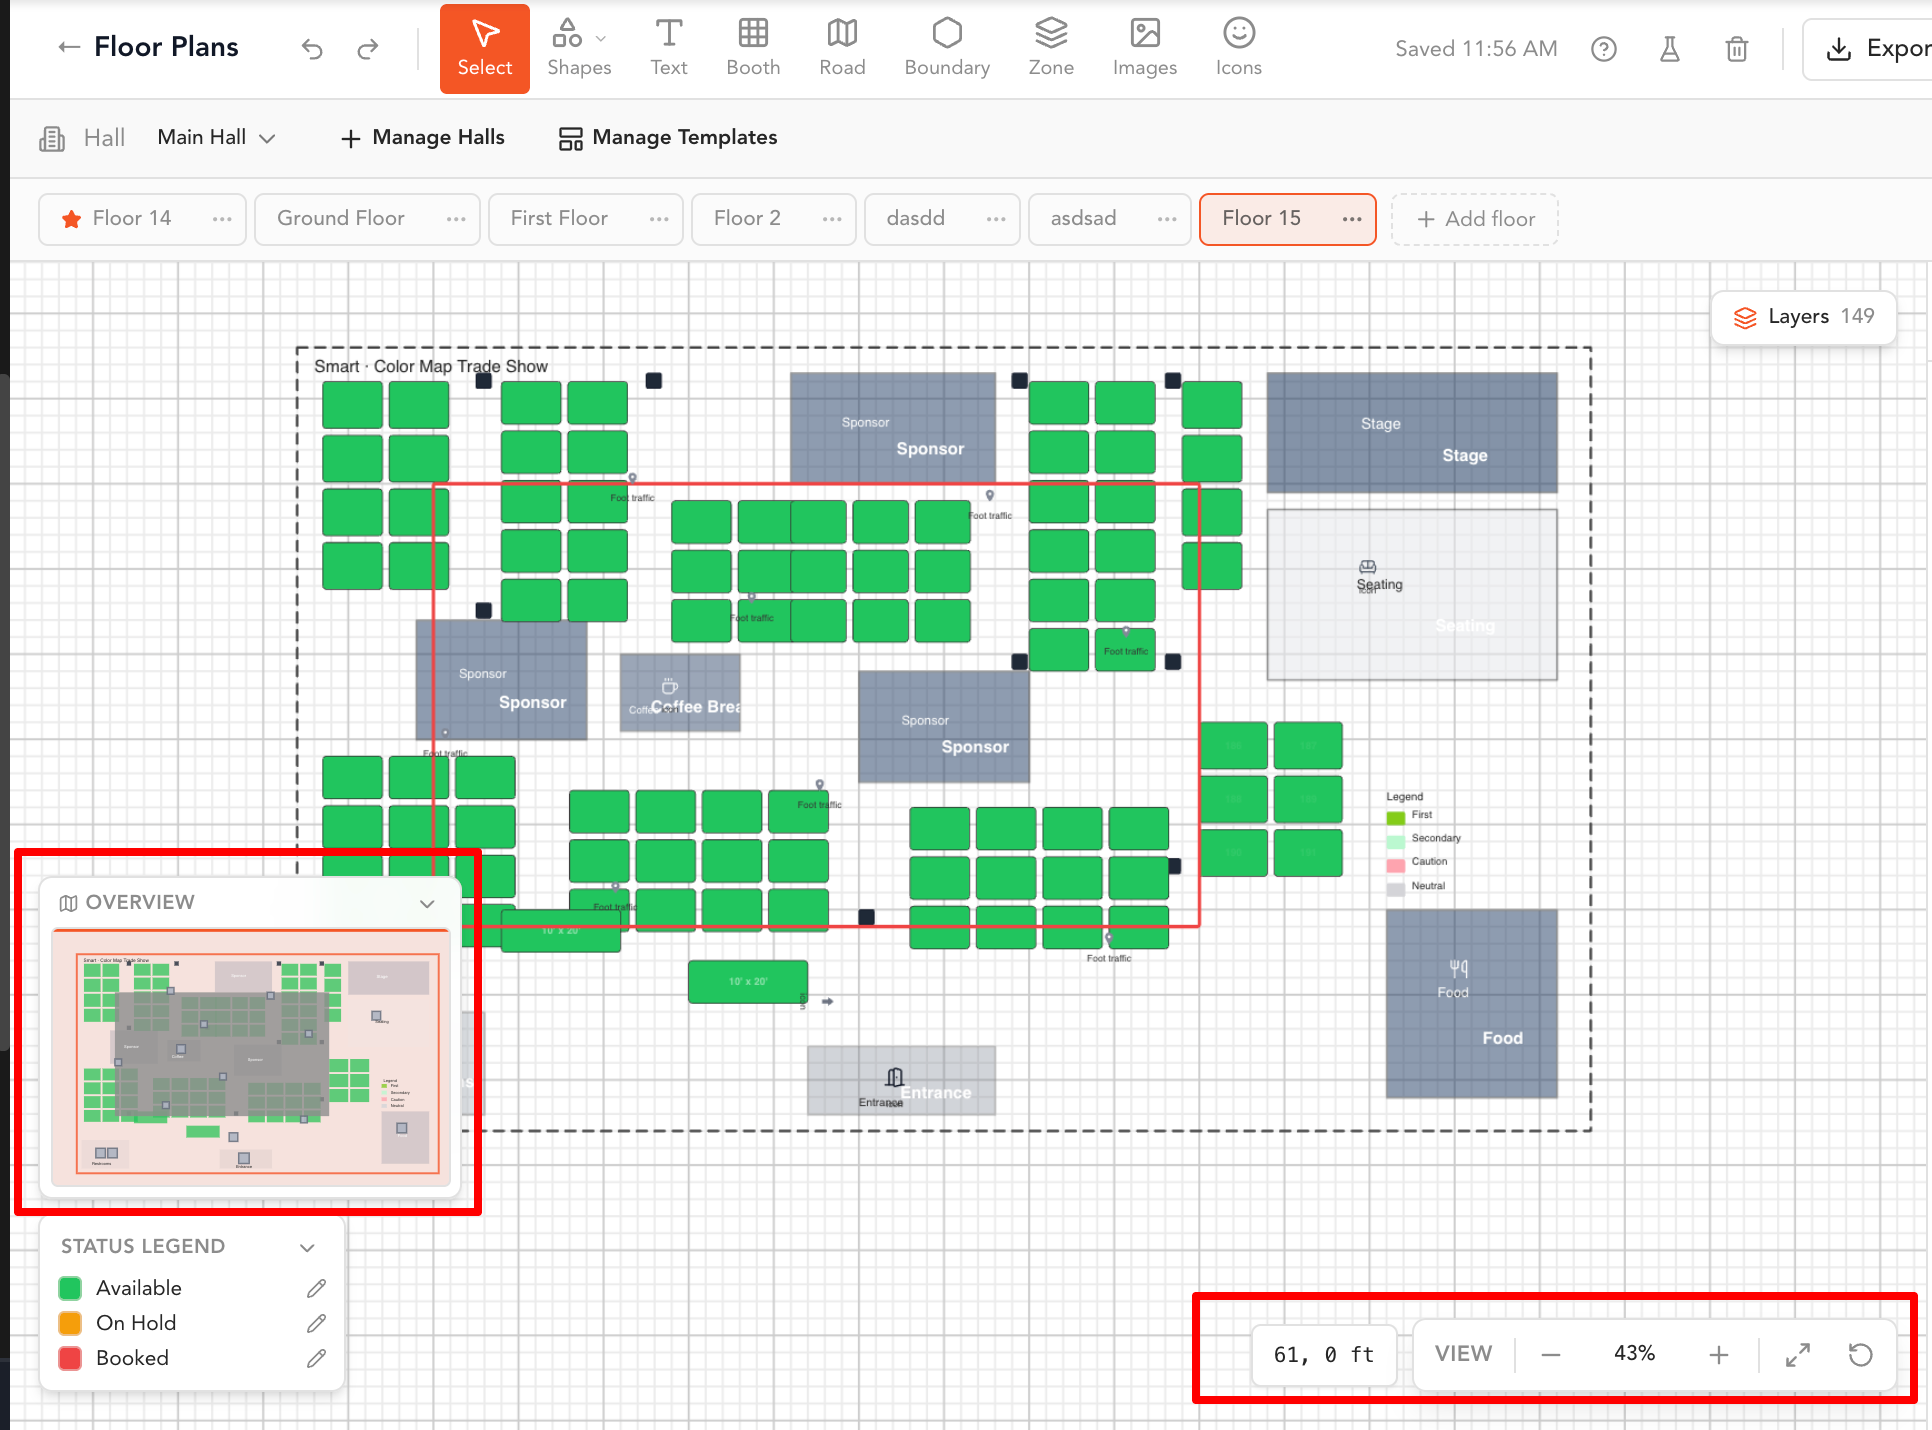
The controls at the bottom of the canvas allow you to:
- Zoom in or out.
- Fit the floor plan within the available area.
- Reset the canvas view.
- View the current canvas coordinates.
- Adjust the selected element’s scale.
Click Layers to view the elements placed on the current floor.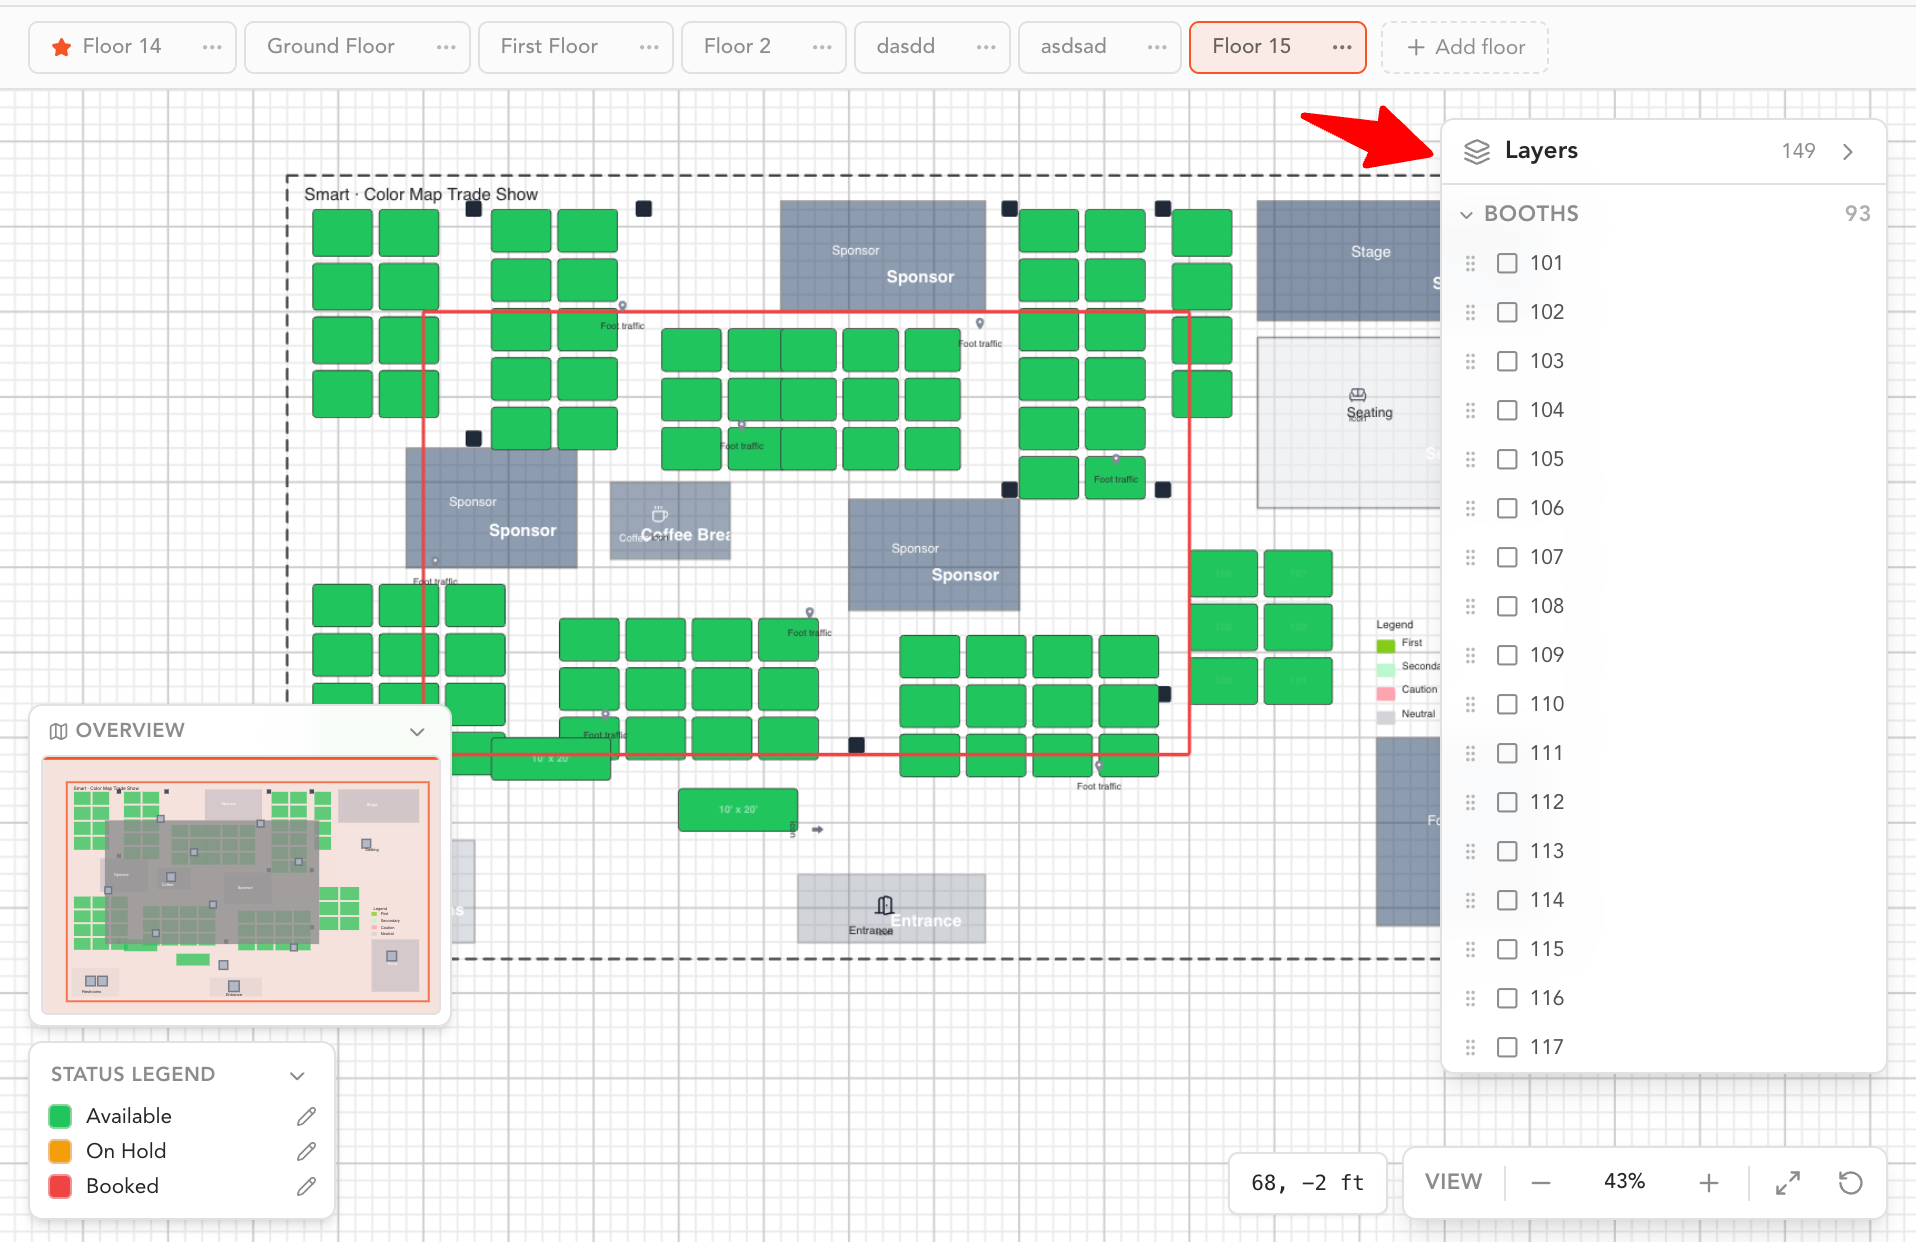
Layers help you locate and organize elements, particularly when several items overlap on the canvas. The layer count indicates the number of elements currently added to the floor.
Managing Booth StatusesThe Status Legend displays the colors assigned to the different booth statuses, including:
- Available
- On Hold
- Booked
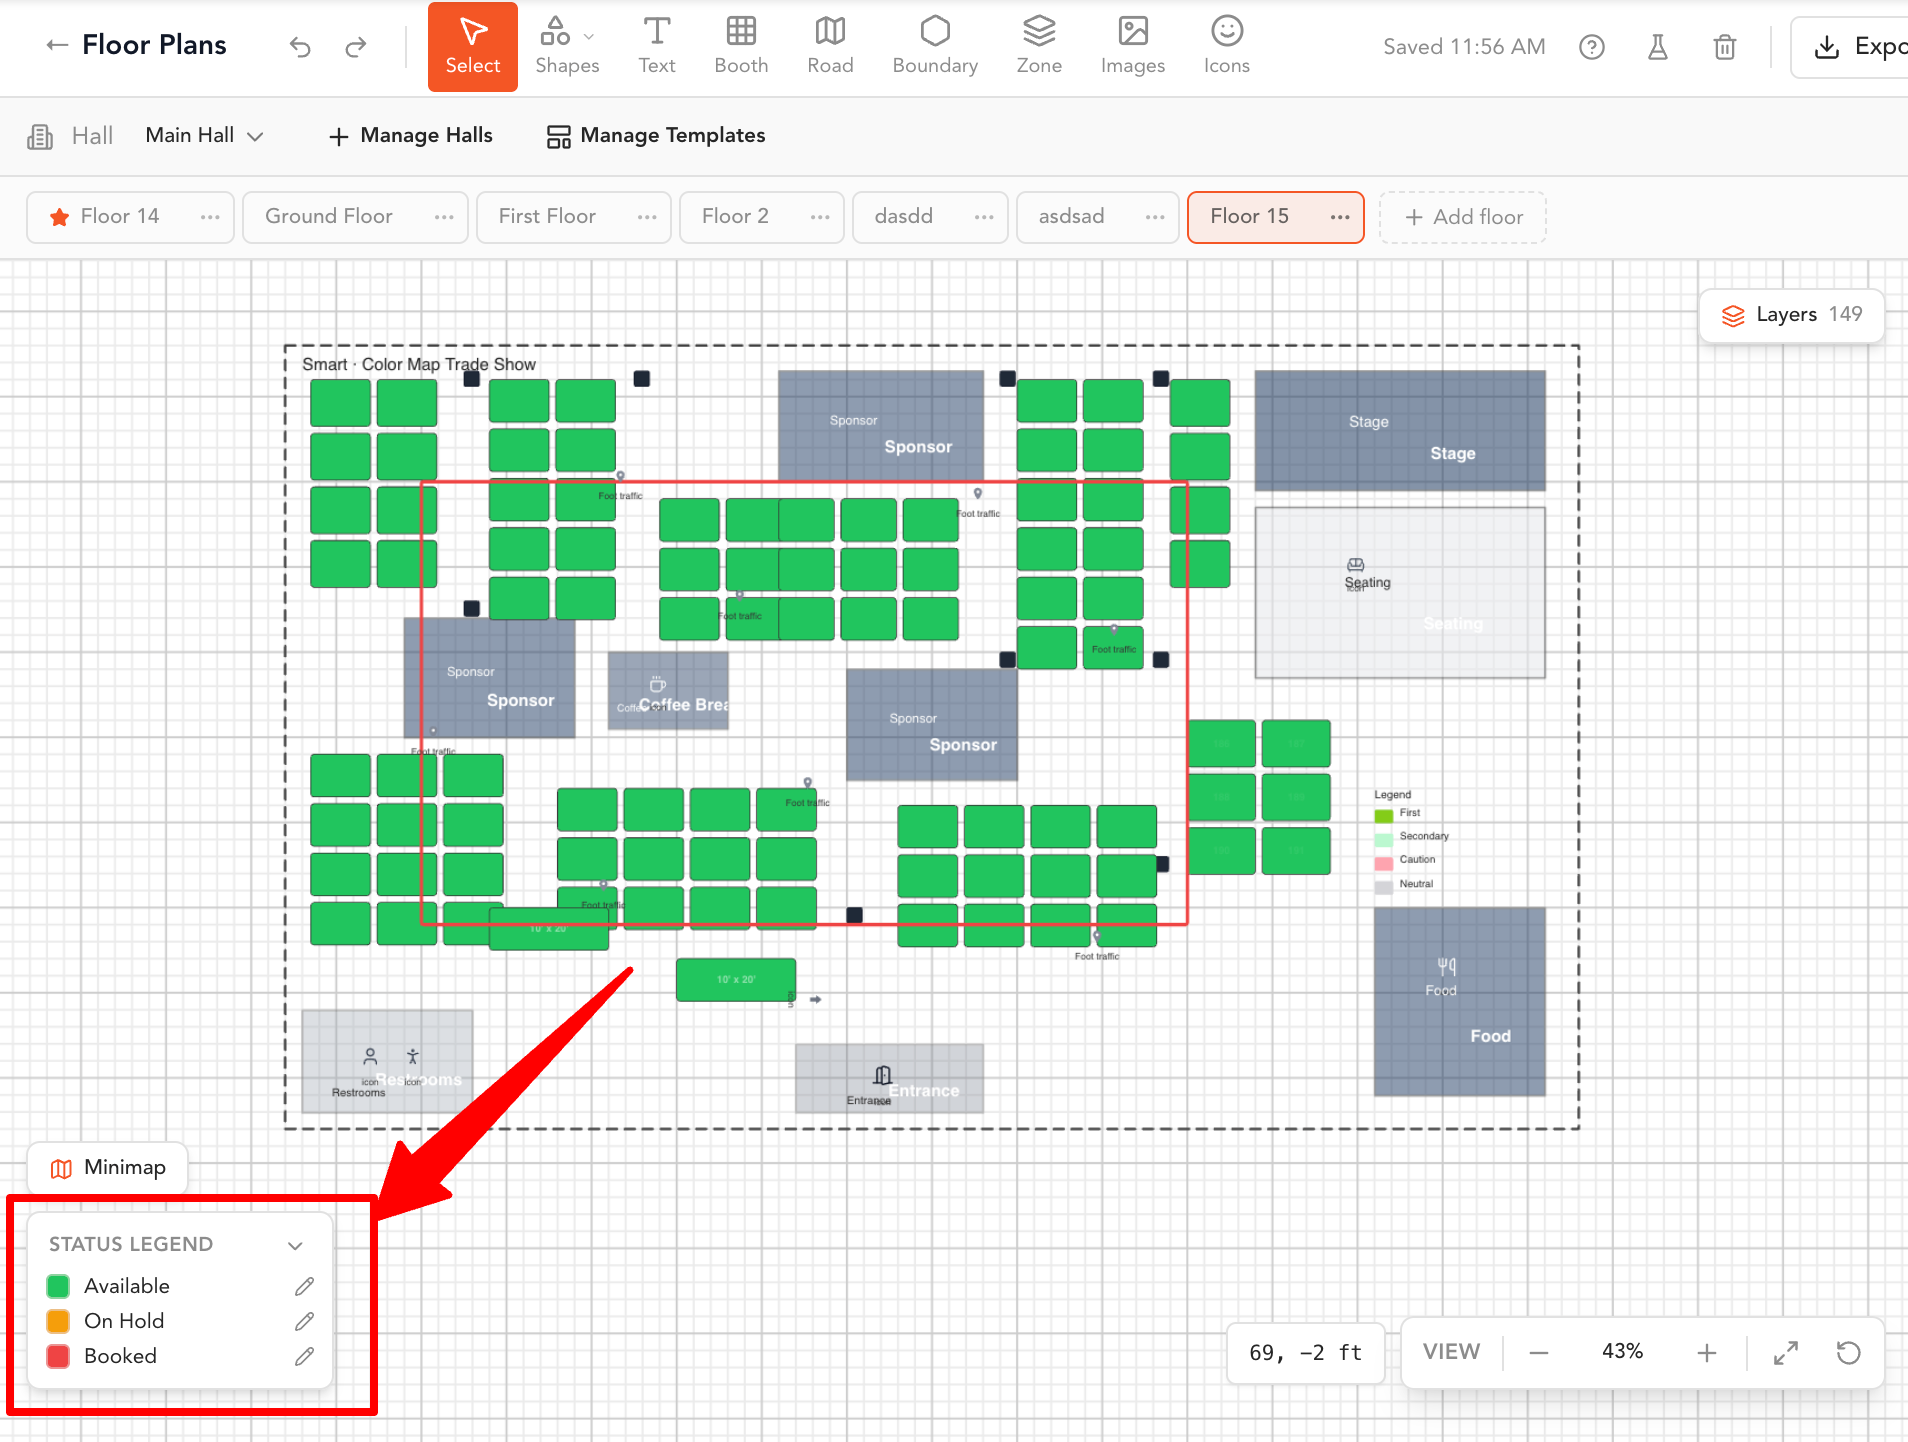
Use the edit option beside a status to change its associated color. The legend helps users identify the availability of booths when viewing the floor plan.
Saving and Publishing a Floor PlanAfter making changes to the floor plan:
- Click Save Draft to save your progress without making the changes live.
- Click Publish when the floor plan is ready to be made available to users.
You can continue editing a saved draft before publishing it.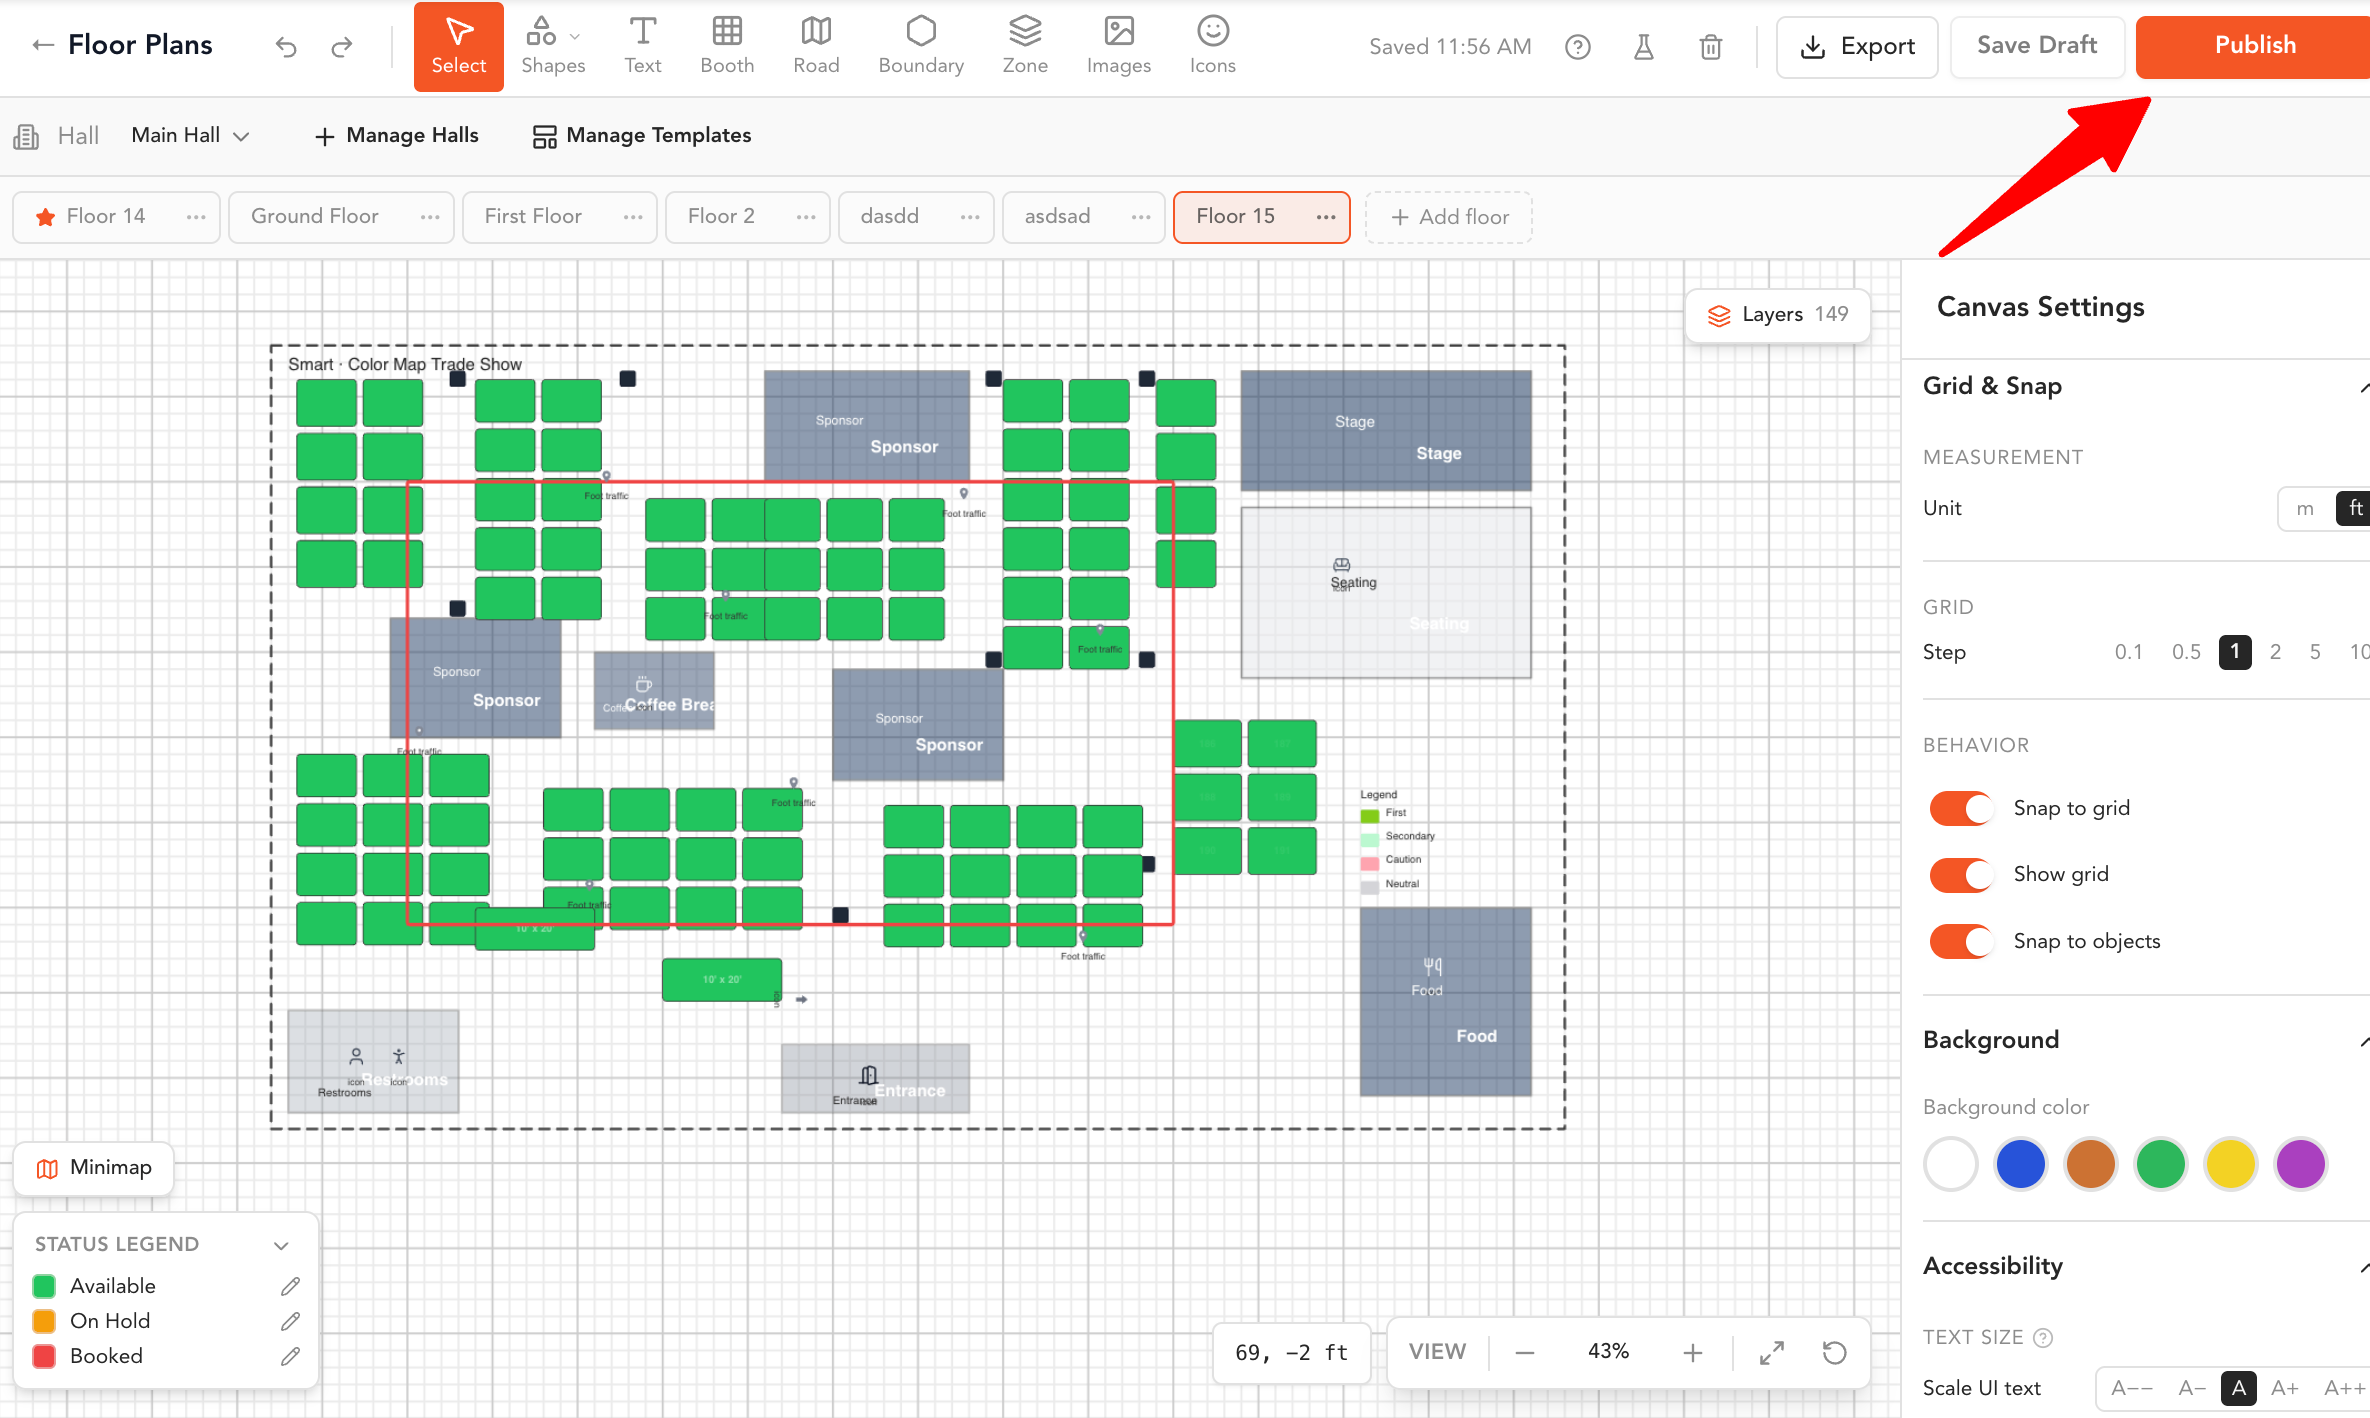
To download a copy of the floor plan:
- Click Export in the upper-right corner of the builder.
- Select the required export format.
The following formats are available:
- PNG image
- JPEG image
- SVG vector
- PDF document
Choose the format that best suits how you want to share, print, or reuse the floor plan.