---
title: How to Enable Shipment Date Selection as an Exhibitor
description: Learn how exhibitors can enable shipment date selection in the Exhibitor Portal and manage available shipping dates. Follow this simple step-by-step guide.
---
[Skip to content](https://help.vfairs.com/exhibitors/how-to-enable-shipment-date-selection-as-an-exhibitor#main-content)
English
Show submenu for translations
Open main navigation
Close main navigation
- English
Show submenu for translations
How can we help you?
- There are no suggestions because the search field is empty.
1. [Exhibitor Knowledge Base](https://help.vfairs.com/exhibitors?hsLang=en)
2. [Trade Show](https://help.vfairs.com/exhibitors/trade-show?hsLang=en)
# How to Enable Shipment Date Selection as an Exhibitor
## Learn how exhibitors can enable shipment date selection in the Exhibitor Portal and manage available shipping dates. Follow this simple step-by-step guide.
Shipment Date Selection allows your users to select shipment dates for their orders from a calendar view. This article walks you through how to turn on this feature and manage your shipping dates.
Step 1: Log In to Your Exhibitor Portal
Log in to your Exhibitor Portal using your credentials.
Step 2: Open Trade Show
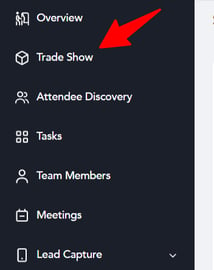
On the left navigation menu, click **Trade Show**.
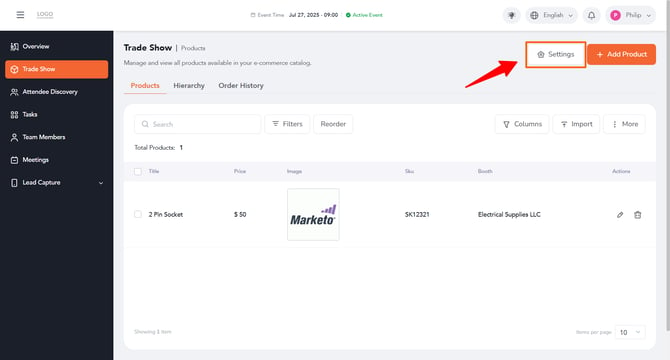
Step 3: Open Settings section
Click settings button seen at top right of the screen.
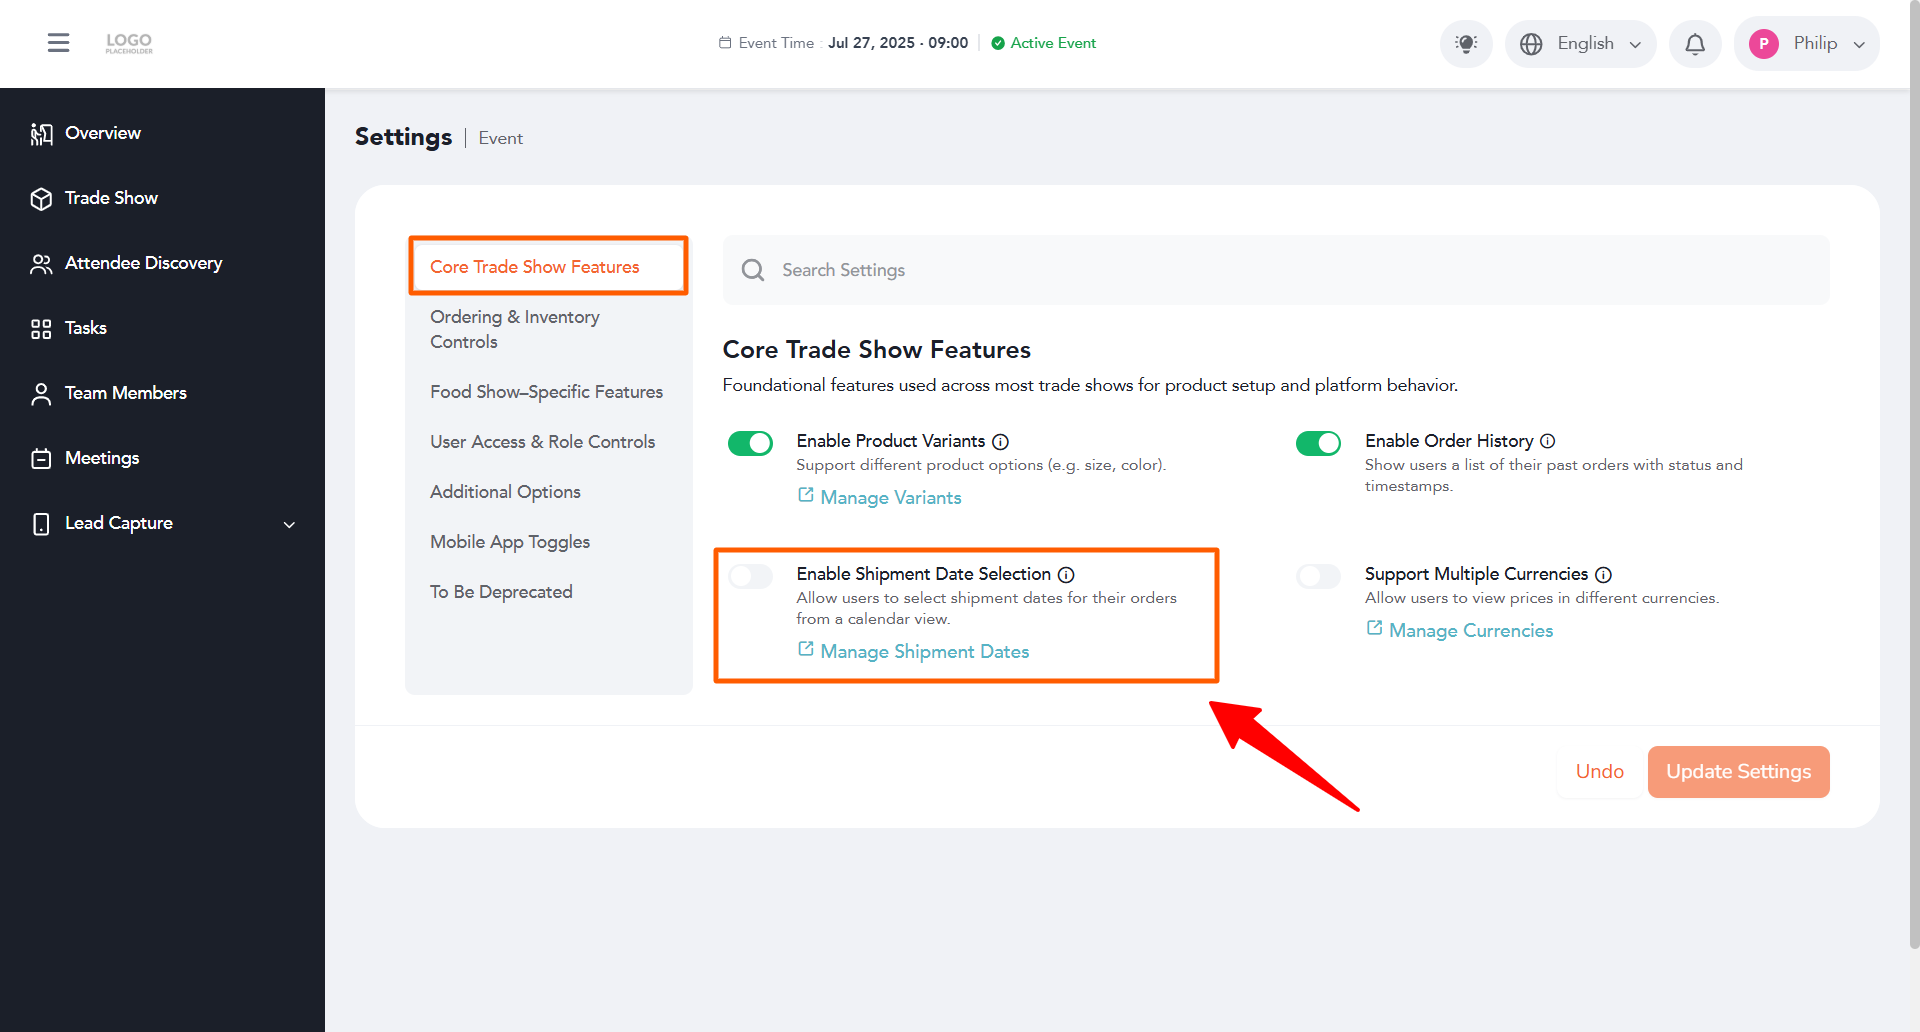
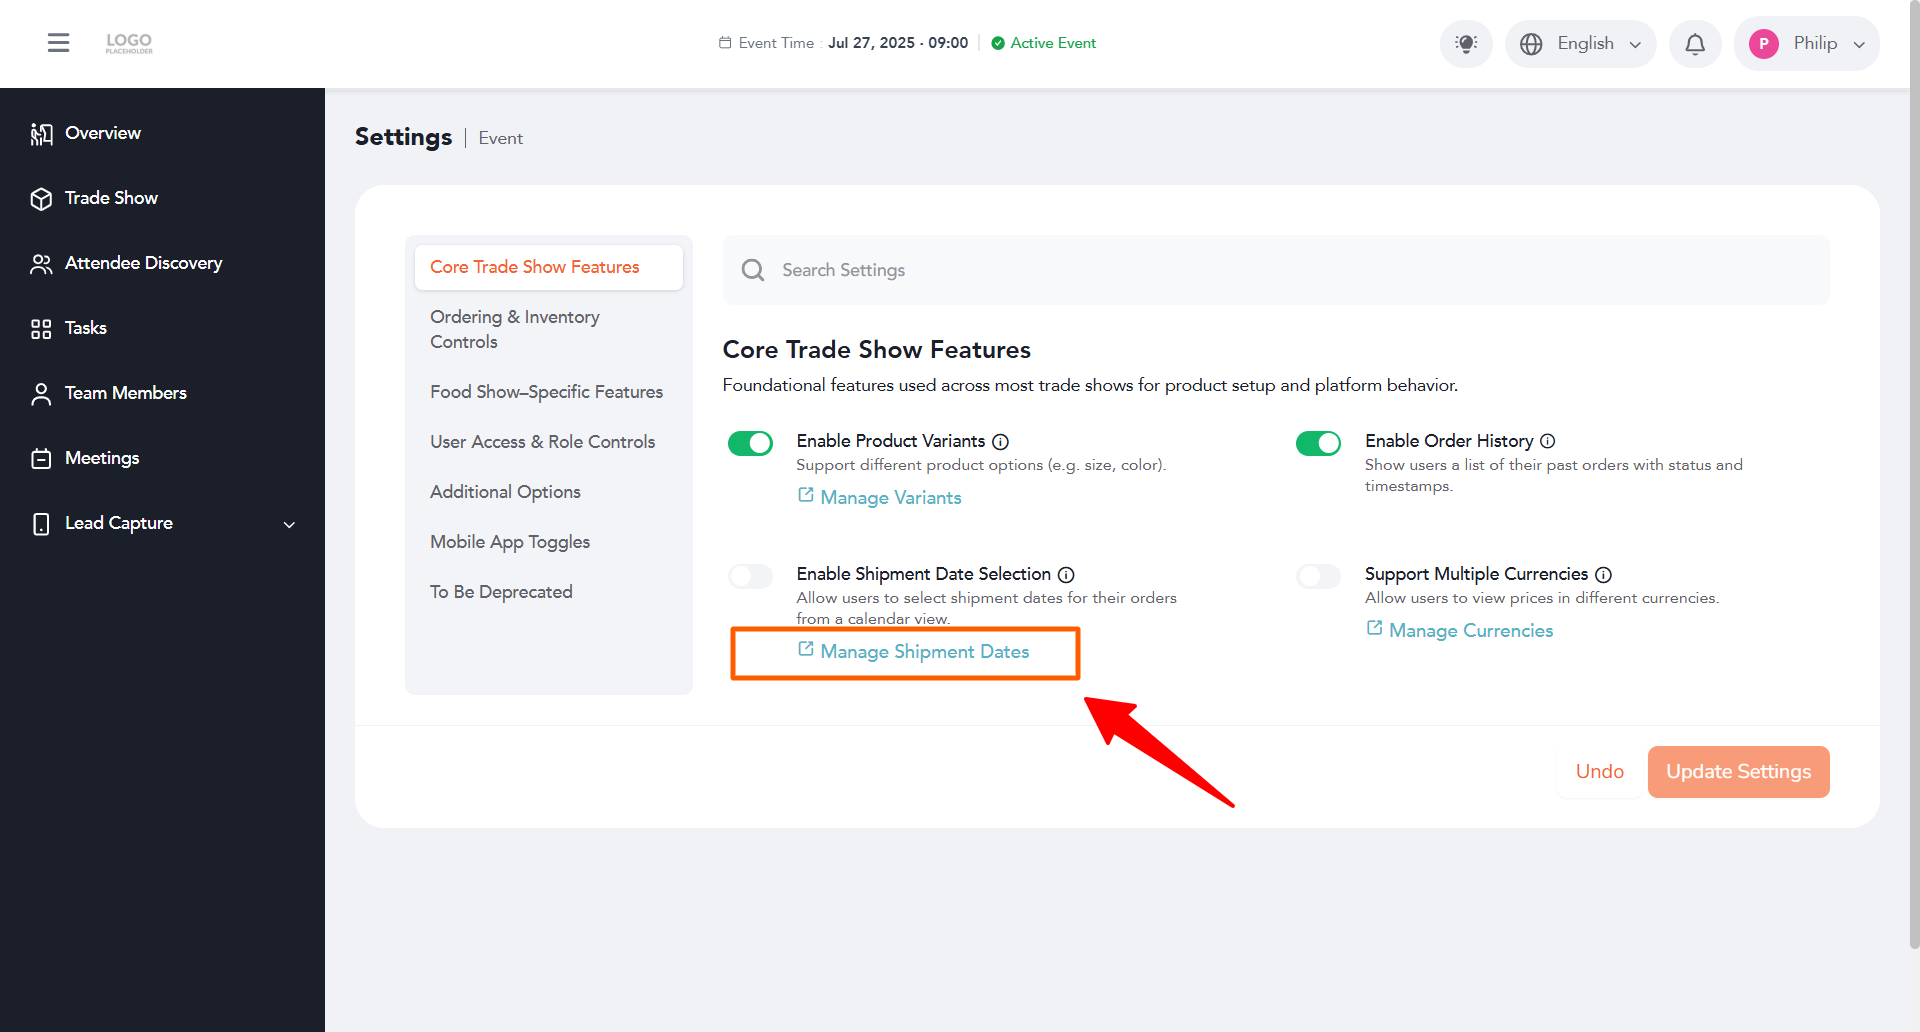
Step 4: Turn On "Enable Shipment Date Selection"
Find the **Enable Shipment Date Selection** option under **Core Trade show features settings** and turn on its toggle. This allows your users to select shipment dates for their orders from a calendar view.
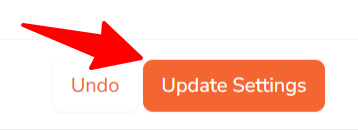
Step 5: Save Your Changes
Click the **Update Settings** button at the bottom right of the screen. A confirmation pop-up will appear letting you know your settings have been updated.
Step 6: Manage Your Shipping Dates
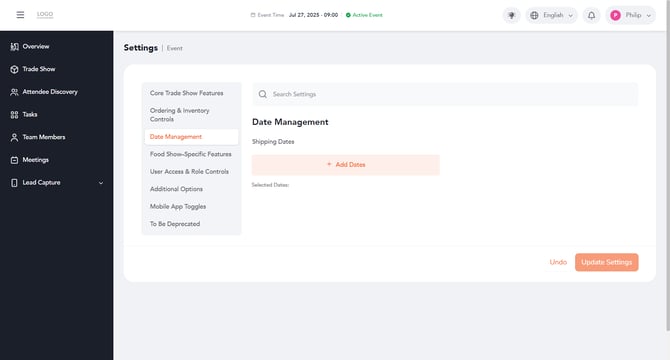
Click the **Manage Shipment Dates** link present at the bottom of the toggle. This will take you to the **Date Management** screen.
Step 7: Add Dates
On the Date Management screen, click **+ Add Dates** to add the shipping dates you want to make available. Your chosen dates will appear under **Selected Dates**.
That's it! You've successfully enabled Shipment Date Selection and can now manage the shipping dates available to your users.
- [Overview/Exhibitor Dashboard](https://help.vfairs.com/exhibitors/overview-exhibitor-dashboard?hsLang=en)
- [Configure Booth](https://help.vfairs.com/exhibitors/configure-booth?hsLang=en)
- [Attendee Discovery](https://help.vfairs.com/exhibitors/attendee-discovery?hsLang=en)
- [Tasks Management](https://help.vfairs.com/exhibitors/tasks-management?hsLang=en)
- [Team Members](https://help.vfairs.com/exhibitors/team-members?hsLang=en)
- [Meetings](https://help.vfairs.com/exhibitors/meetings?hsLang=en)
- [Lead Capture](https://help.vfairs.com/exhibitors/lead-capture?hsLang=en)
- [Trade Show](https://help.vfairs.com/exhibitors/trade-show?hsLang=en)
[.webp?width=107&height=44&name=vfairs-logo-landscape-gradient-5%20(3).webp "vfairs-logo-landscape-gradient-5 (3)")](http://vfairs.com)
vfairs.com Help Center
Copyright © 2026, vFairs LLC