Part 1: Generate an Access Token in vFairs
Step 1: Log in to your organization account
Sign in at https://app.vfairs.com/backend/ with your organization credentials, as you normally would to manage events.
Step 2: Navigate to the Access Tokens screenOnce logged in, go directly to https://app.vfairs.com/backend/v2/organization/access-tokens, paste the URL in the same browser tab.
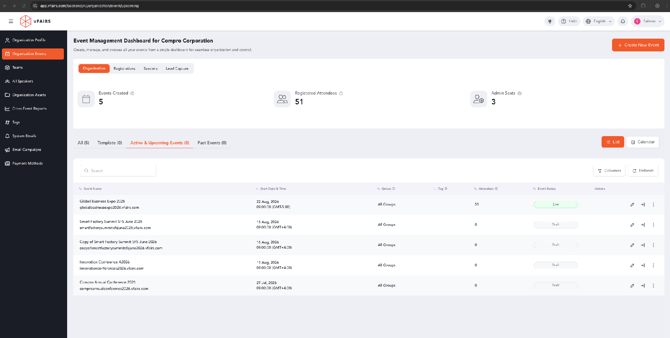
On the Access Tokens screen, click the Generate Access Token button in the top-right corner. A drawer opens on the right.
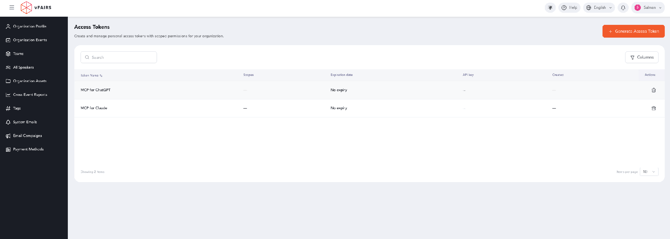
In the drawer, give the token a memorable name (for example, "MCP for Claude"), select a region, and set an expiry date. Under Scopes, check the permissions you want Claude to have access to, then click Generate Token.
Step 5: Copy your API key and API secretA confirmation panel shows your new API key and API secret. Copy both now, for security, the secret is shown only once and cannot be retrieved again later.
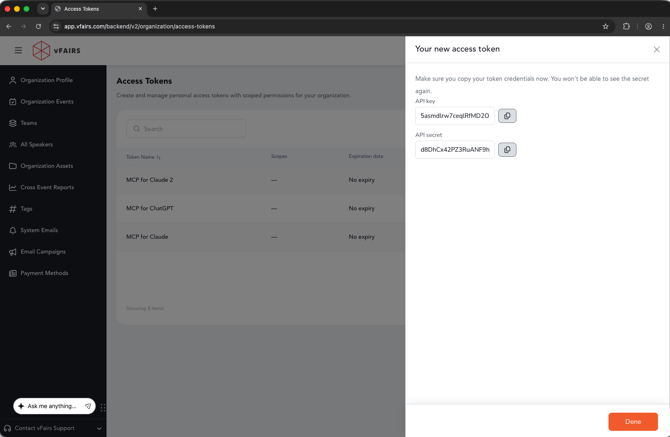
Keep it safe: Treat the API key and secret like a password. Store them in a password manager rather than a chat message or shared document, and revoke the token from this screen if it is ever exposed.
Part 2: Add vFairs as a Custom Connector in Claude
Step 6: Open Connectors in Claude’s settings
Click the + icon by the message box, or open Settings → Customize → Connectors from Claude’s sidebar.
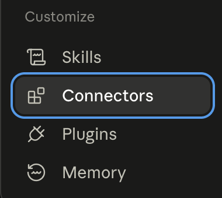
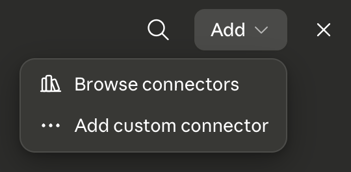
Click + Add, then select Add custom connector from the menu that appears.
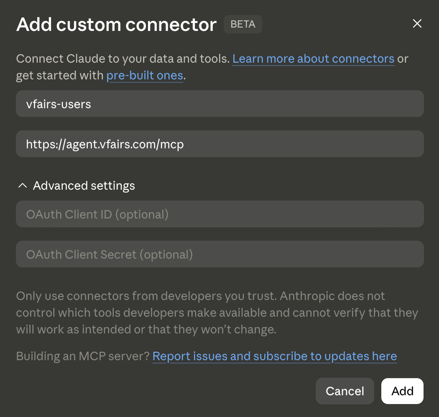
A form asks for a name, the remote MCP server URL, and OAuth credentials. Enter the following:
Name: vfairs-users
Remote MCP server URL: https://agent.vfairs.com/mcp
OAuth Client ID: <API key from Step 5>
OAuth Client Secret: <API secret from Step 5>
Step 9: Click "Add" to finish connectingClaude verifies the credentials and connects to the vFairs MCP server. Once it shows as Connected, the integration is live and ready to use.
Tip: If the connection fails, double-check that the URL was pasted with no trailing spaces, and that the API key/secret were copied in full, a truncated secret is the most common cause.
Part 3: Put It to Work
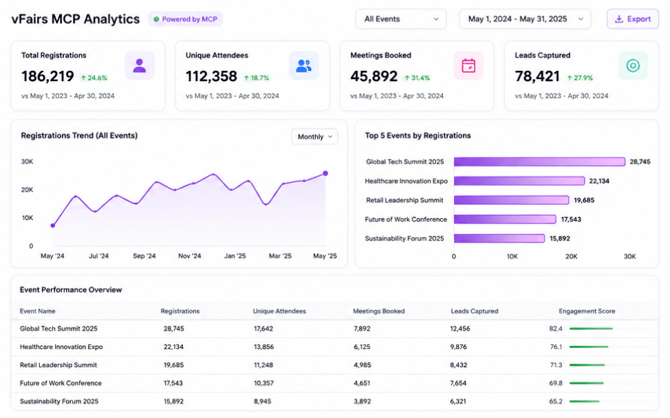
With vFairs connected, mention it in any Claude conversation and ask about your organization’s live event data, no dashboard hopping required.
Examples:
"How many attendees registered for Global Business Expo 2026 this week?"
"List all draft events and their scheduled start dates."
"Build me a dashboard comparing session attendance across our last three events."
"Schedule a weekly registration report to email our team every Monday."
Managing access later: Return to the Access Tokens screen in vFairs any time to revoke or rotate this token, and to Settings → Connectors in Claude to disconnect vFairs.