1. In the Seating Plan Builder, select a seat to open its configuration panel on the right side of the screen. Expand the Labeling section by clicking on its header.
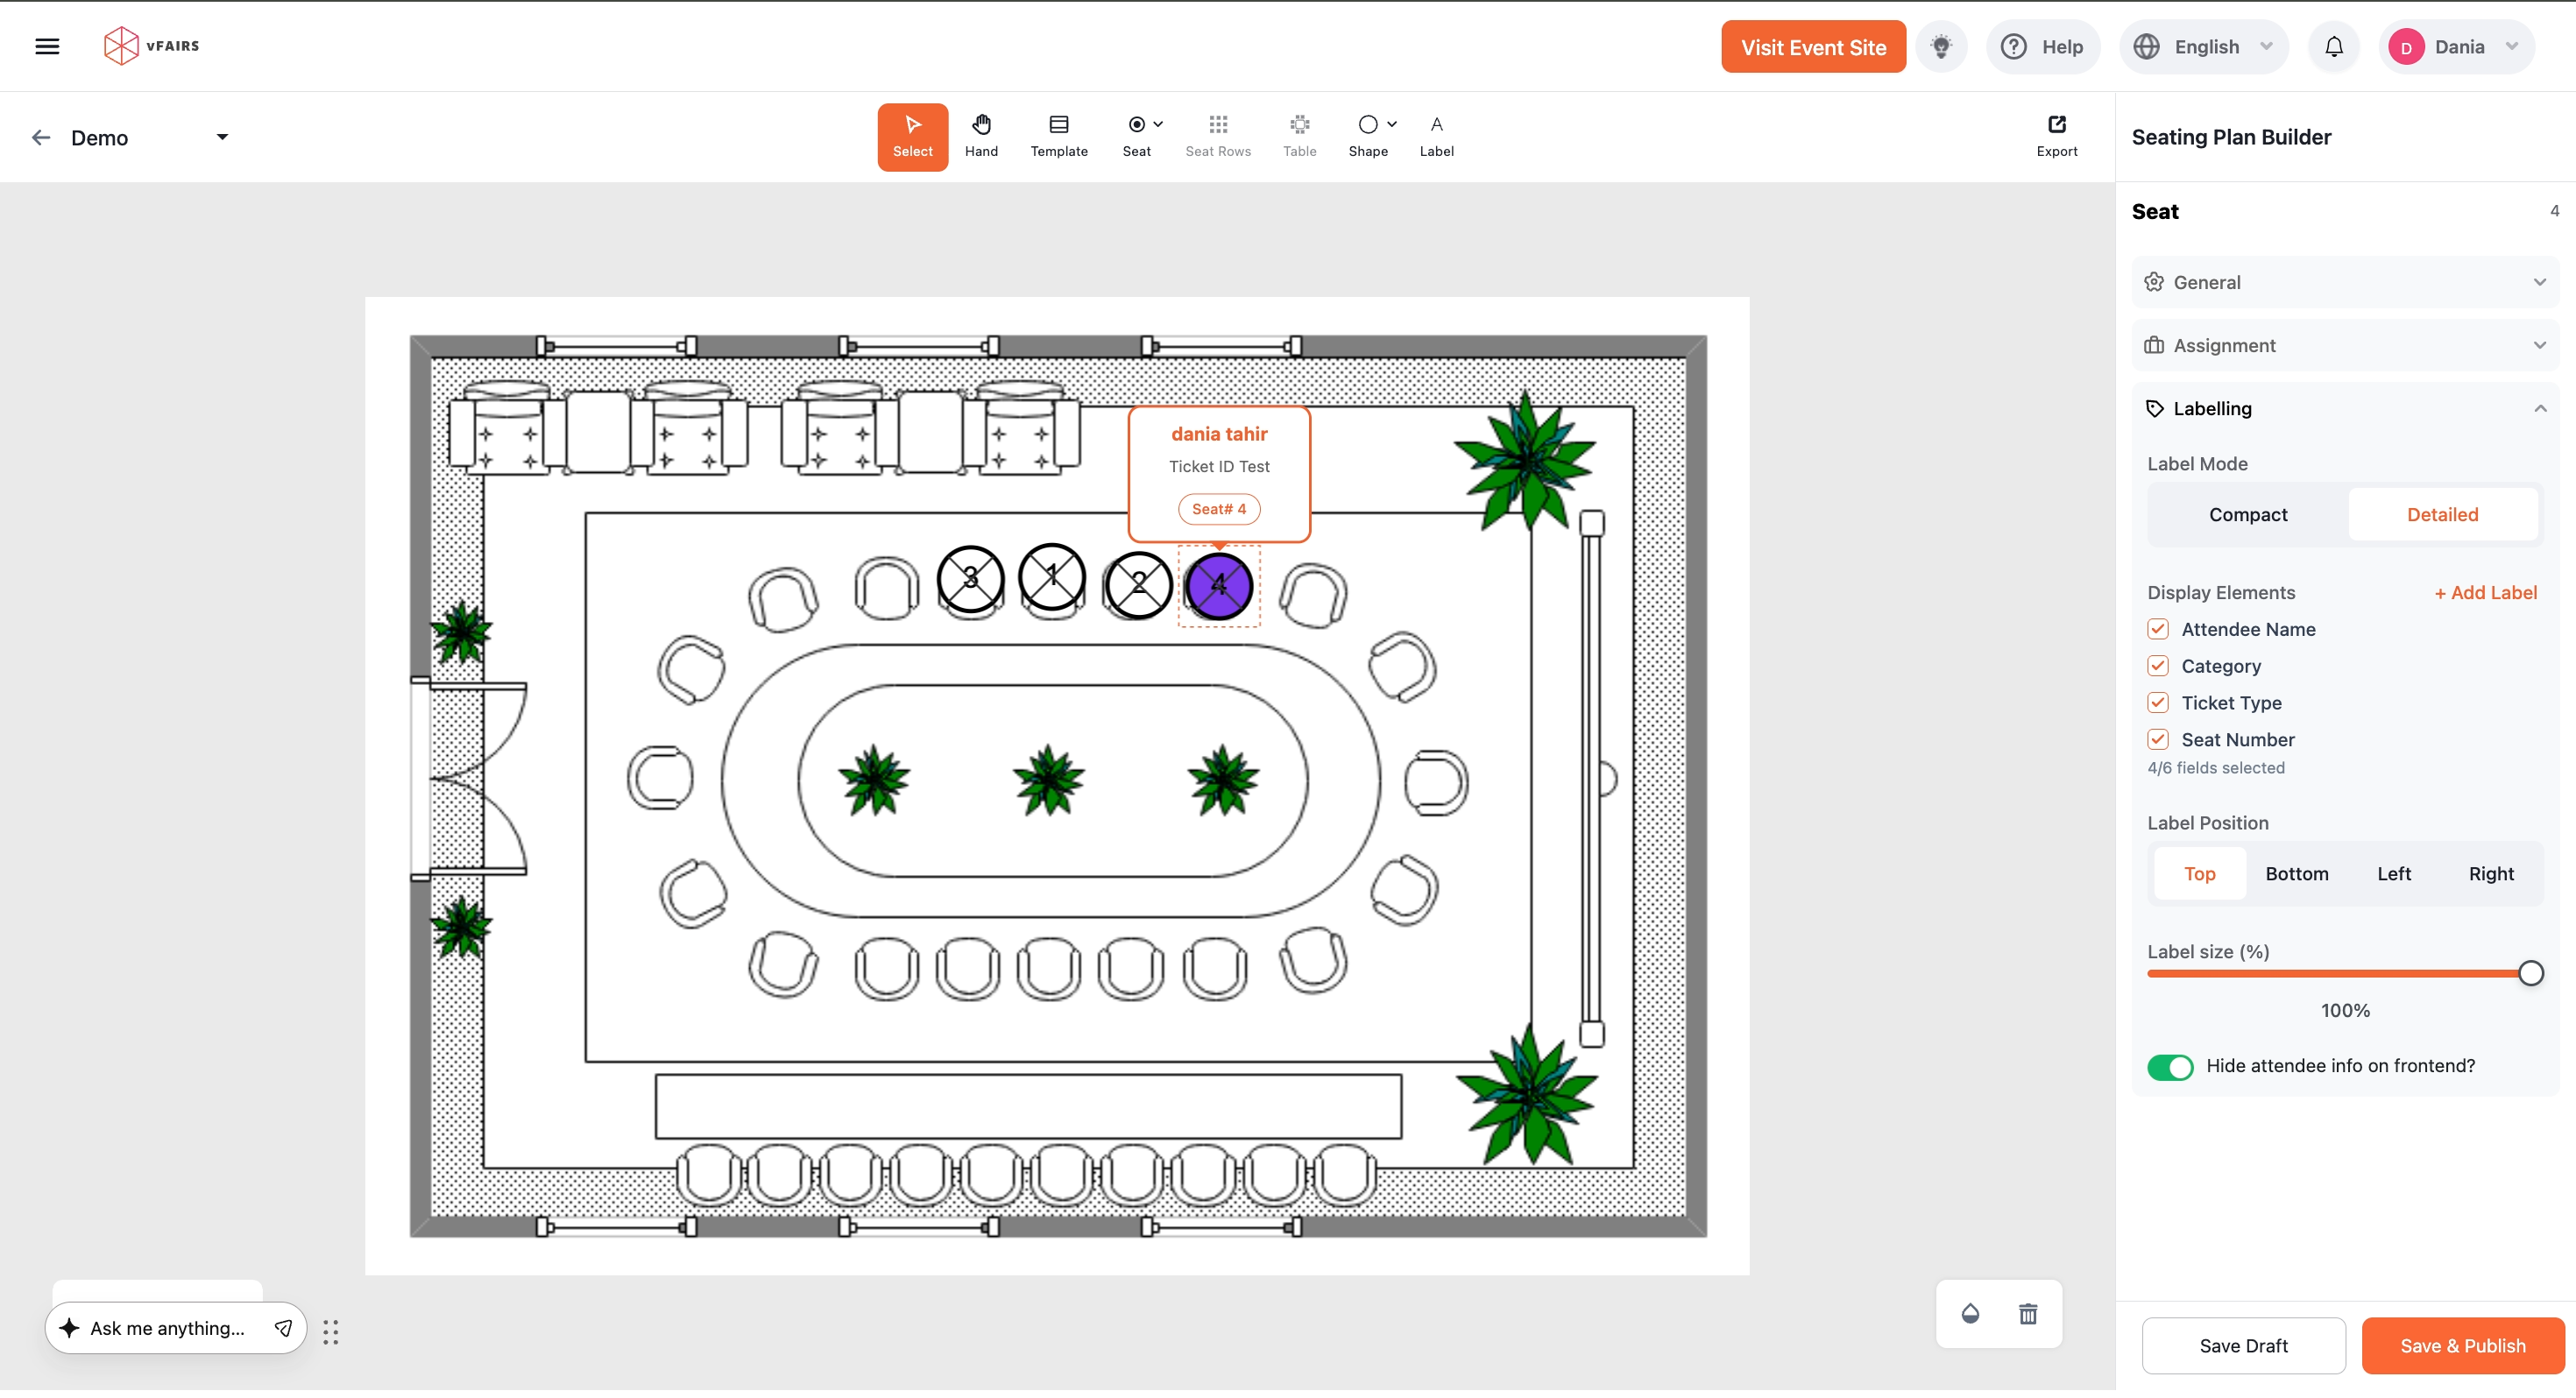
2. Under Label Mode, select the Detailed option. This enables more granular control over what information is displayed on the seat labels.
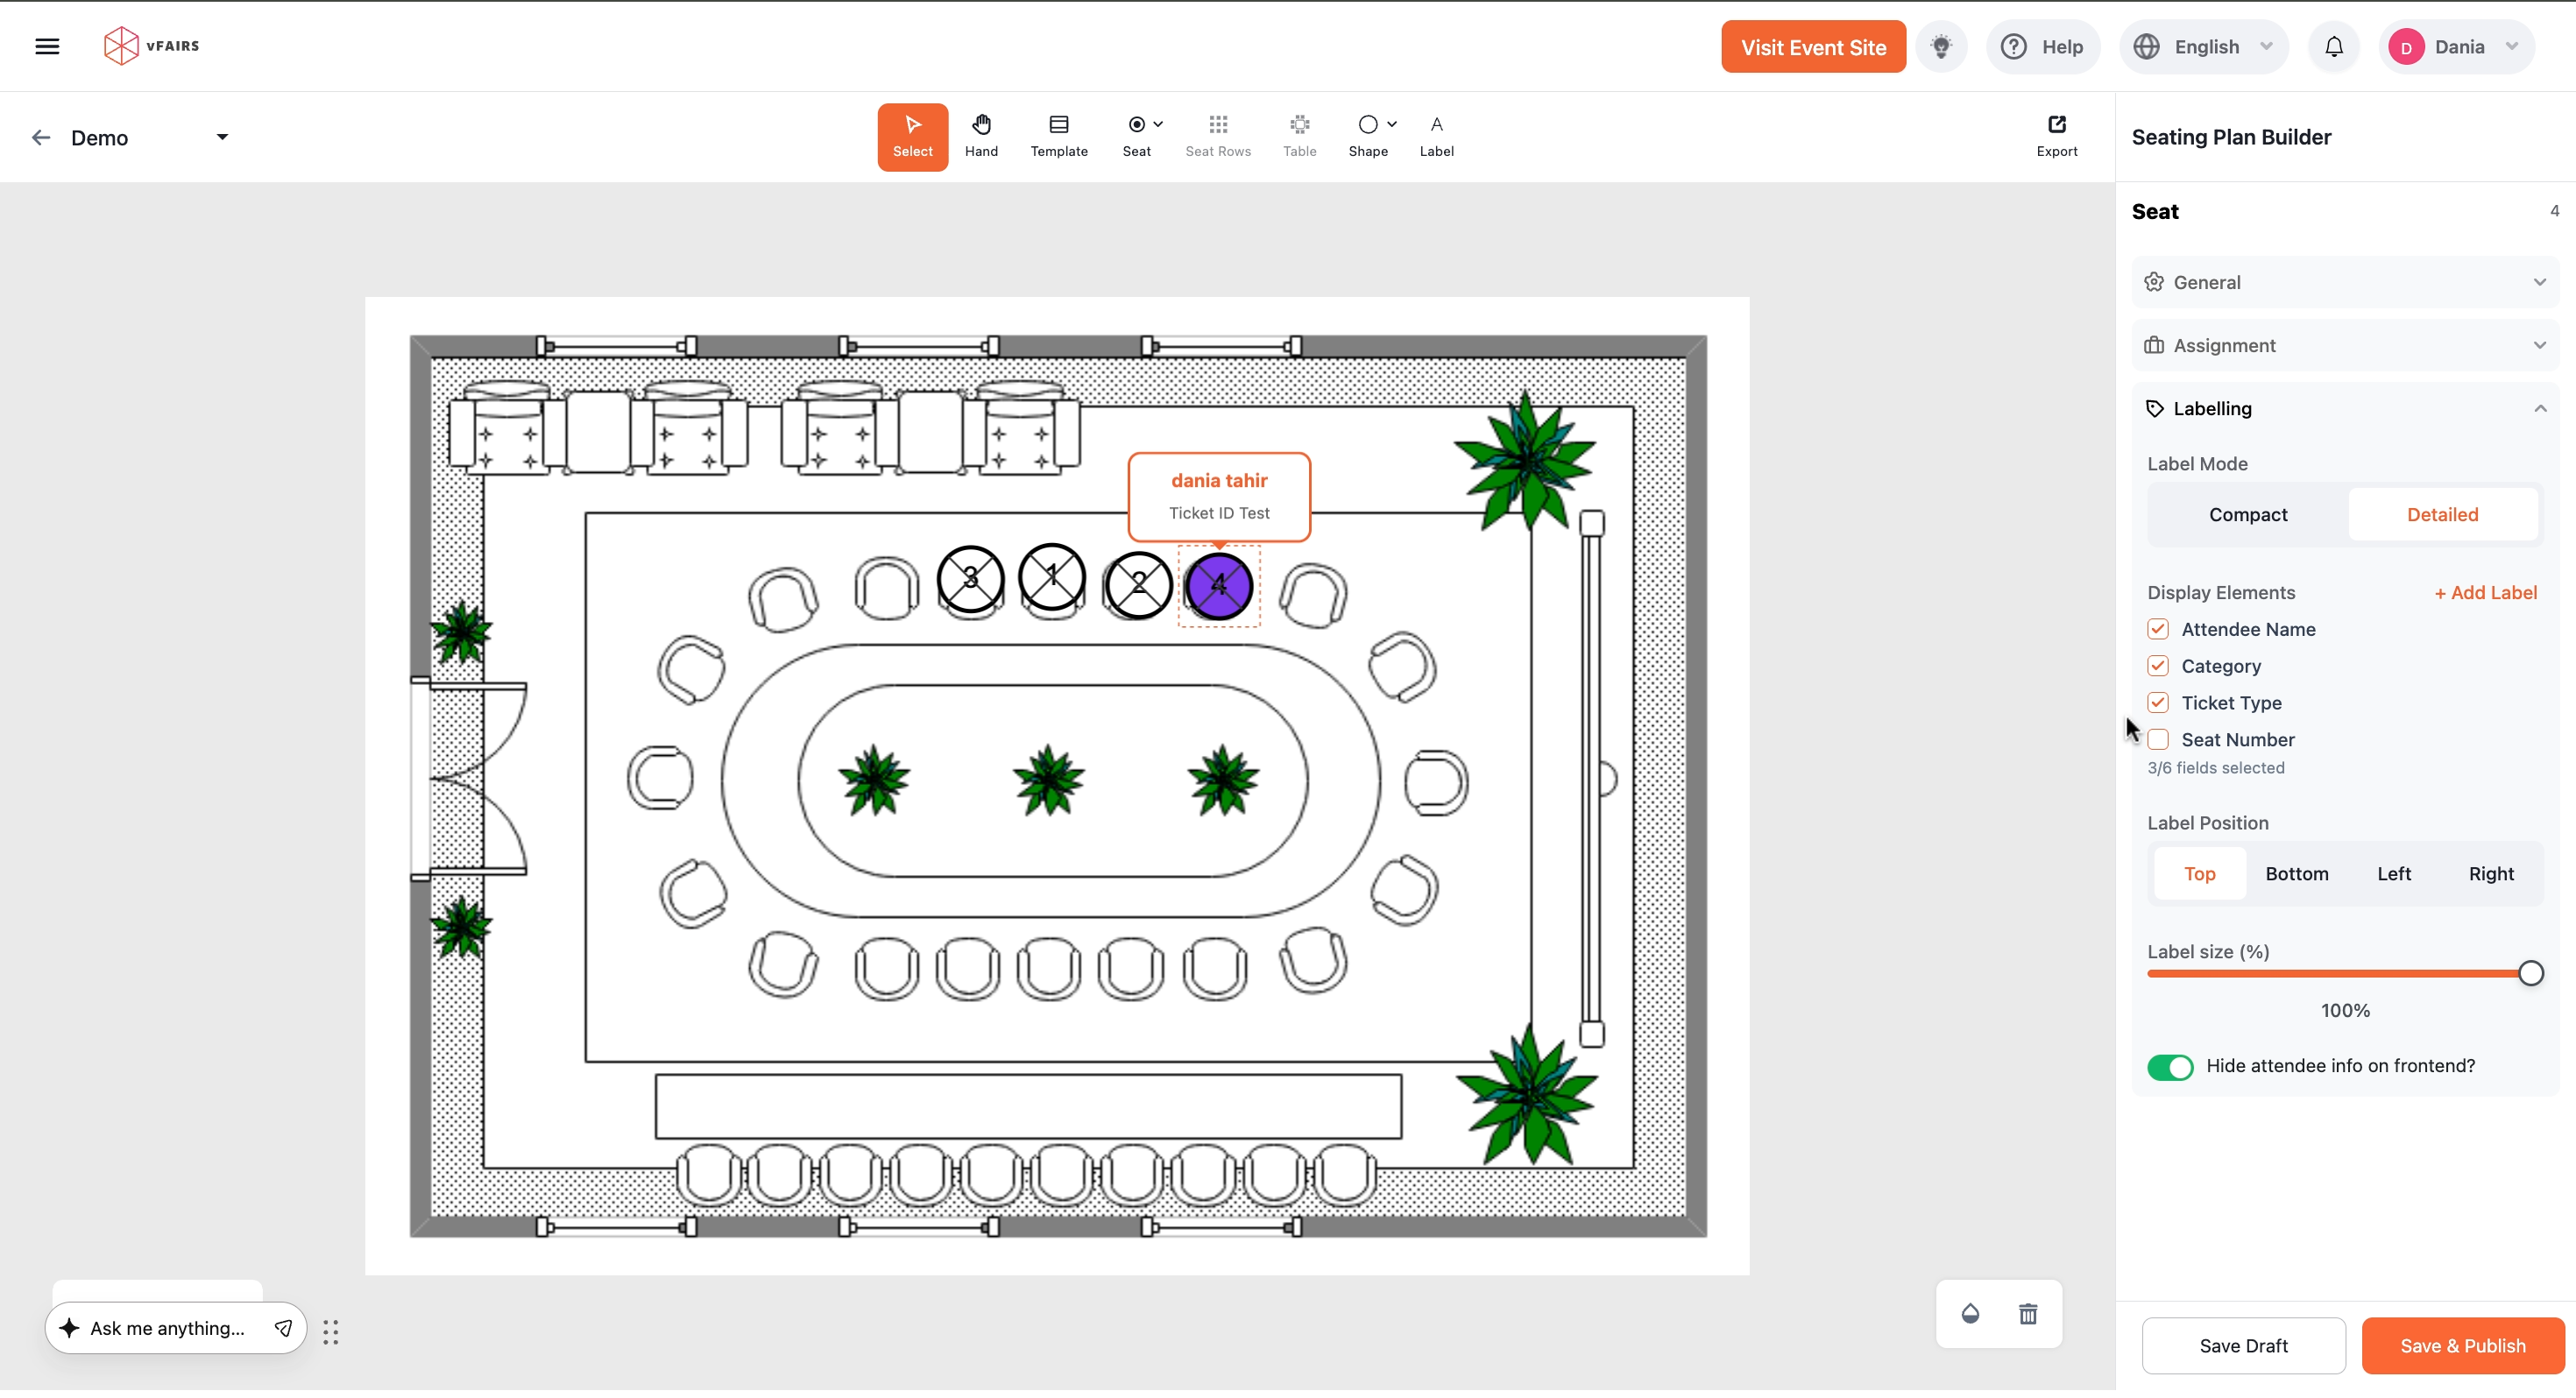
3. To add or remove elements displayed on the label, click the + Add Label button next to Display Elements.

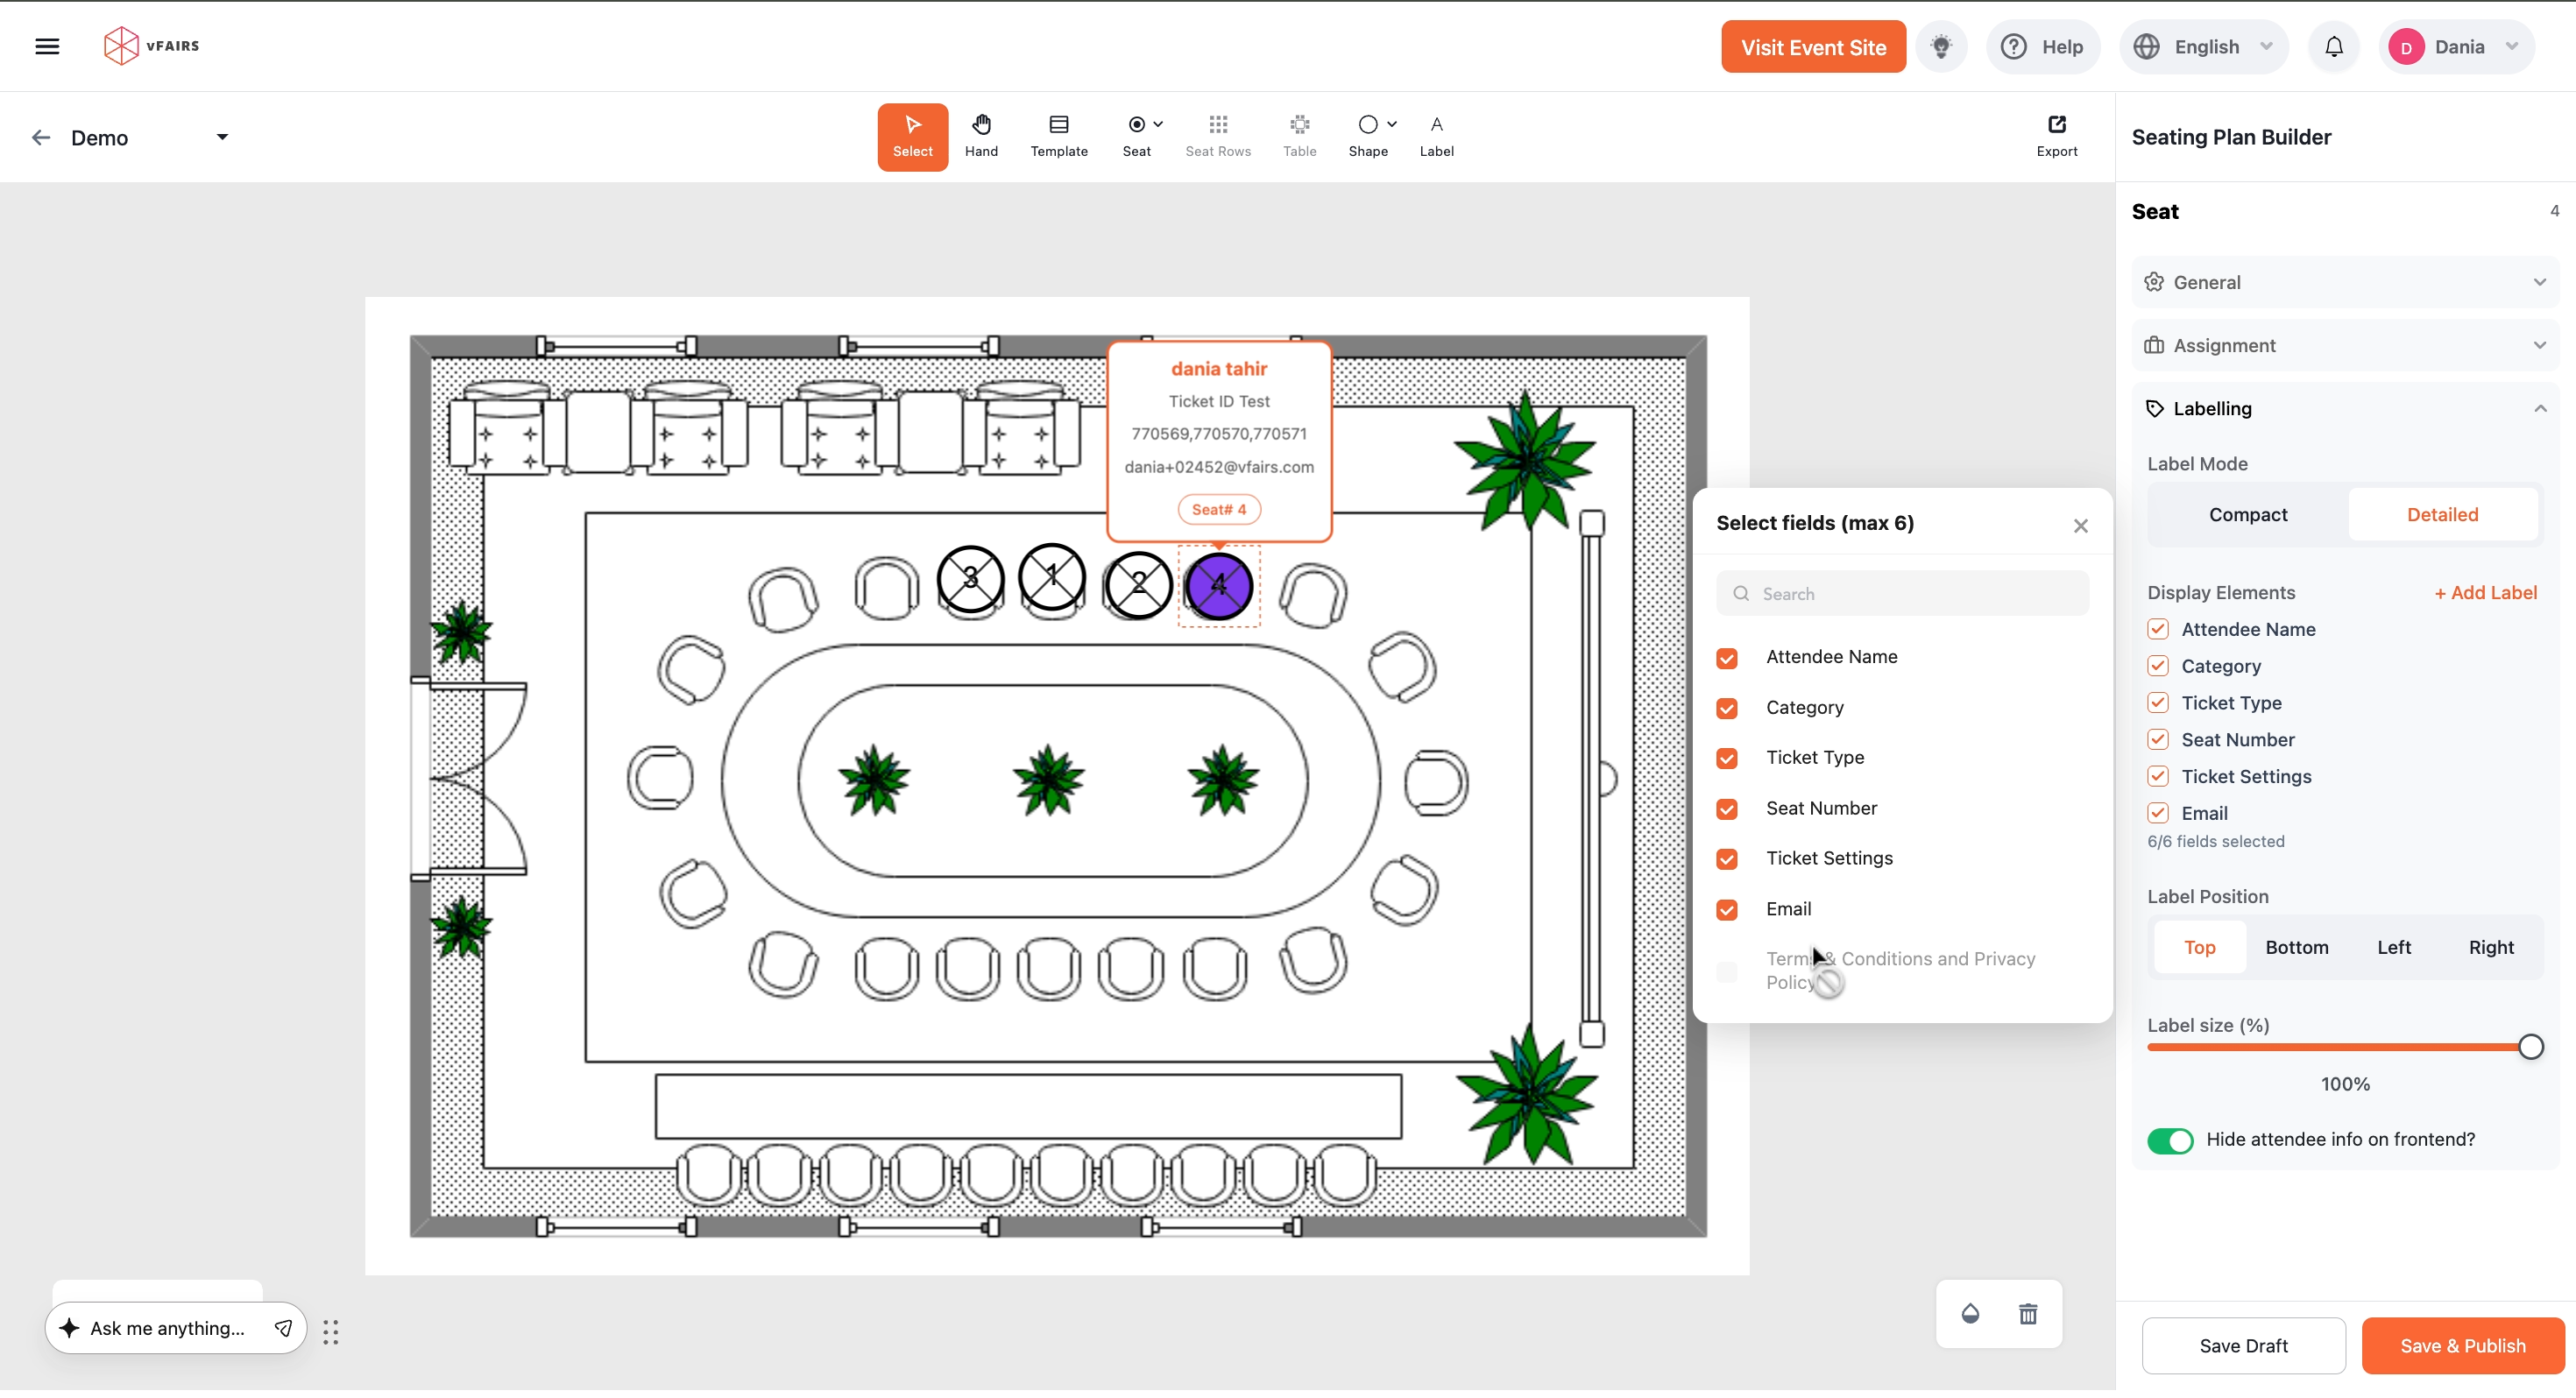
4. A Select fields (max 6) pop-up will appear. Check the boxes next to the fields you wish to display on the label. For example, you can select Attendee Name, Category, Ticket Type, Seat Number, Ticket Settings, and Email.

You can select a maximum of 6 fields to display.
5. As you select fields, the label preview on the seat will update to show the chosen information. The screenshot shows Attendee Name, Category, Ticket Type, Seat Number, Ticket Settings, and Email selected.

6.Choose the Label Position from the available options: Top, Bottom, Left, or Right. This determines where the label appears relative to the seat.
8. Adjust the Label size (%) using the slider to increase or decrease the size of the label text.
9. Toggle the Hide attendee info on frontend? switch to control whether this detailed information is visible to attendees on the event's frontend.
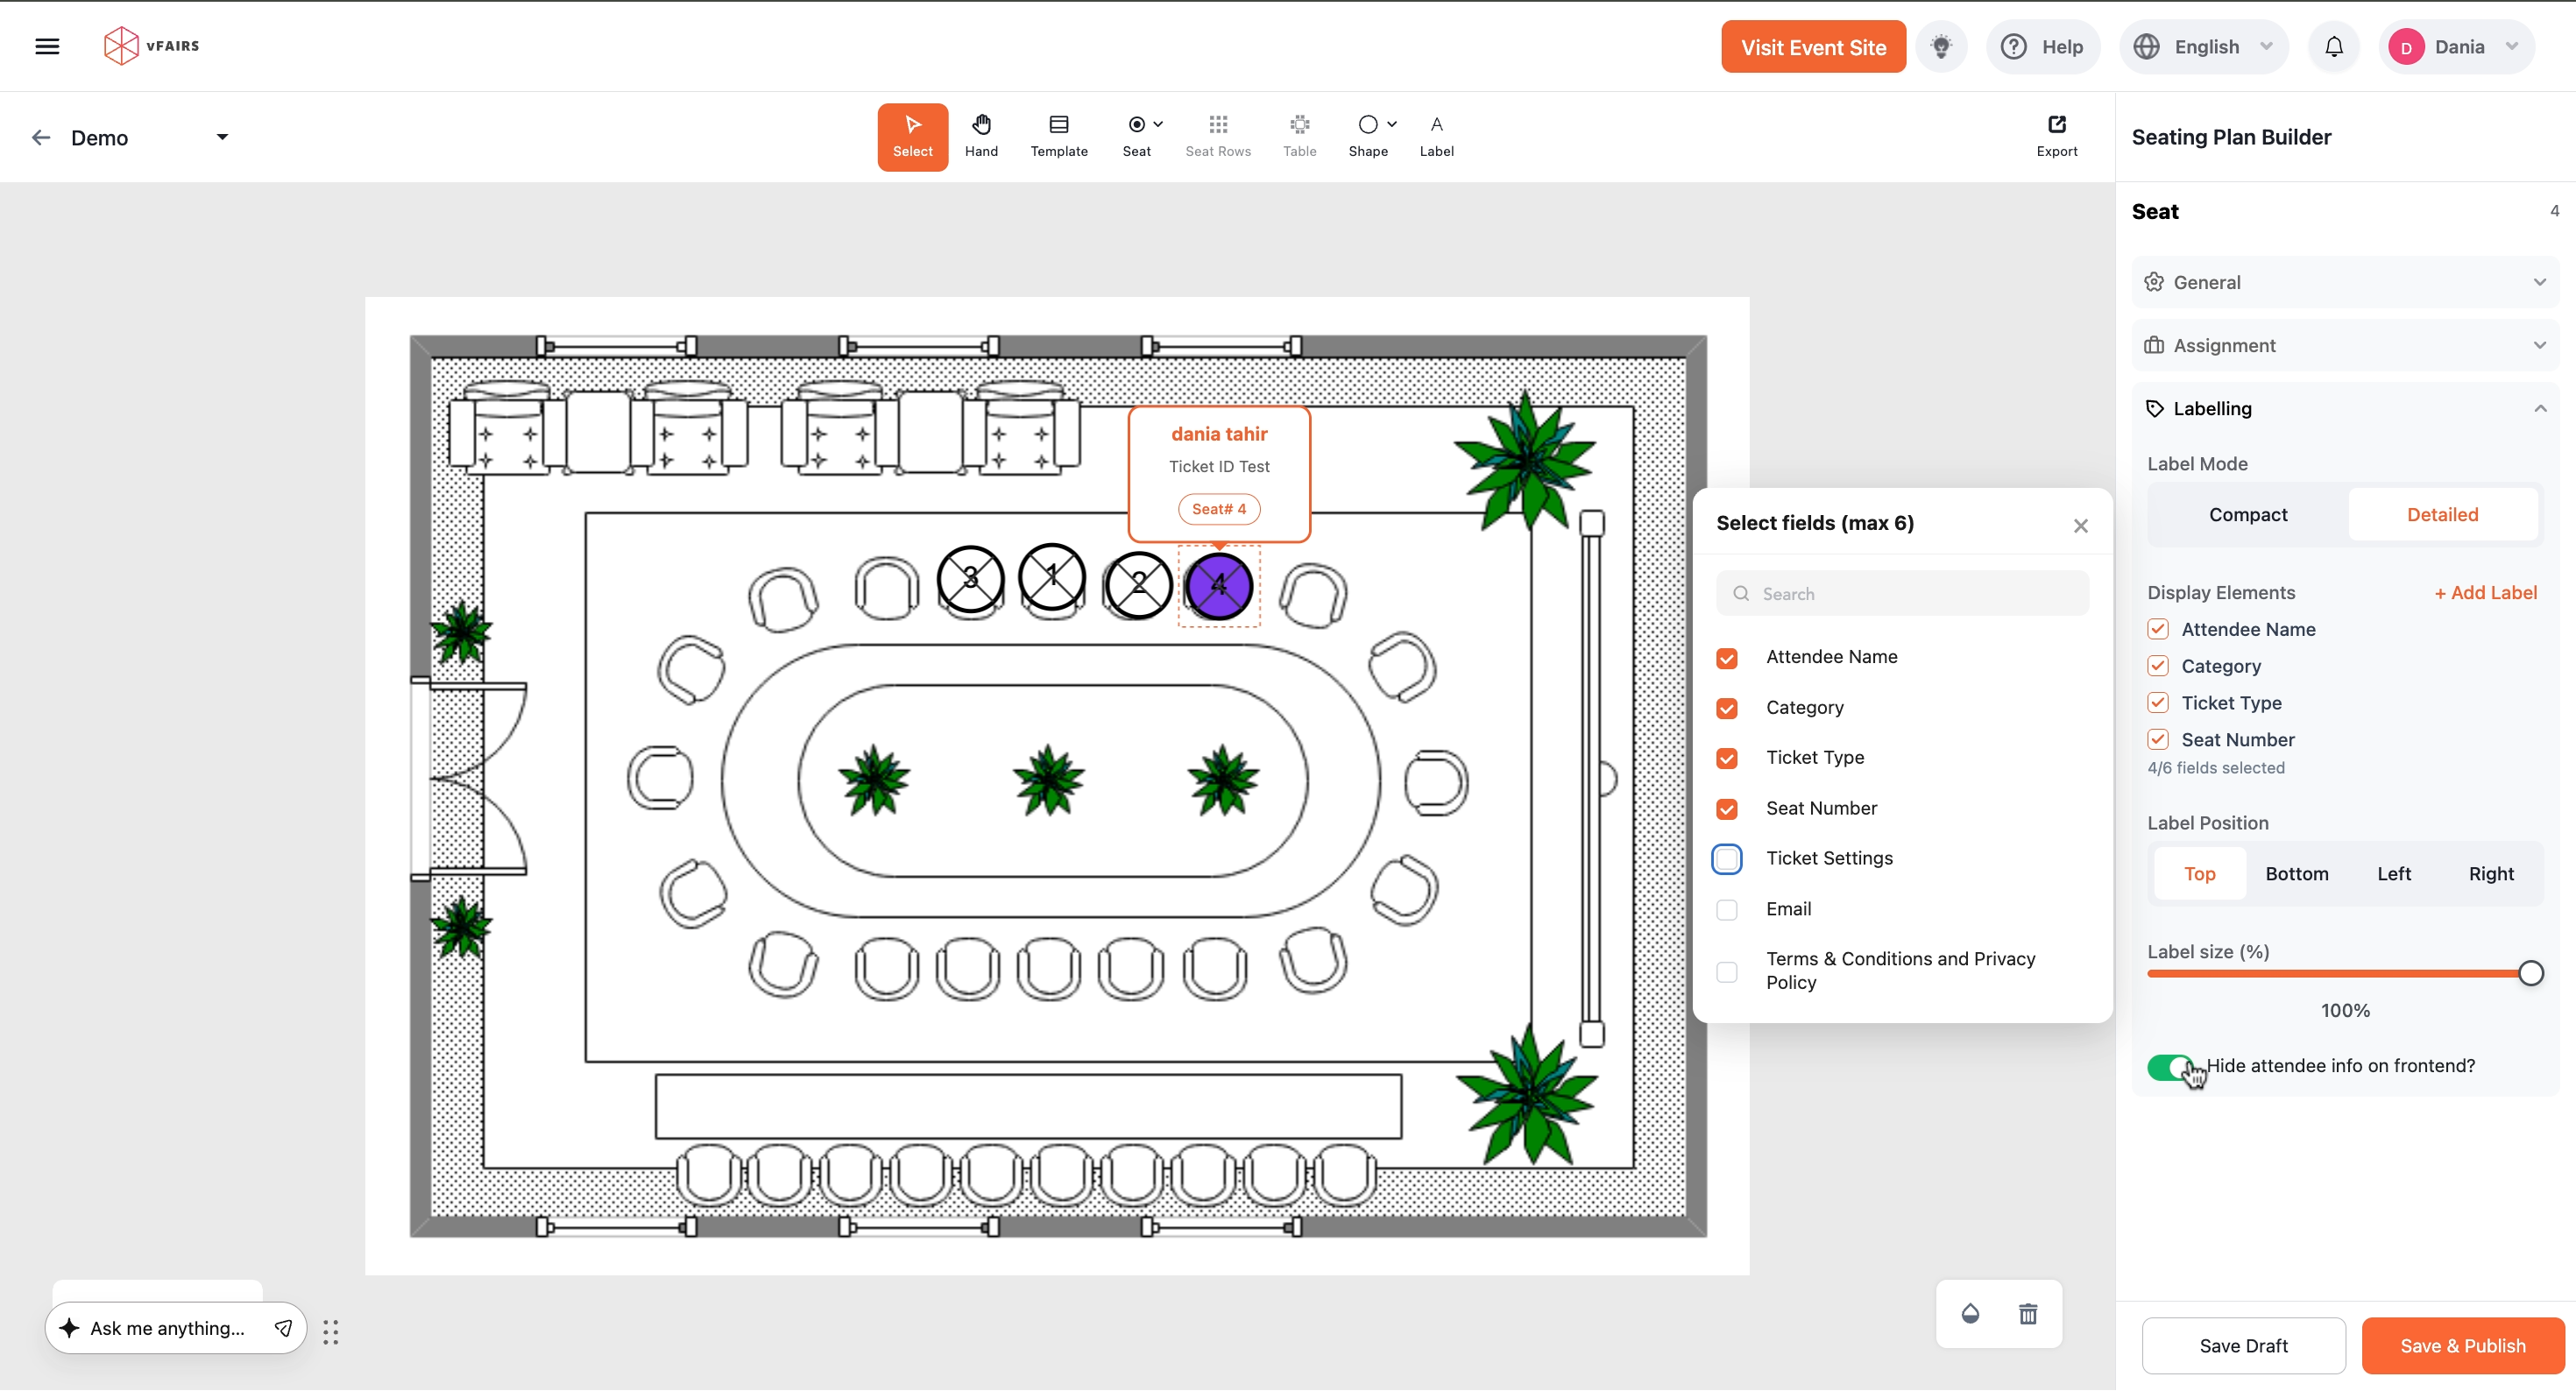
If enabled, attendees will not see the detailed information you've configured on the seat labels.
10. Once you have configured all labeling settings, click Save & Publish at the bottom right of the screen to apply your changes.