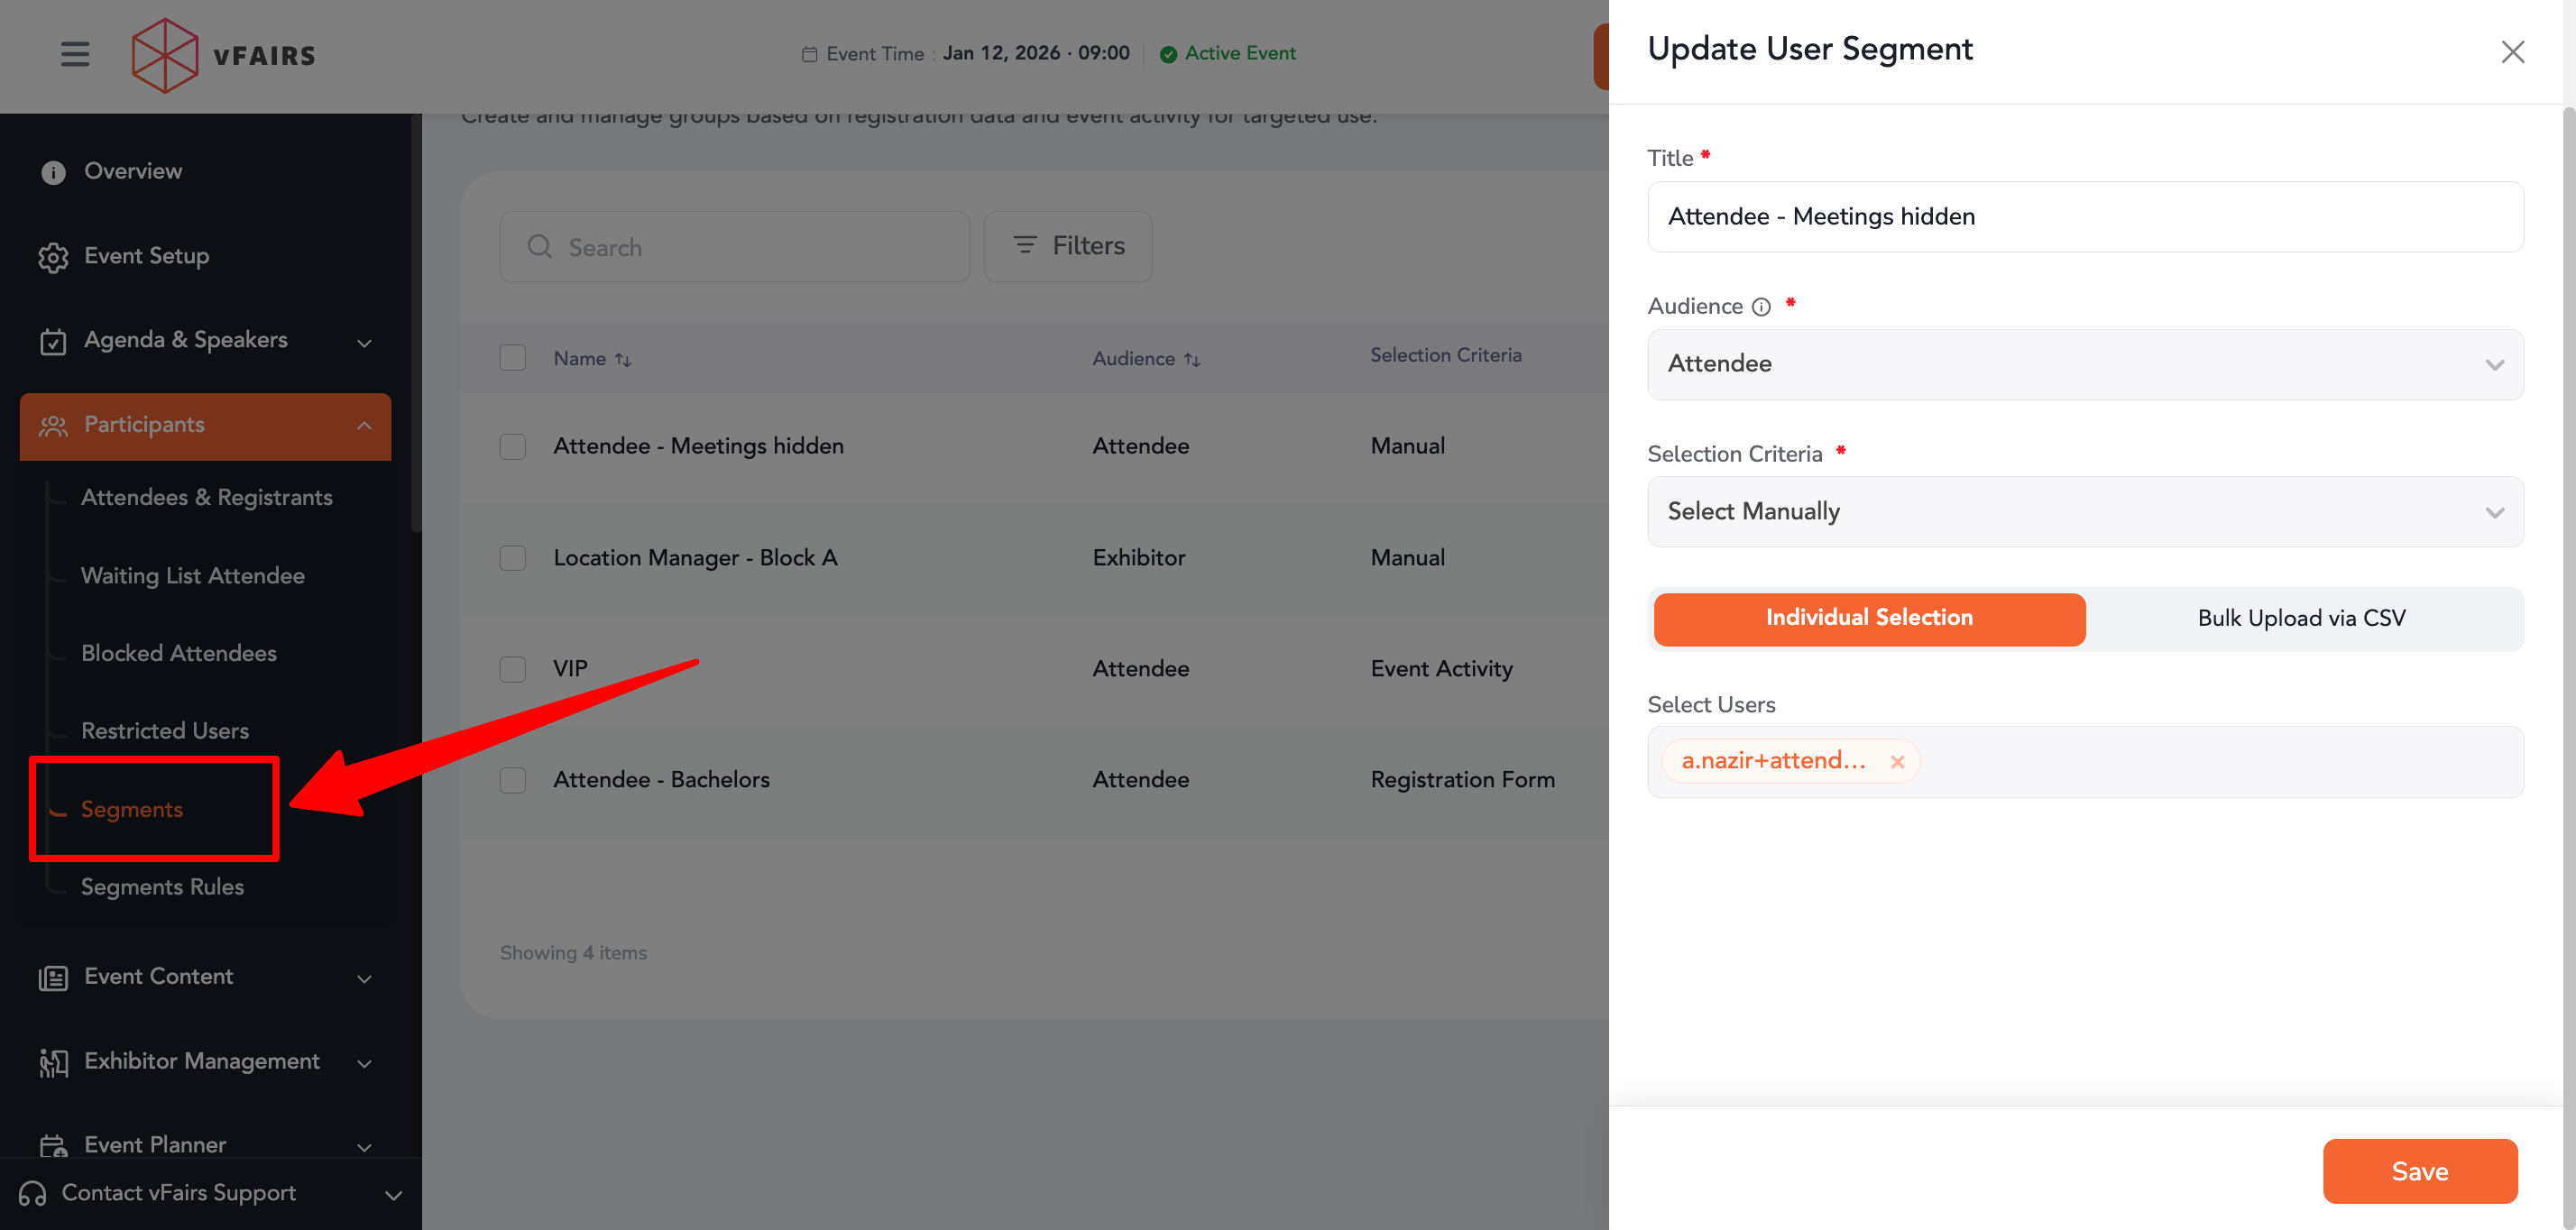
Step 1: Create a Segment
- Go to Participants.
- Navigate to Segments.
- Click Create Segment.
- Enter the required segment details and define the audience criteria.
- Save the segment.
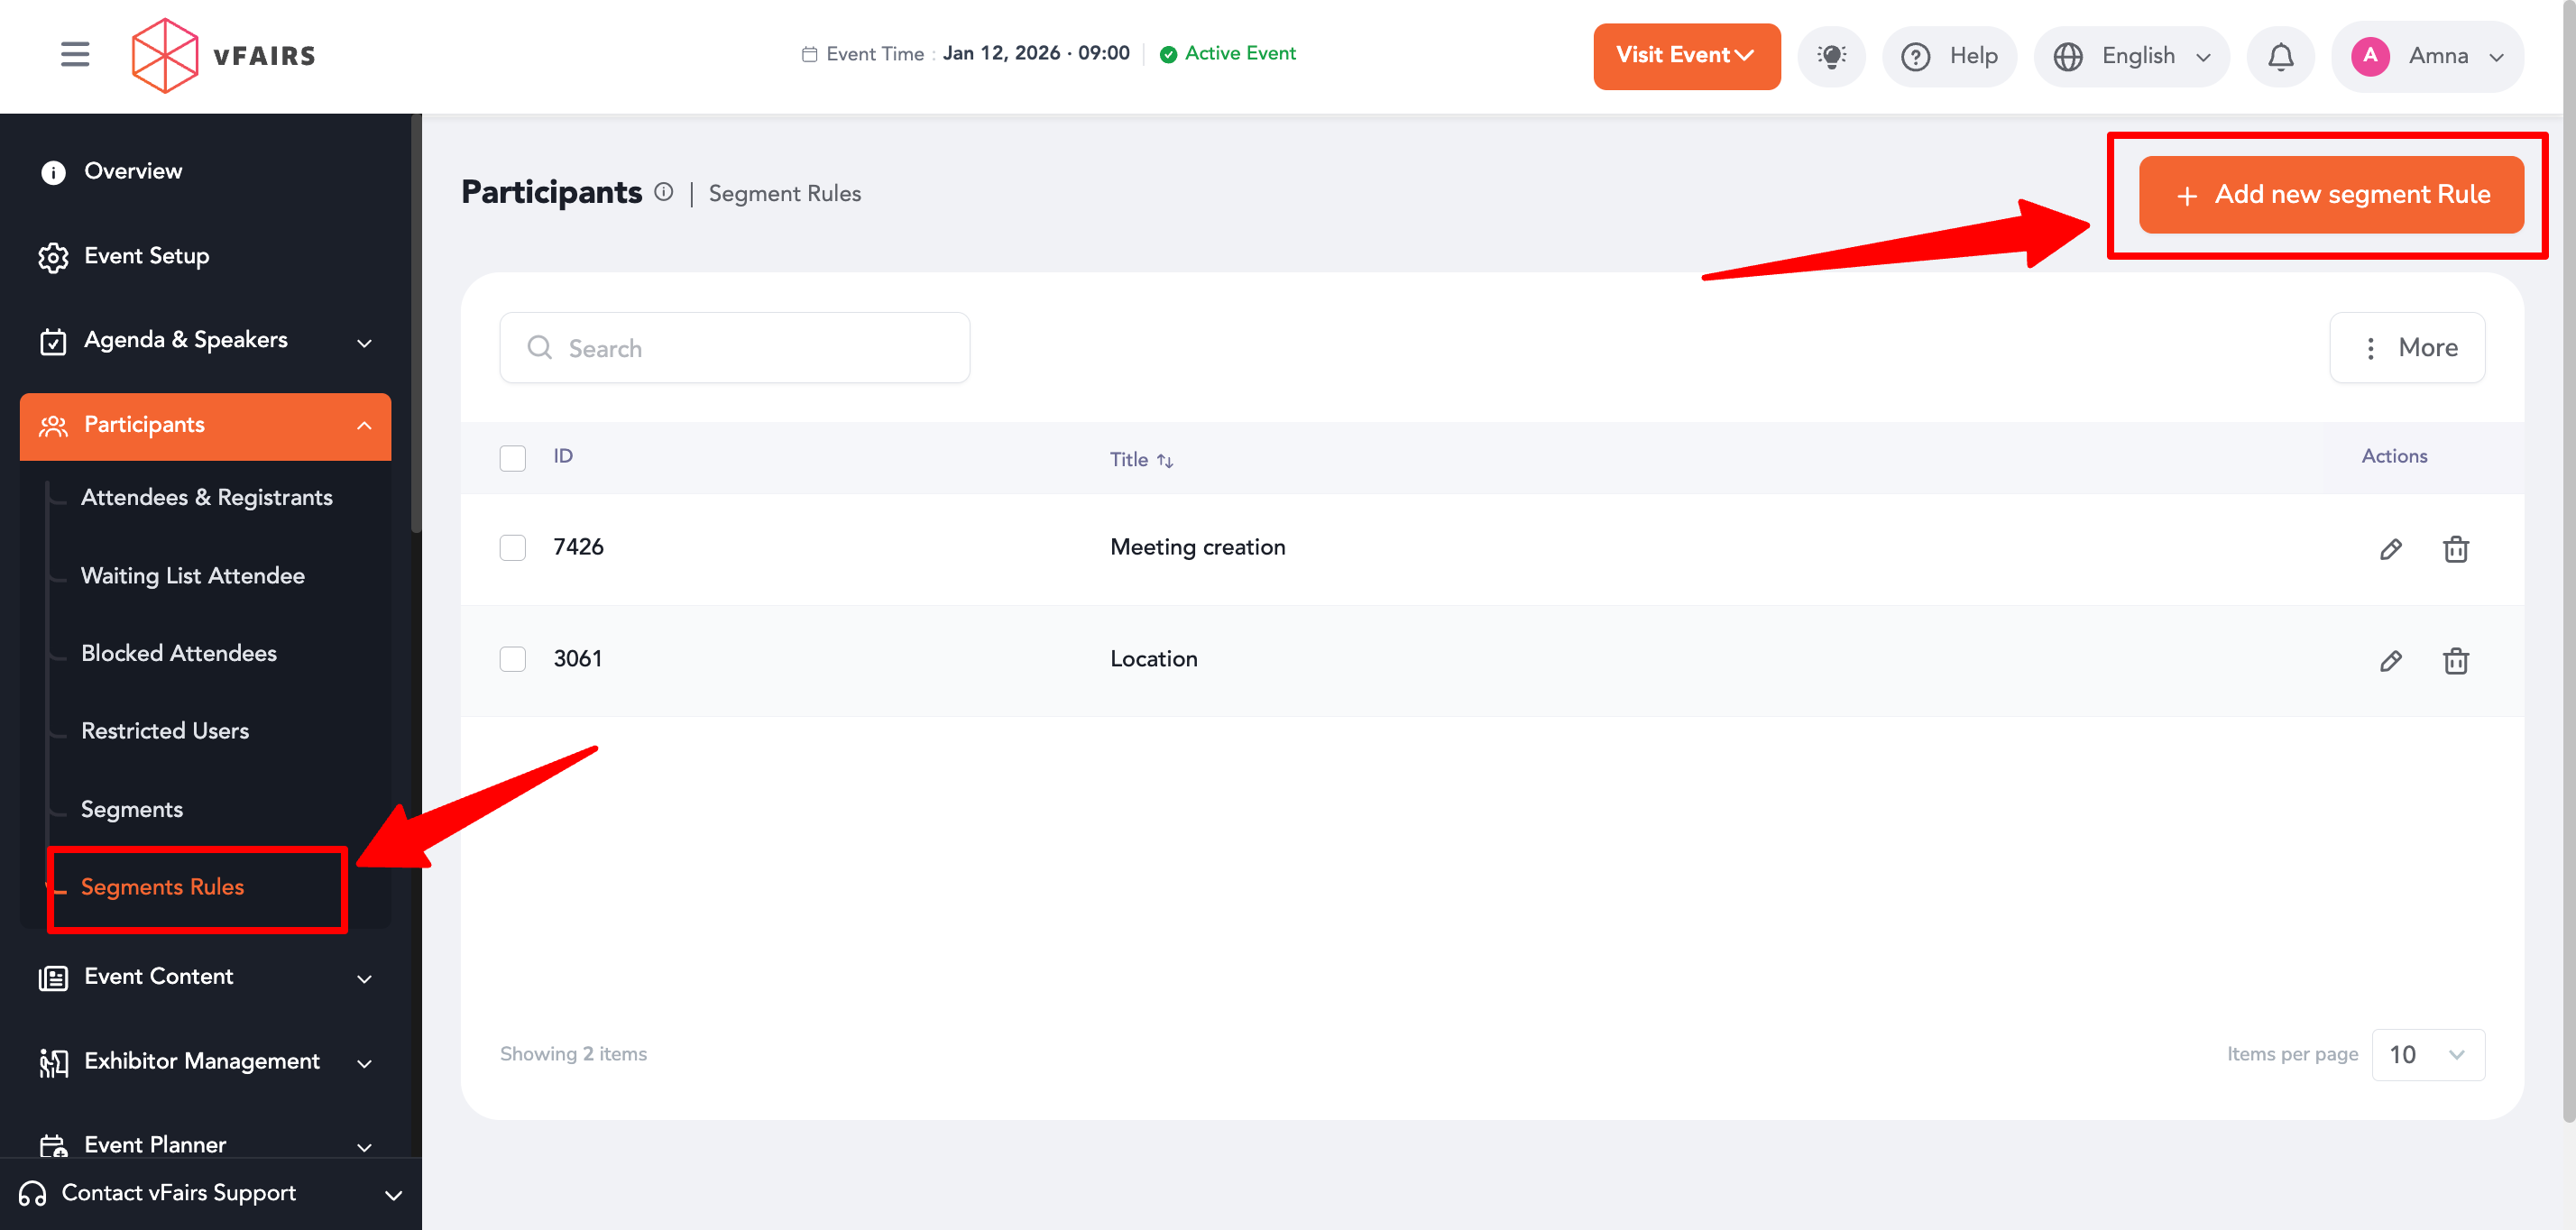
Step 2: Create a Segment Rule
- Navigate to Participants → Segment Rules.
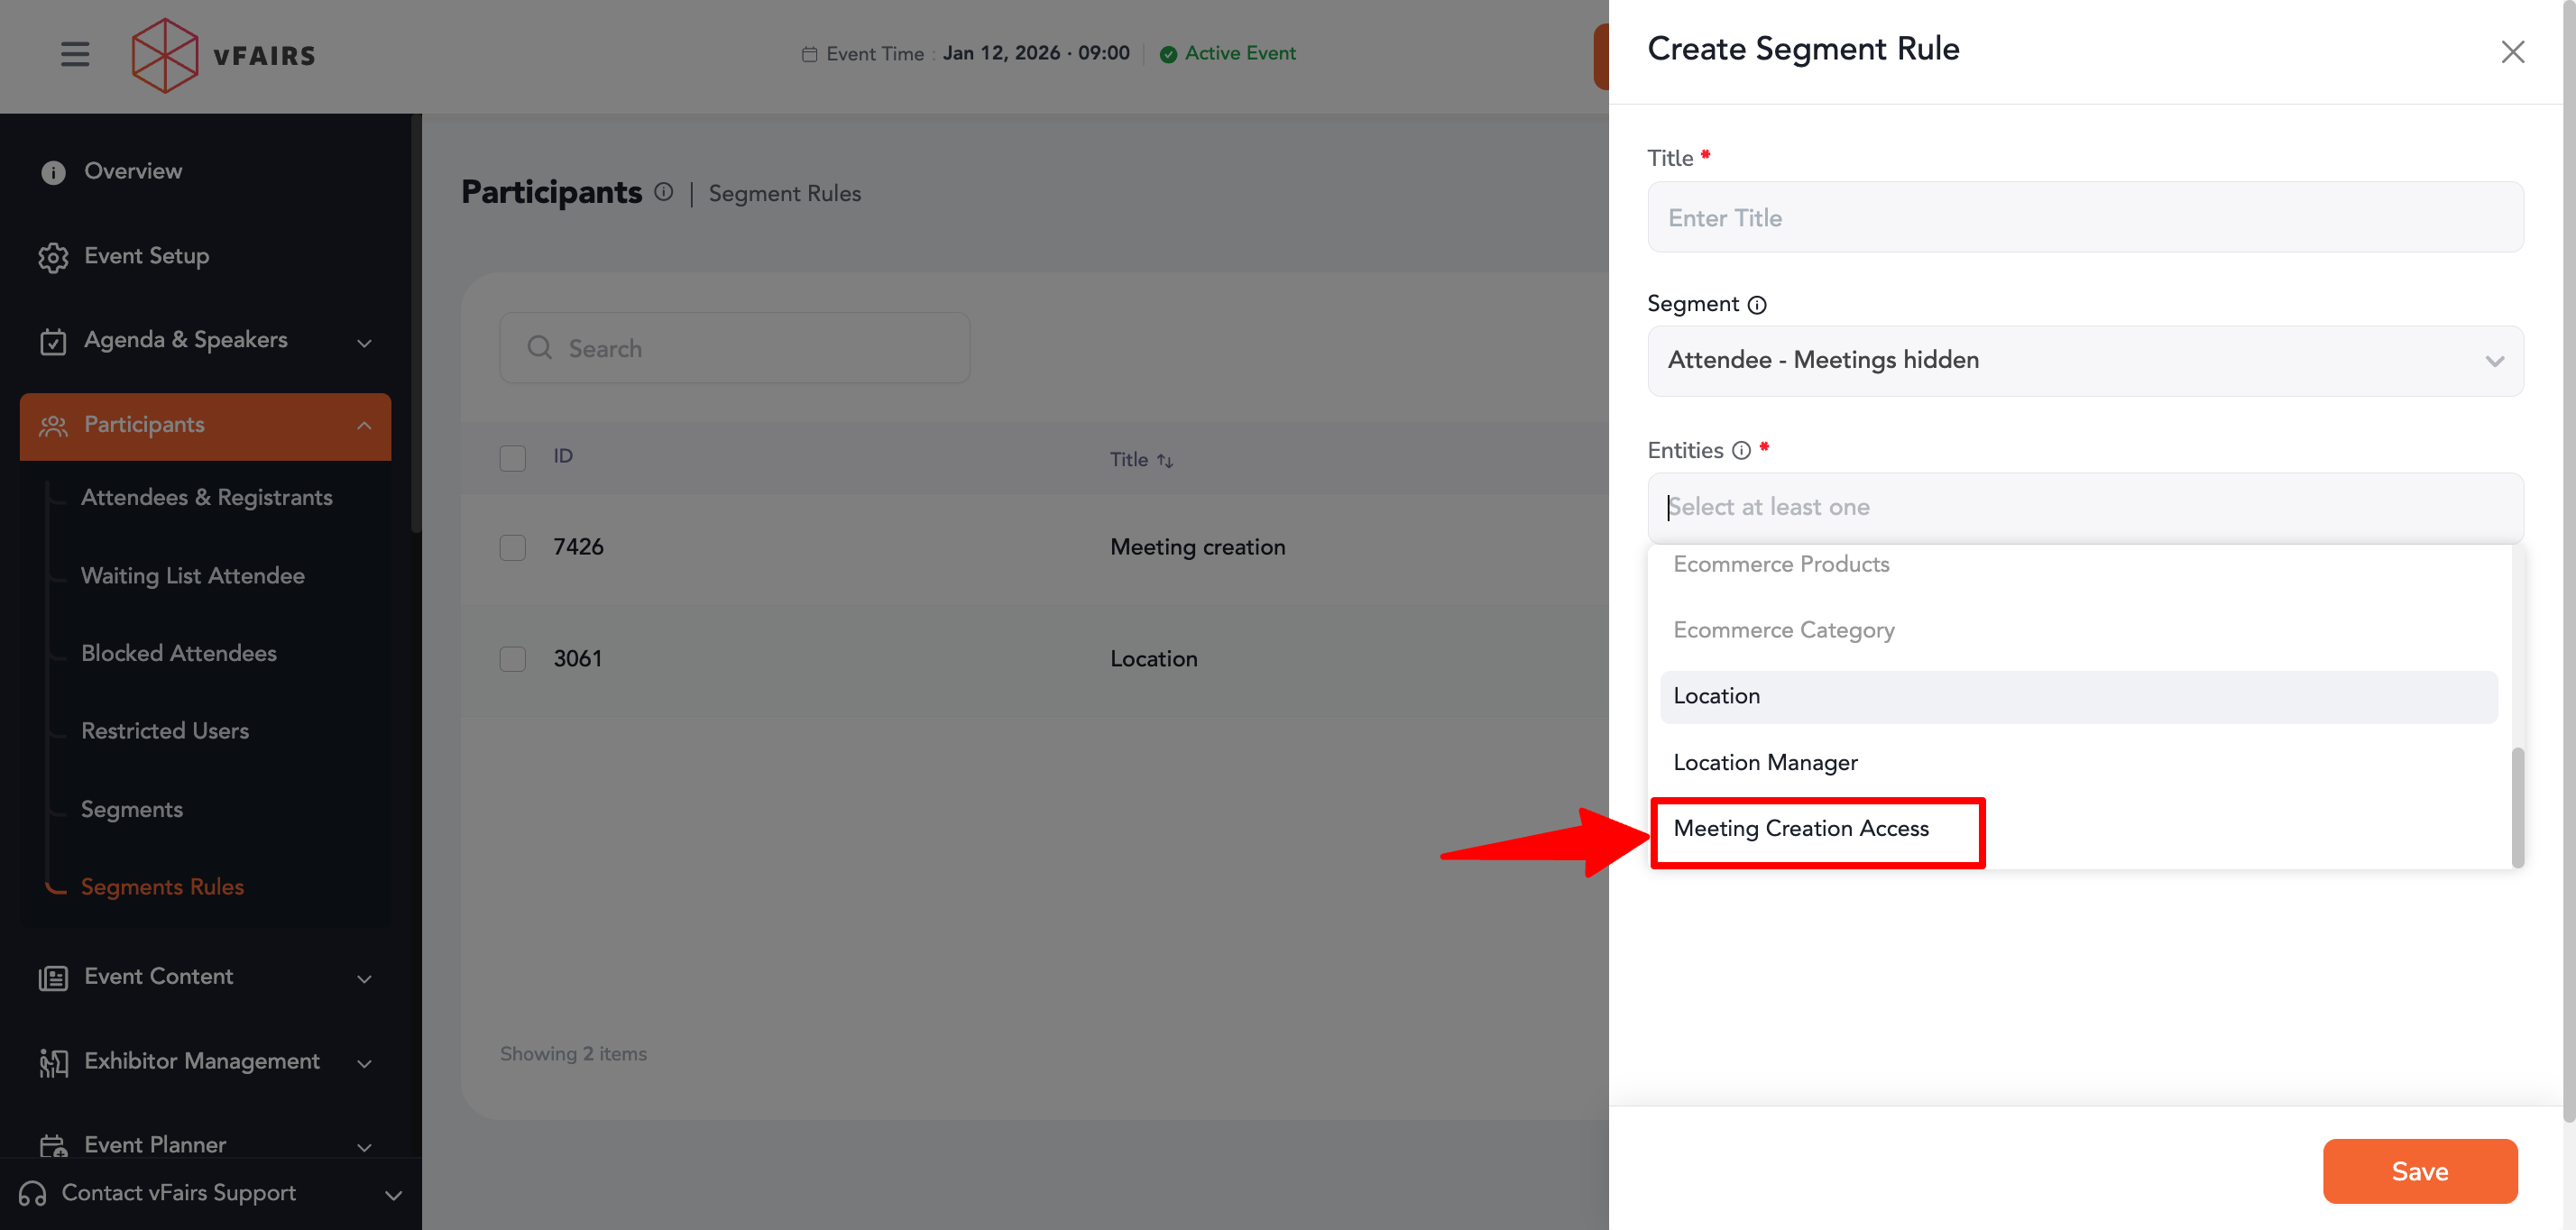
- Click Create Segment Rule.
- Select the segment you created.
- In the Entity dropdown, select Meeting Creation.
- Choose the desired action:
- Show – Users in the selected segment will be able to access the Create Meeting option.
- Hide – Users in the selected segment will not be able to access the Create Meeting option.
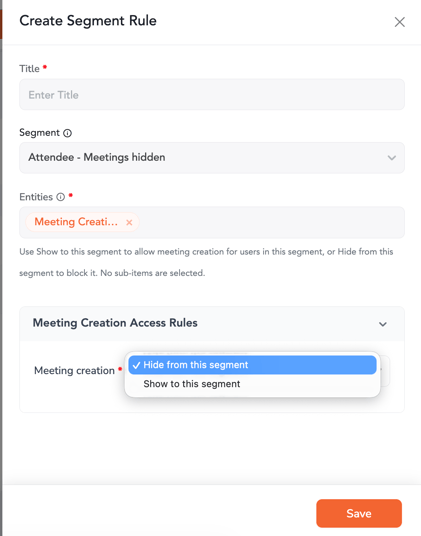
- Save the rule.
How It Works
Once the segment rule is applied:
- Users who belong to the selected segment will see or not see the Create Meeting option based on the configured action.
- The rule will apply across all meeting creation entry points where meeting booking is available i.e. mobile, web, exhibitor portal.
Important Notes:
- Segment rules only control the visibility of the Create Meeting option.
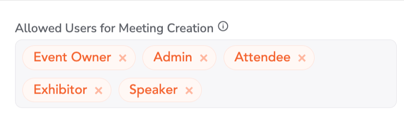
- Users must still belong to a role that has permission to create meetings.
- If a user's role does not have meeting creation access, they will not be able to create meetings even if the segment rule is configured to show the option.
- Segment-based restrictions work alongside the Meeting Module permissions and role-based access controls (RBAC).
Use Cases
- Allow meeting creation for VIP attendees only.
- Restrict meeting booking for specific attendee groups.
- Enable meeting creation for sponsors, exhibitors, or selected networking audiences.
- Create exclusive networking experiences based on attendee segments.