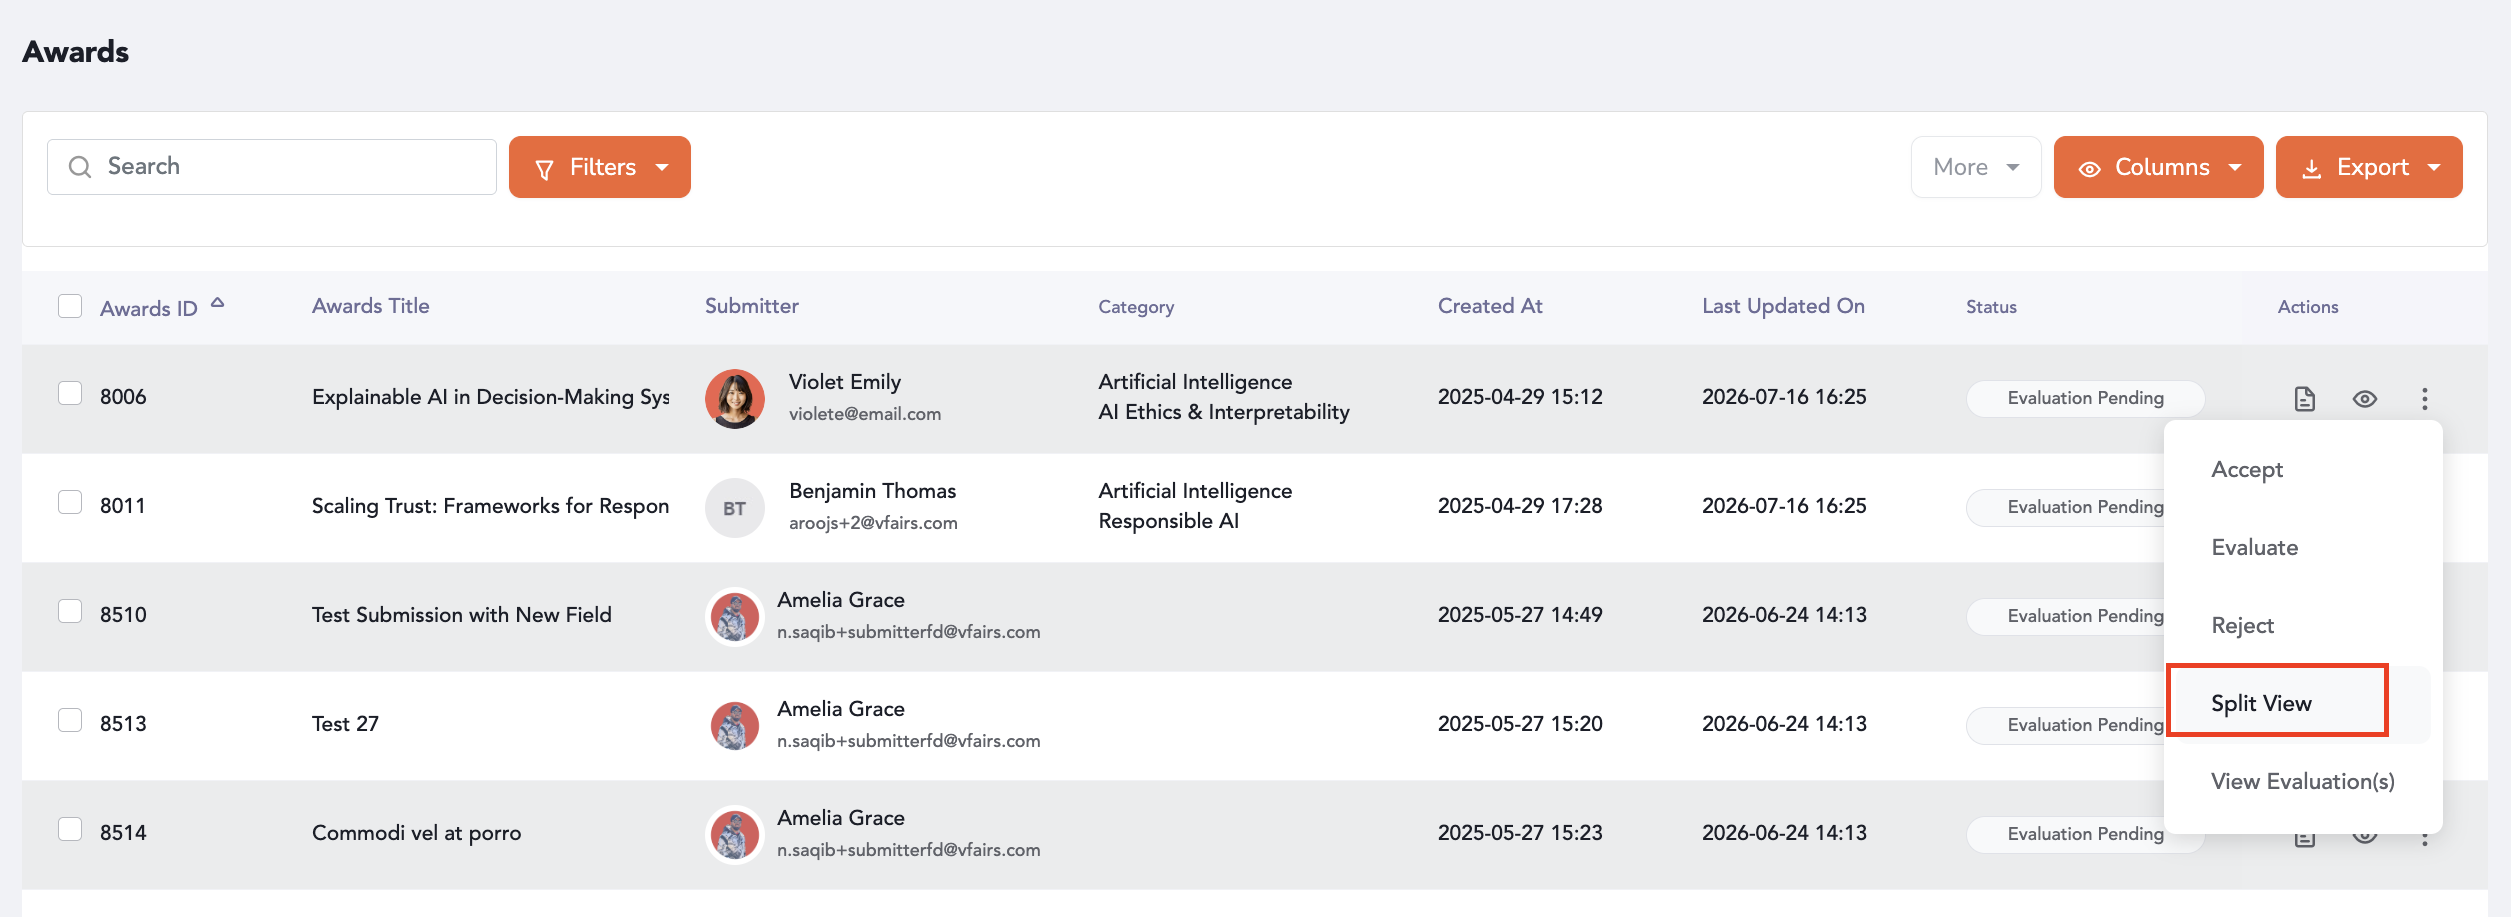
- Navigate to the Reviewer Portal.
- Open the Abstract Listing.
- Locate the submission you wish to evaluate.
- Click the three-dot (⋮) menu corresponding to the submission.
- Select Split View.
The selected abstract opens in the Split View workspace.
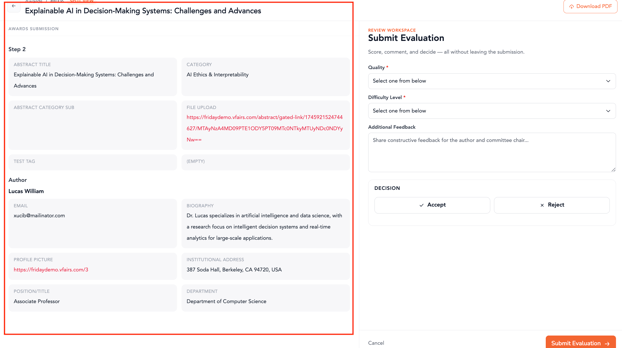
Step 2: Review the Abstract (Left Panel)
The left panel displays the complete submission in a read-only format.
Reviewers can access the following information:
Submission Information
- Abstract Title
- Download PDF
- Category
- Sub-category
- Uploaded Files
- Tags
- Submitter
Abstract Content
- Complete abstract body
Authors
Each listed author includes:
- Initials avatar
- Full name
- Email address
- Biography
- Institutional address
All information is displayed for reference and cannot be edited by reviewers.
The Reviewer Workspace contains the evaluation form.
Begin by completing the required evaluation fields.
Required Fields
- Quality
- Excellent
- Good
- Average
- Below Average
- Difficulty Level
- Beginner
- Intermediate
- Advanced
- Expert
Optional Field
- Additional Feedback
Reviewers can continue reading the abstract while completing these fields, as both panels scroll independently.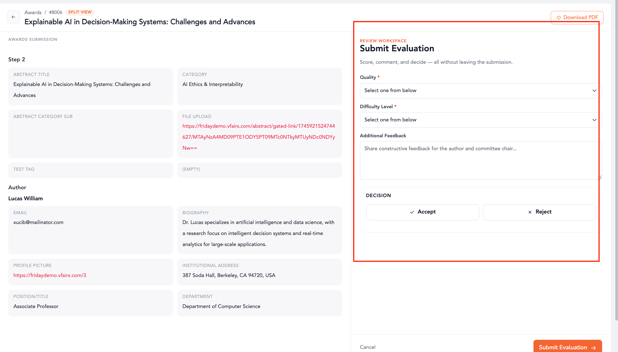
After completing the evaluation, choose one of the available decisions.
Accept
Selecting Accept reveals:
- Acceptance Reason (Required)
- Acceptance Option (Required)
- Describe Reason
The status indicator updates to:
Will Accept
Reject
Selecting Reject reveals:
- Rejection Reason (Required)
- Rejection Option (Required)
- Describe Reason
The status indicator updates to:
Will Reject
Only the fields relevant to the selected decision are displayed.
Step 5: Submit Your EvaluationOnce all required fields have been completed, the Submit Evaluation button becomes enabled.
Click Submit Evaluation to finalize your review.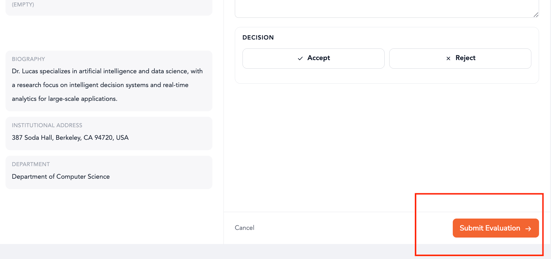
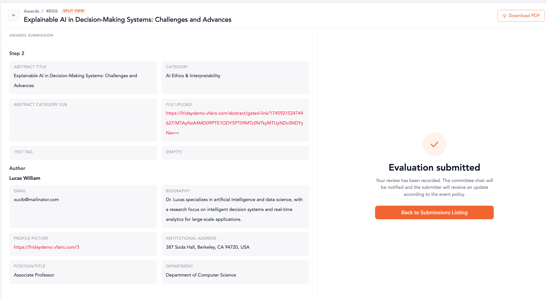
After a successful submission:
- The Reviewer Workspace transitions to a confirmation state.
- A success message confirms that the evaluation has been submitted.
- A summary of the recorded decision is displayed.
- A Back to Abstracts button becomes available.
The abstract remains visible in the left panel for reference until you navigate away.
Step 9: Return to the Abstract ListingThe system returns you to the Abstract Listing while preserving your previously applied filters.
The reviewed submission now reflects its updated evaluation status within the listing.