Learn how to create session tracks to organize your event sessions into categories or themes.
Steps to Add a Session Track
-
From the left navigation menu, select Sessions then Session Tracks.

-
Click the + Add Track button.

-
Fill in Track Details:

| Field | Description |
|---|---|
| Track Name |
Enter a name that clearly defines the content of this track (e.g., Day 1 Track, VIP Track, On-Demand Content, etc. |
| Language | Choose the primary language that sessions in this track will be conducted in (e.g., English, French). |
| Parent Group | If applicable, assign the track to a parent group. This is useful for categorizing tracks into broader topics or themes. |
| Track Type | Select the track type(s) that will be part of this track. Options include webinars, on-demand videos, live presentations, etc. |
4. Configure Advanced Settings (Optional):
| Advanced Option | Description |
|---|---|
| Default | Set this track as the default for your event agenda. |
| Active | Toggle this option to activate or deactivate the track. If inactive, the track won’t appear on the event agenda for attendees. |
| Enable Attendee Voting | Enable this if you want voting capability for posters under this track. This is useful for interactive or competition-based event sessions. |
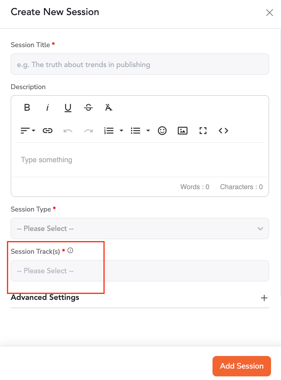
5. Navigate to the "Sessions Listing" section and access the session creation drawer. Scroll below to navigate to the "Session Track(s)" field to link single or multiple tracks to the session being added.

Note: In cases where parent and child session tracks are associated, the parent tracks that have linked child tracks will not appear in the track selection dropdown.
6. Save the track.
After filling out the required fields and configuring any optional settings, click Add Track to create the session track.
Here’s how the session tracks appear in the sessions listing area.
