Learn how to create and enable consent forms for badge printing in the Badge Printing App. This guide helps you set up forms to collect user consent for data collection, badge issuance, or any other necessary approvals during your event.
Setting up the consent form for your event consists of two parts:
- Create the consent form
- Enable the consent form
Create the consent form
- From your event dashboard, expand "Registration" in the left navigation and click on "Form Builder."
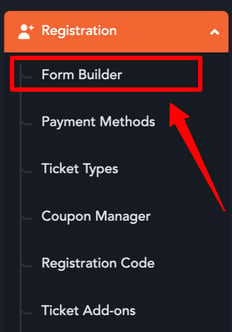
- On the form builder screen, click on "Add" to open the form creation tab.

- Fill out the form fields as described in the image below:
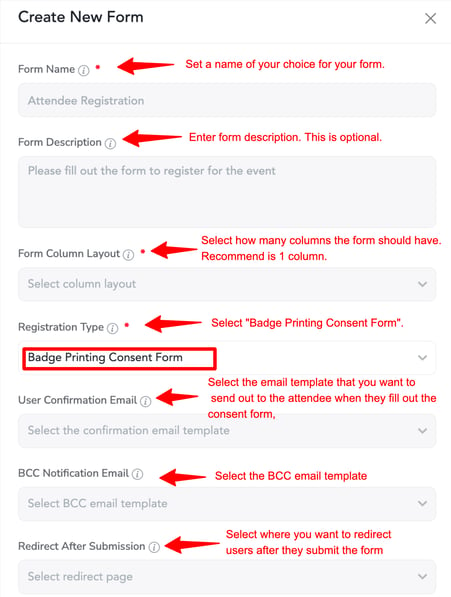
- Click Save to apply changes.
- Your newly created form should now appear on the Form Builder screen.
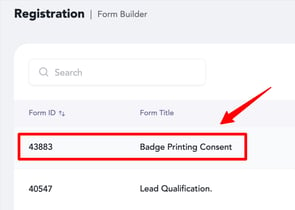
- Next, you will need to set the fields of this form. To do, click on the settings icon next to your form to edit the fields:
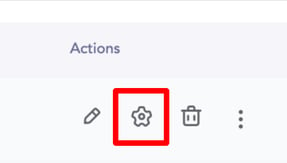
- This will take you to the field editor where you can add, remove, or edit the properties of various fields in your form.

- There are few default fields, you can also personalize by adding field of your choice.
- Hover over any field and click on this icon to drag and drop at any location of your choice.

- Similarly any field can be deleted by hovering over the field and clicking on the delete icon.

- Any field settings can also be edited by clicking on the ‘edit’ icon.

- For example if you want to edit the label of the field. Make it required or not required.

- Then there are few advanced settings. Whether the field status is inactive or active.
- Whether you want to keep the field but hide in the form.
- Whether the field value would be editable in the edit profile.
- Whether the field should show in the edit profile and user details.
- Edit profile is for the individual and user details showcasing is for general admin view.

Do you want to have one field dependent on the other? Checkout how to add field dependencies?
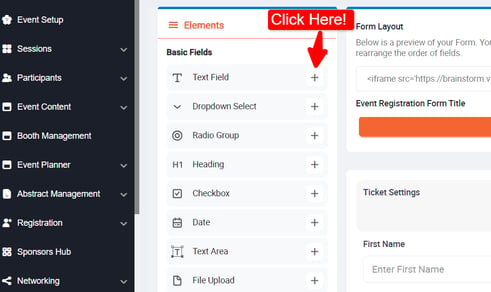
Here is what field types we have available:
Basic field elements:
These element types provide the ingredients to create any type of fields. For example, if I want to collect
- Text Field: Allows users to input a single line of text.
- Dropdown Select: Provides a list of options from which users can select one.
- Radio Group: Allows users to choose one option from a group of predefined options (usually presented in a circular format).
- Heading (H1): A large text field used to display headings or titles.
- Checkbox: Allows users to select one or more options from a list (square boxes).
- Date: A field that lets users input or select a date.
- Text Area: A larger field for entering multiple lines of text.
- File Upload: Enables users to upload files from their device.
- Star Rating: Allows users to rate something by selecting a number of stars.
- Paragraph: Used for displaying text content in paragraph form.
- Number: A field that allows users to input numeric values.
There are few sub mappings for these fields which come under the advanced settings of the field type:
- Accommodation / Lodging (Dropdown)
- Room type (dropdown)
- Check-in date (date and time picker field)
- Check-out date (date and time picker field)
- Arrival date and time (Date and time picker)
- Number of Guests. (Text Box)
- Flight number (number field)
- Pick-up required? (Yes/No)
- Special Requests (Text Area)
Section 2: Pre-defined fields
- First Name: A text field where users input their first name.
- Last Name: A text field for users to input their last name.
- Email: A field that captures the user's email address.
- Password: A field for users to set or input a secure password (typically hidden for privacy).
- Phone Number: Allows users to enter their contact phone number.
- Countries and States: A dropdown field where users can select their country and state.
- Hidden: A field that stores data without being visible to users, often used for backend processes.
- Button: Adds a clickable button, usually for submitting or triggering actions in a form.
- How will you be attending the event?: A field where users indicate how they will attend an event (likely a dropdown or radio group).
- Group Registration: Enables users to register multiple participants or group details.
- Terms & Conditions and Privacy Policy: A checkbox to confirm the user agrees to the terms and conditions and privacy policy.
- Address: A field for users to input their complete address.
- Zip: A field for users to enter their postal code.
These fields are typically used in forms for gathering personal and logistical details, especially in event registration processes.
Enable the consent form
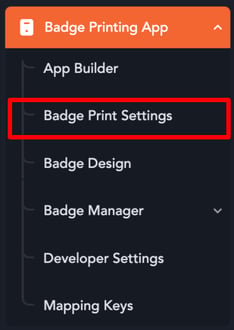
- To enable the consent form for your event, expand "Badge Printing App" in the left menu, then click on "Badge Print Settings".
- Please search for the following toggle and enable it

- Scroll down and click "Update Settings".
- The consent form is now enabled for your event and will appear before printing any badge.
