What is a Survey?
Surveys are designed to help organizers gather insights and feedback from participants during an event. Whether it's getting input before the event, gathering feedback on sessions, or understanding networking engagement, surveys help organizers enhance the overall event experience.
Steps to create a survey
- Access the Form Builder page:
Login to the backend, navigate to the "Registration" section in the left menu and select “Form Builder” under Registrations.
2. Click 'Add' to create the survey form.

3. Fill in the required fields:
-
Form Name - This will be used in backend as a your survey name.
- Form Description - This will be used as add more details on survey details.
- Registration Type - Select 'Survey Form' option in the registration type in drop down field.
- Post Survey Submission Text - this text will appear to your users once they have successfully submitted a survey
-
Multiple Submission Surveys - Enable this toggle, if want to allow multiple submission from a same users
- Publicly Accessible Link - Enable this toggle, if you want survey to be accessible publicly. When disabled, survey can only be submitted after logging in the application.
- Show Survey in Popup - Enable this toggle, and survey will appear in a popup instead of embedded in full page.
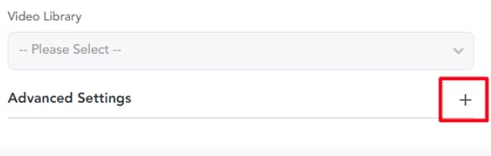
- Redirect After Submission - Associate a page or menu where you want users to be redirected once they have submitted a survey

After filling out the necessary fields, click the 'Save' button. The survey creation form will be closed and your newly created survey will be listed on the survey listing page.

Managing Surveys
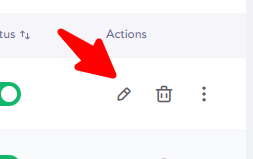
Once your survey is created, you can manage it from the Survey Listing page.
- Edit a Survey
Click on the Edit Survey icon (pencil) to modify the survey’s title, description, or settings.
- Edit Survey Questions
Click on the gear icon to add, edit, or rearrange the questions in your survey using the Survey Form Builder.
- Delete a Survey
You can delete any survey by clicking the Delete Survey option under the Actions button. - Duplicate a Survey
If you want to use a similar format for a new survey, click on the Duplicate Survey option.
- Copy Link
You can copy the survey public link from the menu. This can be shared in emails, or directly over chat.

Adding Questions to a Survey
To add or edit questions within a survey:
- Click on the “Edit Survey Questions” Button
A survey form builder will appear, allowing you to customize your survey. - Add Question Fields
You can choose from different field types to structure your survey:- Text Field: For open-ended responses.
- Dropdown or Radio Button: To provide multiple-choice answers.
- Star Rating: Use to capture feedback on sessions, speakers, or other event elements.
- There are numerous other fields that you can to capture feedback based on your requirement


3. Edit Field Labels and Configurations
Customize each question by editing the field label, options, and configurations.


4. Save the Survey Questions
Once all questions are set, click the Save button to finalize your survey.
Adding Surveys to Sessions
To add a survey to a session.
1. Navigate to the Sessions section in the left menu.

4. Locate the Select Survey dropdown and choose the survey you want to attach to the session.

Now participants will be able to see and complete the survey linked to the session.

Adding Surveys to the Navigation Menu
To make surveys easily accessible for participants, you can add them to the event’s navigation menu:
Note: The below steps will help you update the navigation menu and add your survey to the event’s site.
You can learn more about the navigation menu here.
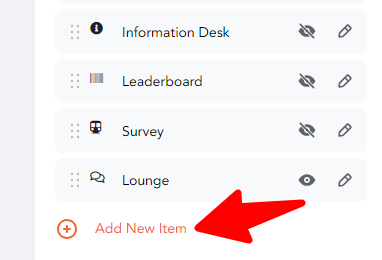
- Navigate to Event Content > Navigation Menu.

- The Navigation Menu Builder will open.
- Click on the "Below Header" in the menu editor.

- Select Add New Item to create a new menu option.
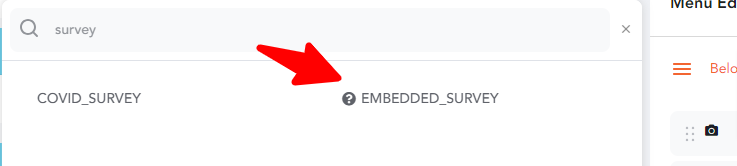
- Search Survey and choose EMBEDDED_SURVEY from the list of options.
- Customize the menu item by adding a label, changing the icon, and selecting the survey you want to display.

7. Set the Context to Popup.
8. Select the user type that will see this menu option or leave it blank for all users.
9. Make sure the survey is Active before saving the changes.


Participants will be able to view the survey menu option in the navigation bar.

