Steps to design a new Email Campaign in the backend:
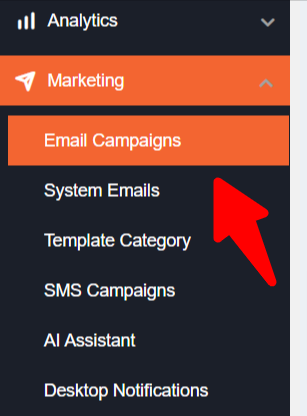
- Once you are logged in to your event’s backend, click on the left menu named Marketing to access the Email Campaigns dashboard.
-
On the Email Campaigns dashboard, you will see a Create button on the top right side which you can click to start designing a new campaign.

-
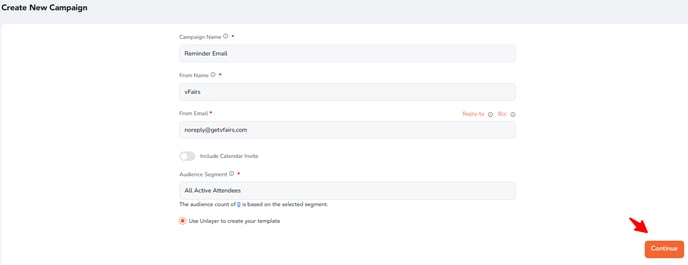
Enter Basic Campaign Details
Upon clicking, you will be taken to a screen where you need to fill in the following fields:-
Campaign Name
-
From Name
-
Audience Segment
Once these fields are filled, click on Continue to proceed.
-
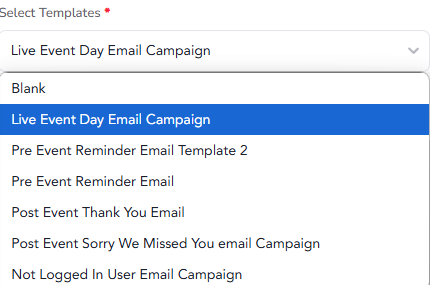
Designing the Email Campaign
-
Click on the Select Templates dropdown to choose a prebuilt template to edit.
-
Once editing is complete, click on Send Test and enter the email(s) to send the test email to.

-
To enter test recipients, use the format:
Name:email@example.com
For example, if your name is John Doe and your email is john@email.com, enter:John:john@email.com
For multiple recipients, separate each with a comma:John:john@email.com, Jane:jane@email.com -
Click Send Now to send the test email to the specified recipients.

-
To send the campaign to all the audience, click Send Now in the scheduling section after setting the date and time.
-
Alternatively, you can click Save Draft to continue editing later, or click Schedule to set the date and time for sending the campaign.
-
After setting the date and time, click the Schedule button to confirm.

The scheduled time of the email campaign will always follow the Event timezone setup in the backend Event Settings.
4. You can edit, clone, delete or download statistics for your campaign using these icons under Actions on the Email Campaign Dashboard.

Saving Your Work
At any stage, admins can save the email draft and continue editing it later. There’s no need to complete the campaign setup in one go.
Using Dynamic Tags in Email Campaigns
To personalise your emails, you can use dynamic tags to automatically pull attendee information, such as:
- Names
- Email addresses
- Fields from the registration form or attendee data import.
These tags allow you to tailor your emails to each recipient, creating a more engaging experience.