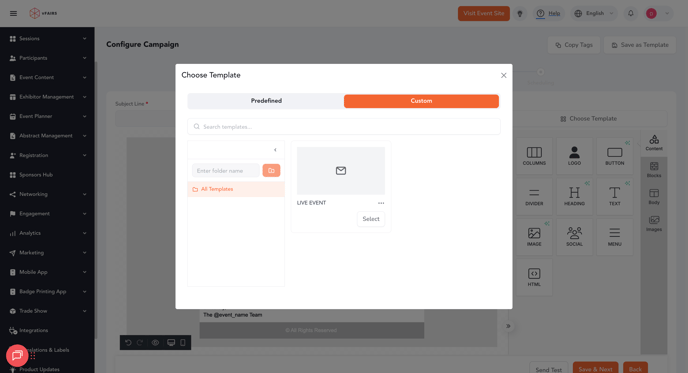
Step 1: Open the Templates Modal
-
Navigate to the Email Campaign builder.
-
Click Choose Template.
-
Switch to the Custom tab the Folders panel will appear on the left.
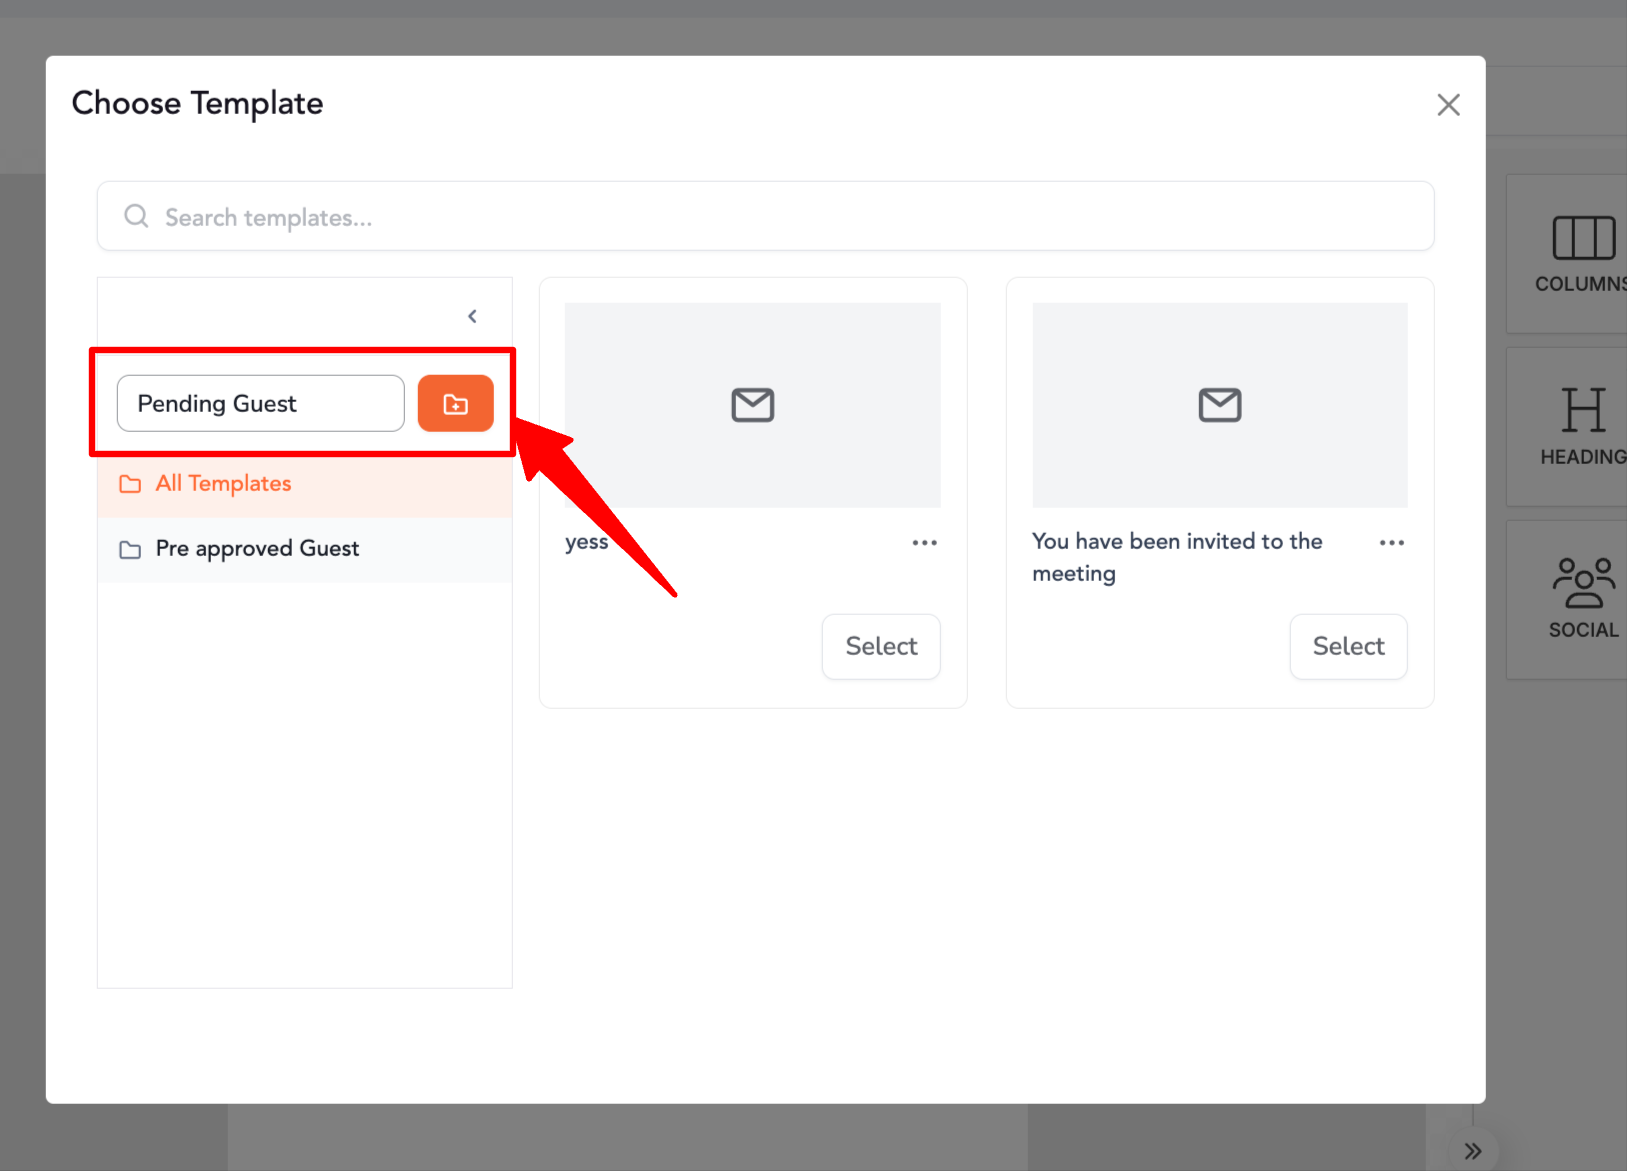
Step 2: Create a Folder
-
In the Folders panel, type a folder name in the input field.
-
Click the folder icon to save.
-
A new folder will appear in the panel.
-
Note: “All Templates” is always present and cannot be renamed or deleted.
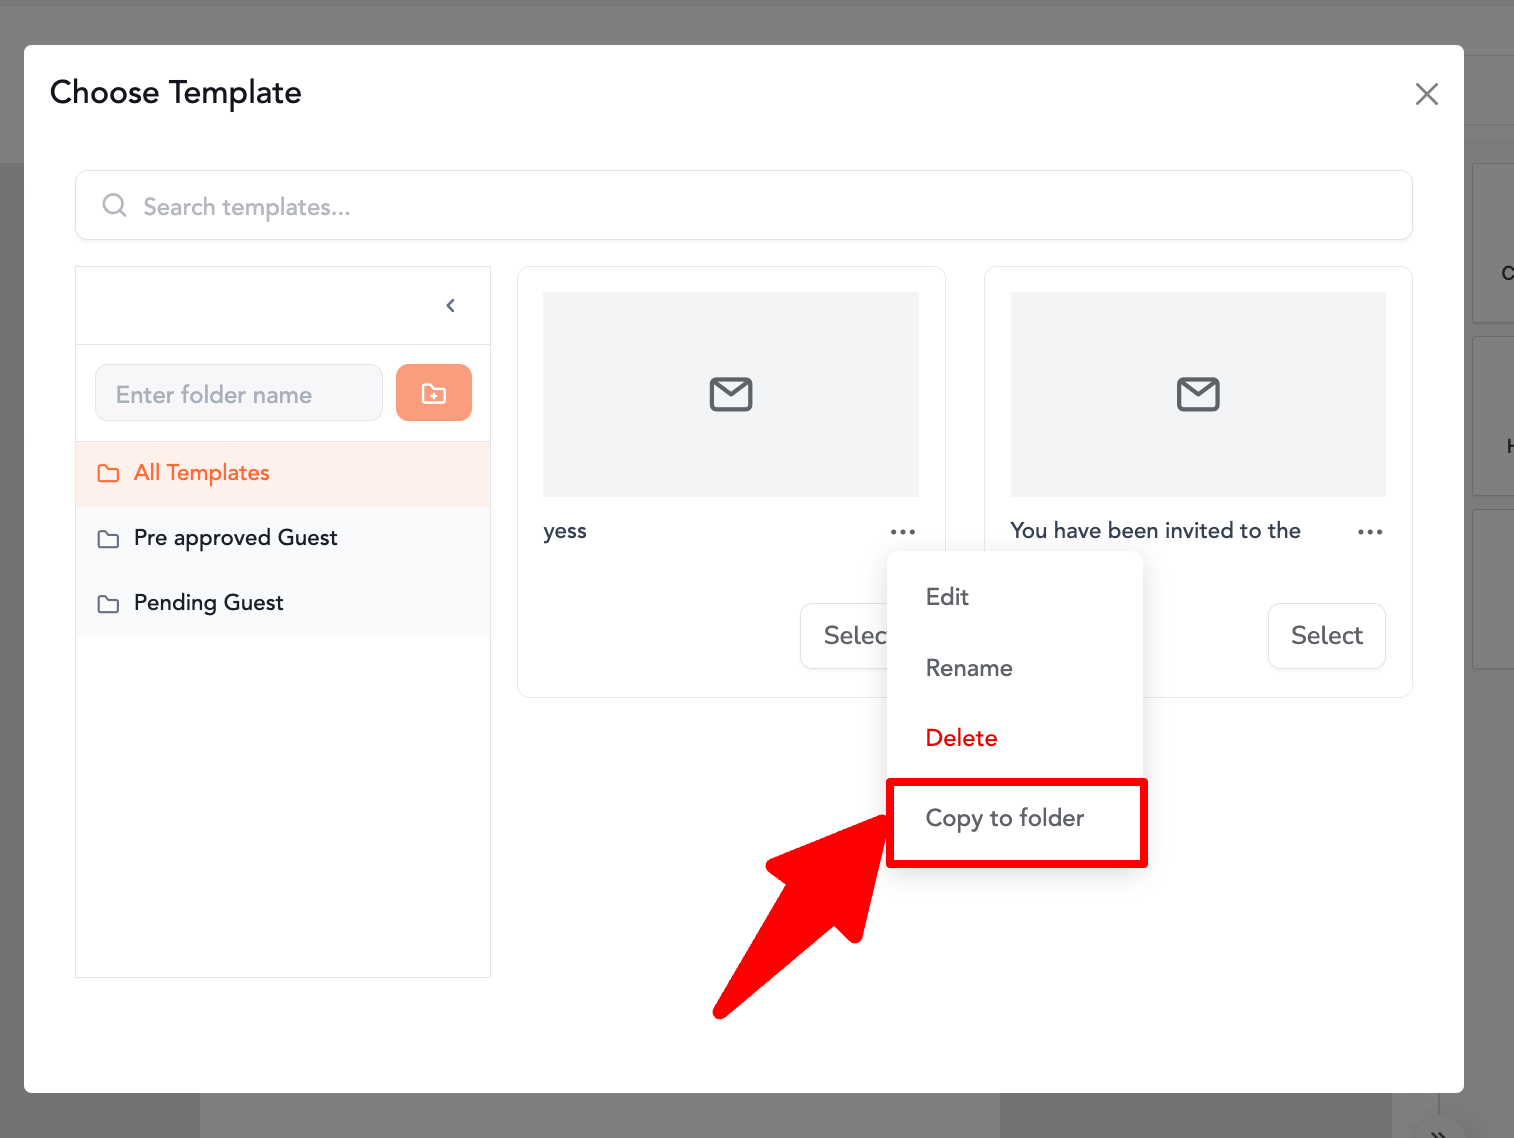
Step 3: Copy Templates into a Folder
You can assign templates to folders in two ways:
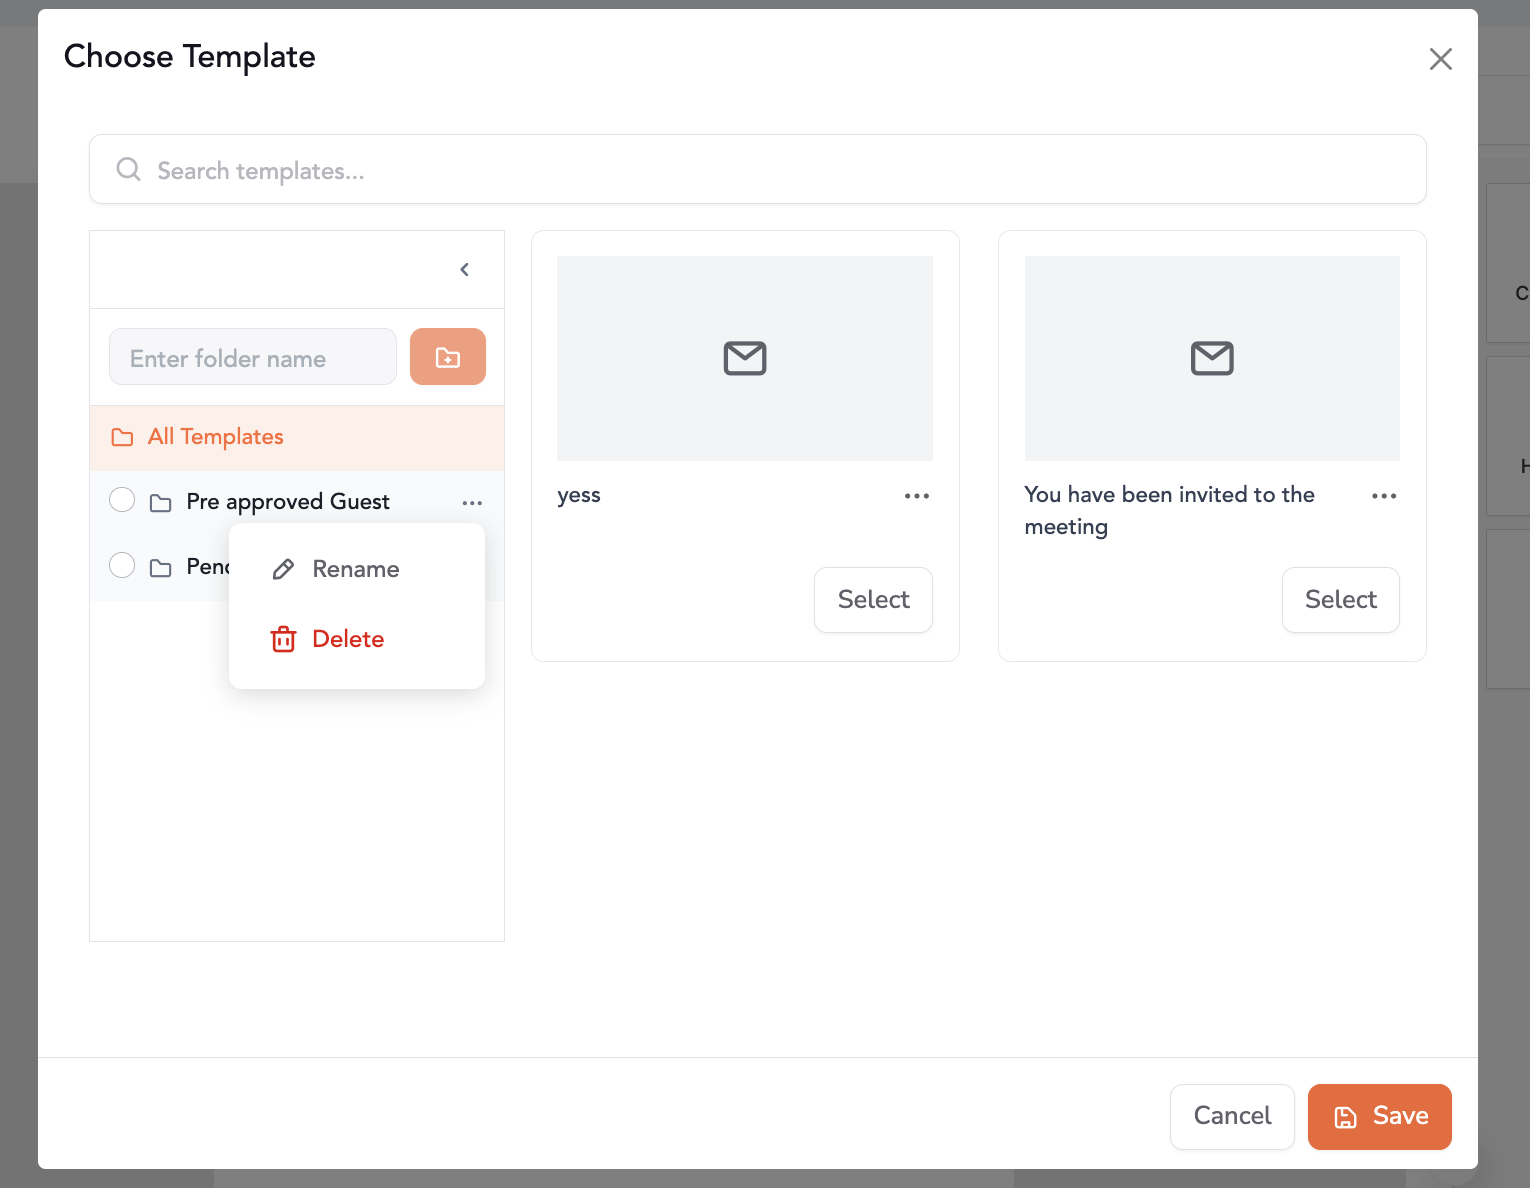
Option A: From Template Card Menu
-
Click the ⋯ menu on any template card.
-
Select Copy to Folder.
-
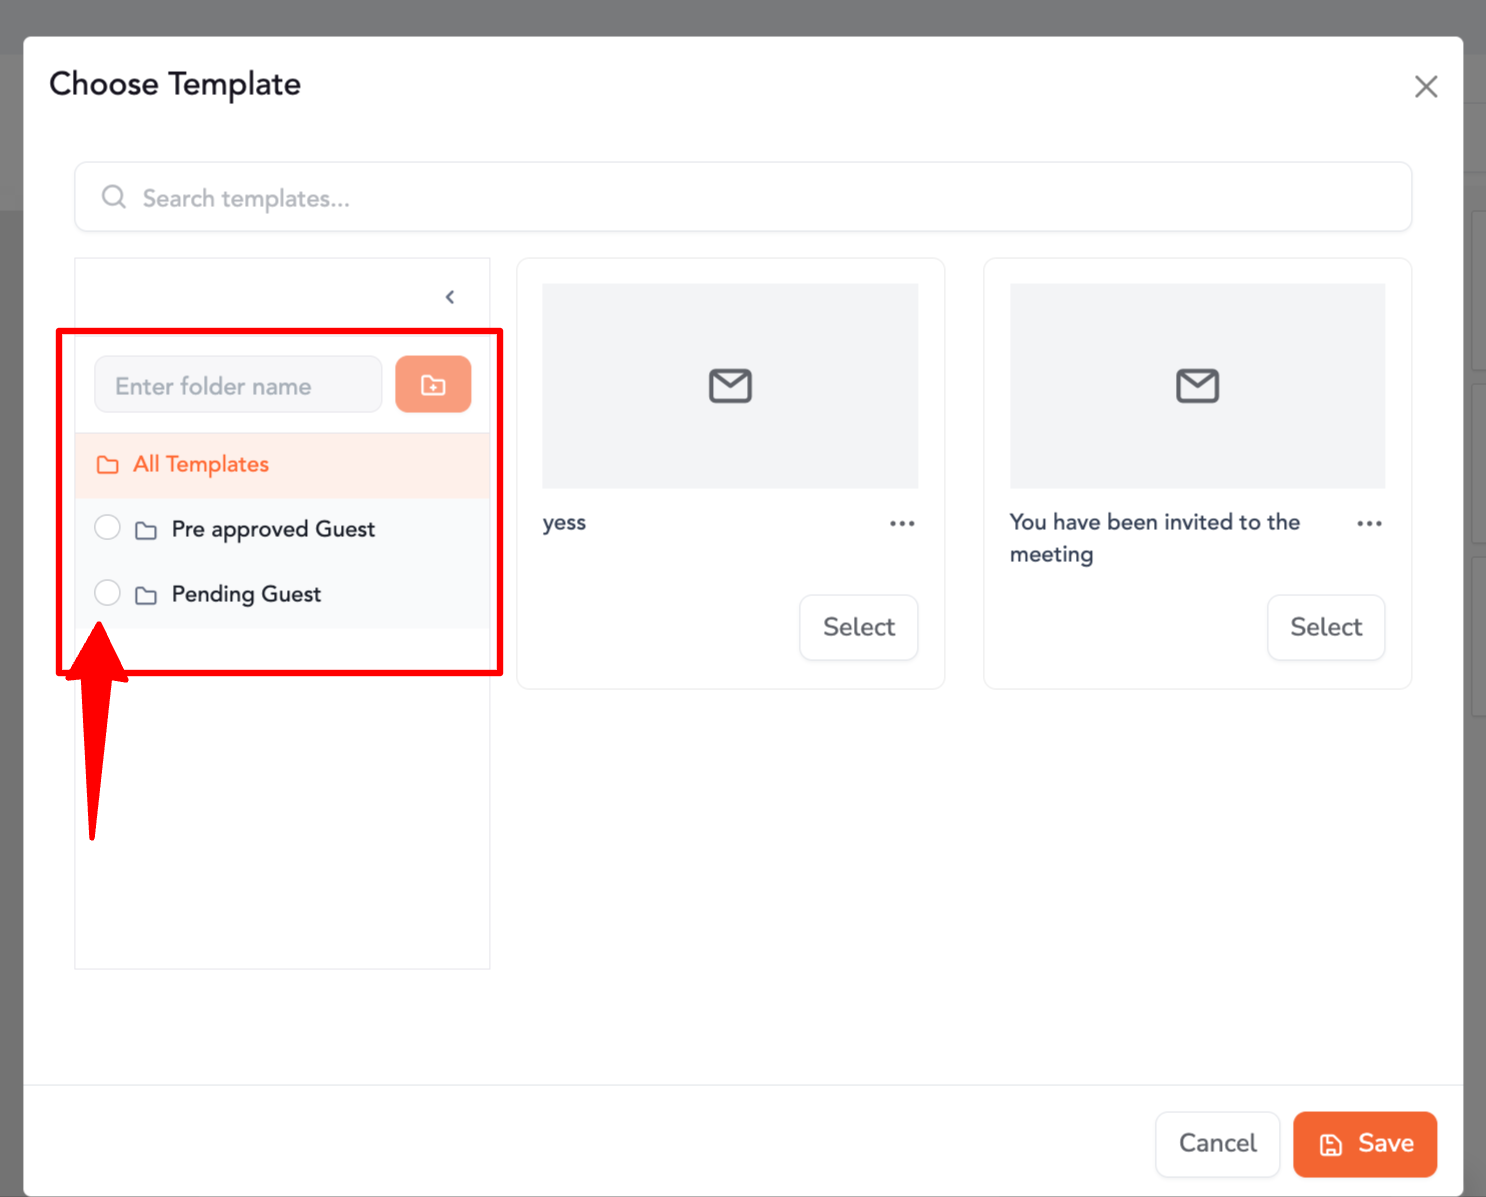
The sidebar switches to radio button mode.
-
Select the destination folder.
-
Click Save → Template is moved to the folder.
Step 4: Manage Folders
-
Rename Folder – Select a folder, click the rename option, and update the name. (Not allowed for “All Templates”).
-
Delete Folder – Select a folder, click delete, and confirm.
-
Templates inside are moved back to All Templates.
-
Templates are not deleted unless you manually delete them from All Templates.
-
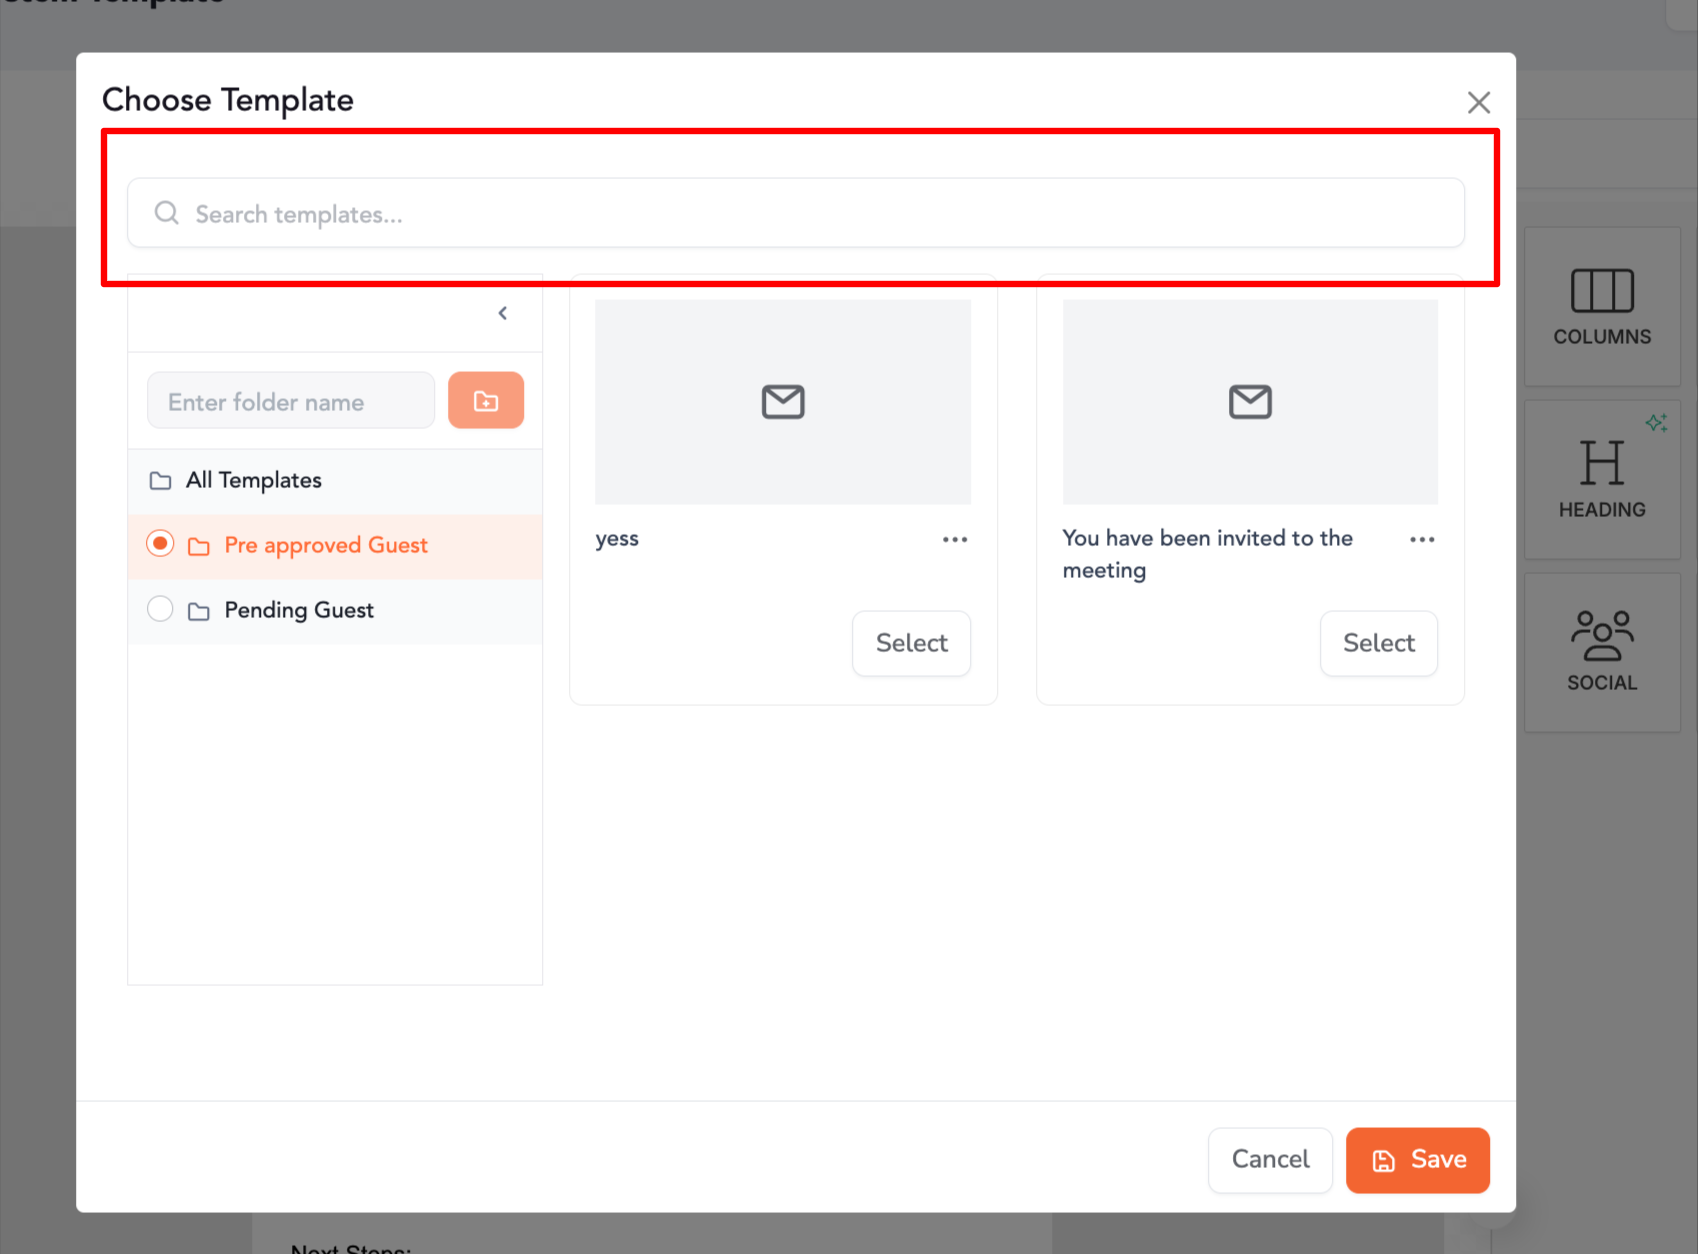
Step 5: View and Search Templates by Folder
-
Clicking a folder filters the grid to show only templates inside it.
-
Use the search bar to find templates by name within the Custom tab.
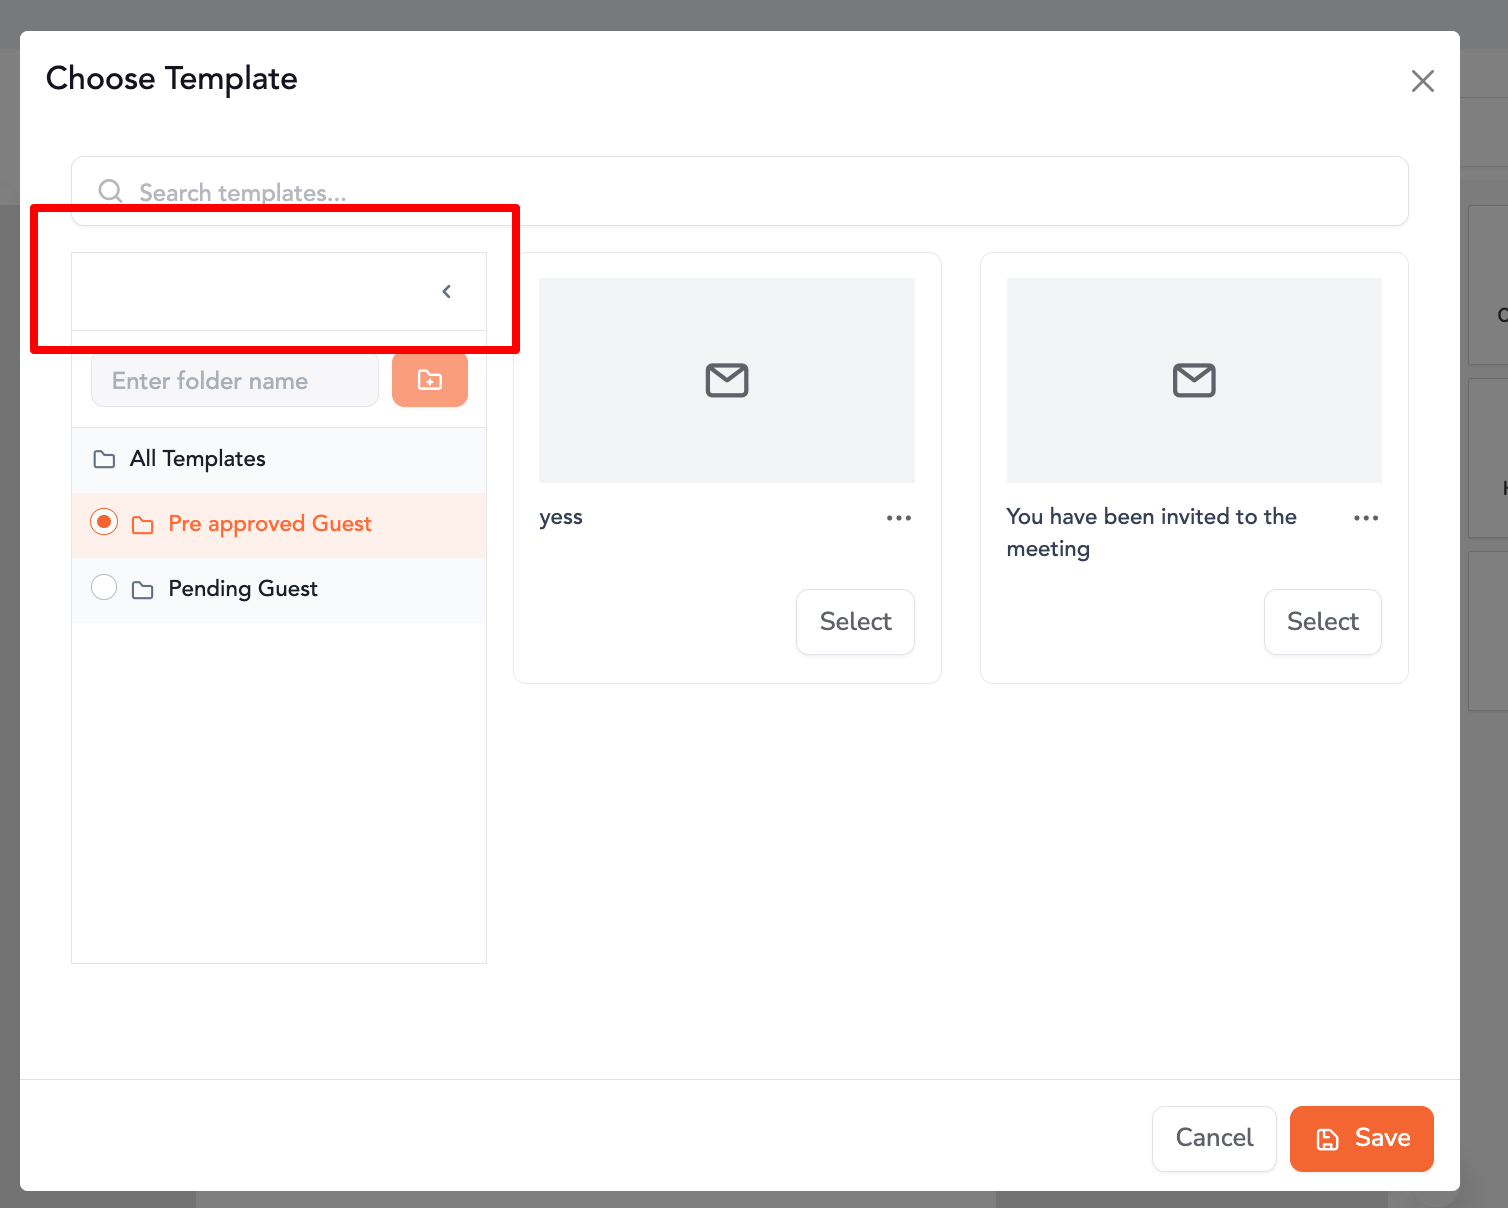
Step 6: Collapse or Expand the Folder Panel
-
Use the toggle control to collapse or expand the folder panel.
-
The panel is open by default, but your last state (collapsed/expanded) persists the next time you open the modal.
This way you can categorize and organize your templates using folders