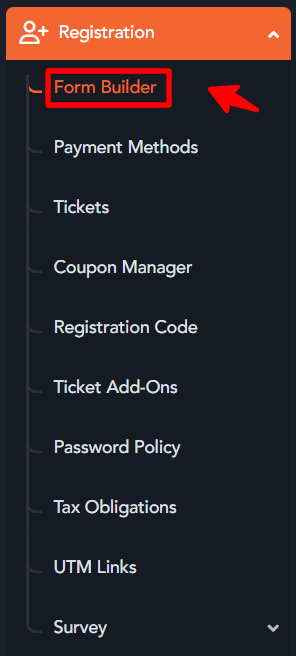
1. Log In and Open Form Builder
- Log in to the Event Backend.
- Navigate to the Registration dropdown and click on Form Builder.
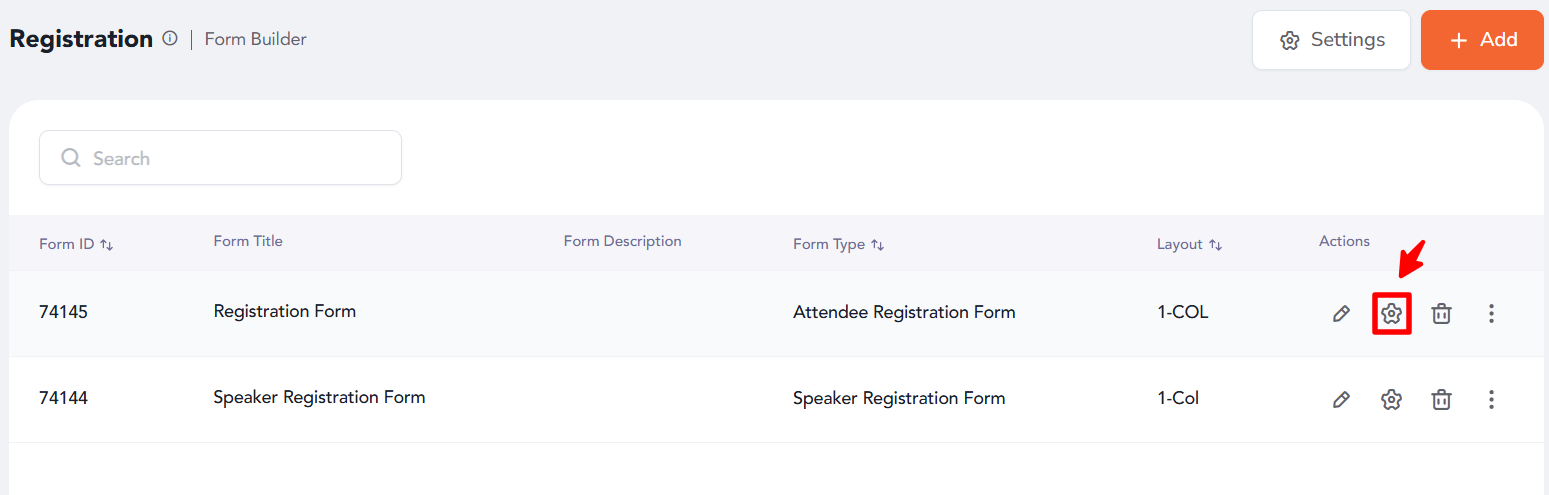
2. Access the Registration Form
- In the Form Builder interface, locate the Registration Form section.
- Click the Edit Form Fields button to begin customizing the form.
3. Add the Session Field
- In the Predefined Fields section, find and click on Session to add it to the form.

4. Position and Configure
- Adjust the session field’s position within the form.
- Configure any required settings such as label, requirement, or multi-selection.
- Click the Save Form button to apply the changes.

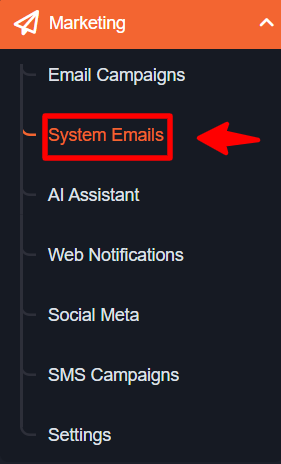
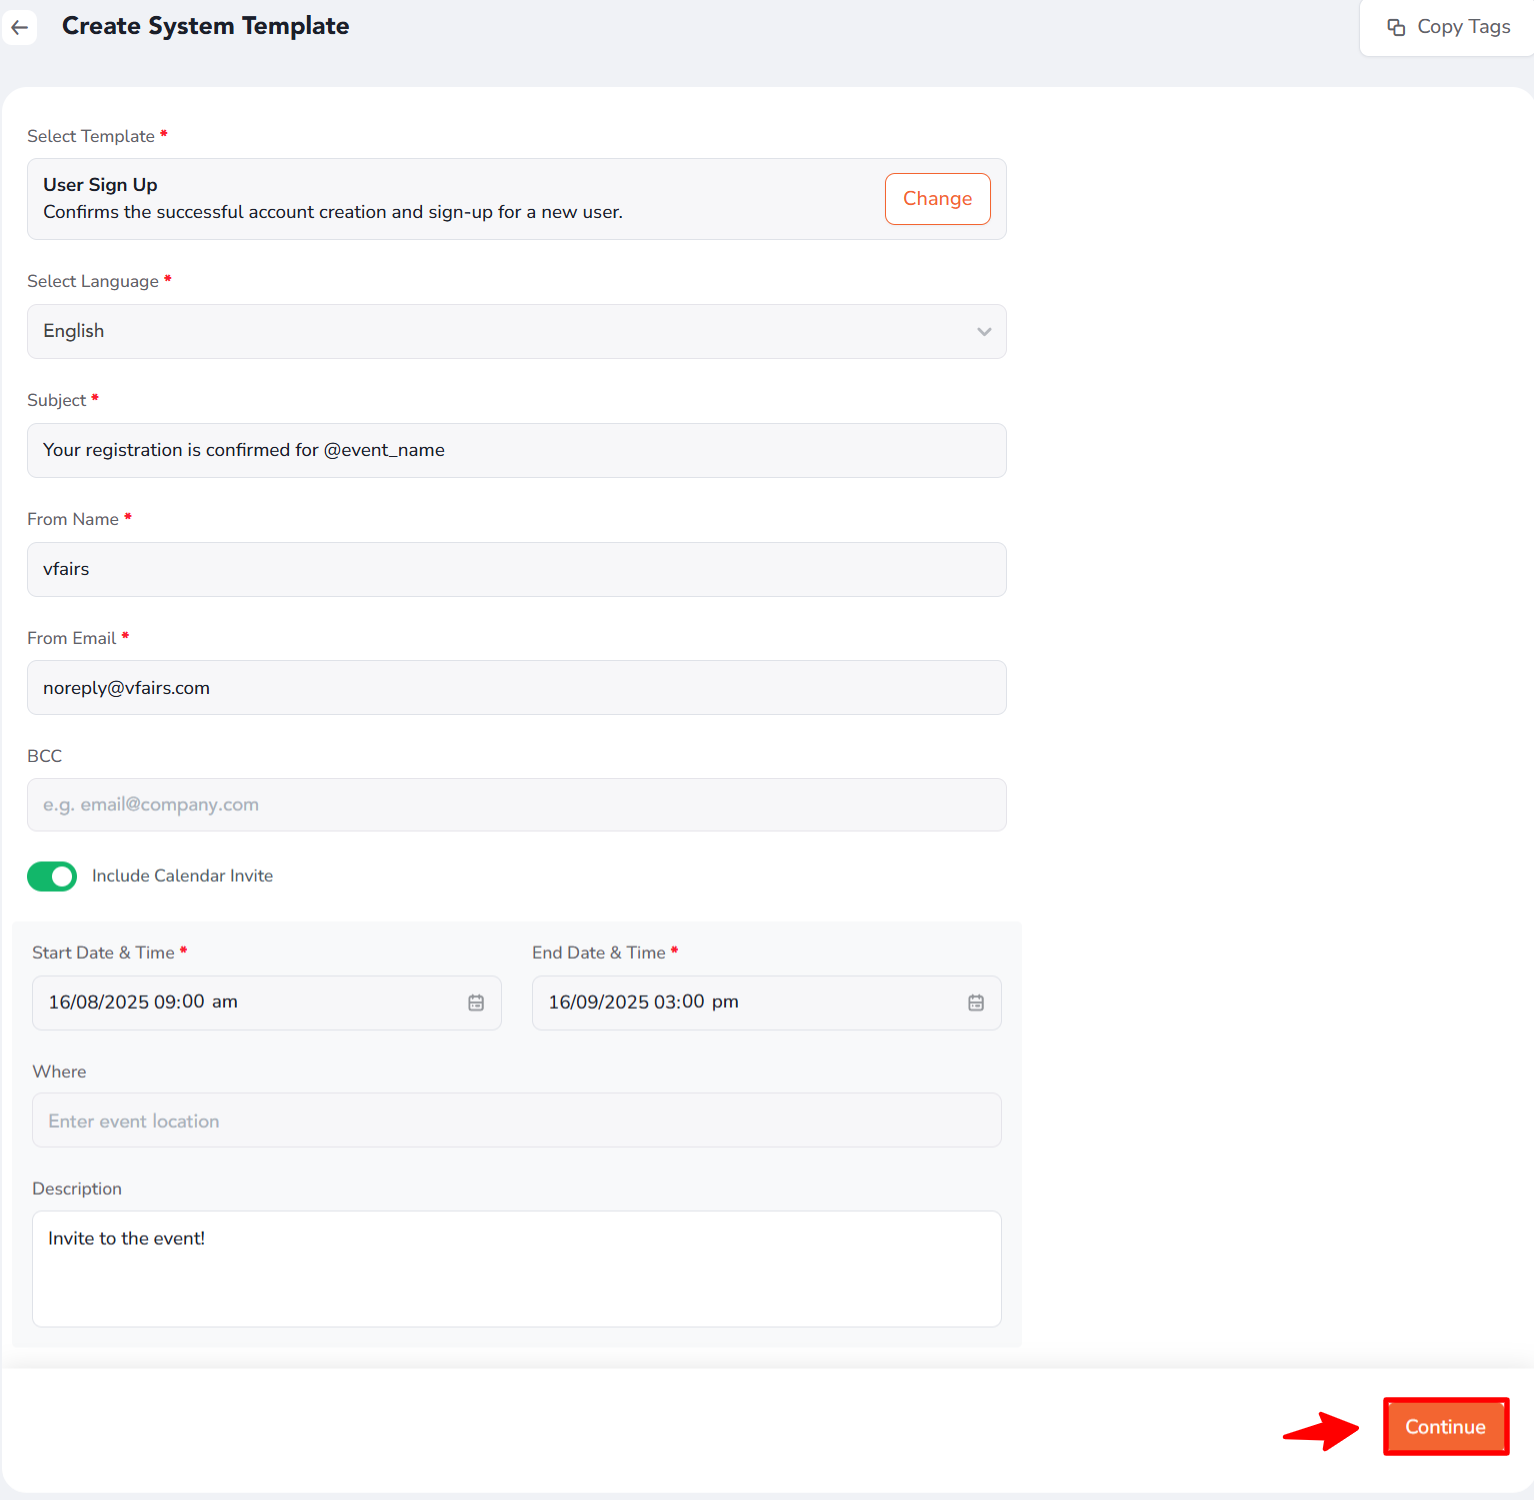
5. Edit the Confirmation Email
- Navigate to Marketing > System Emails and locate the Sign Up email.
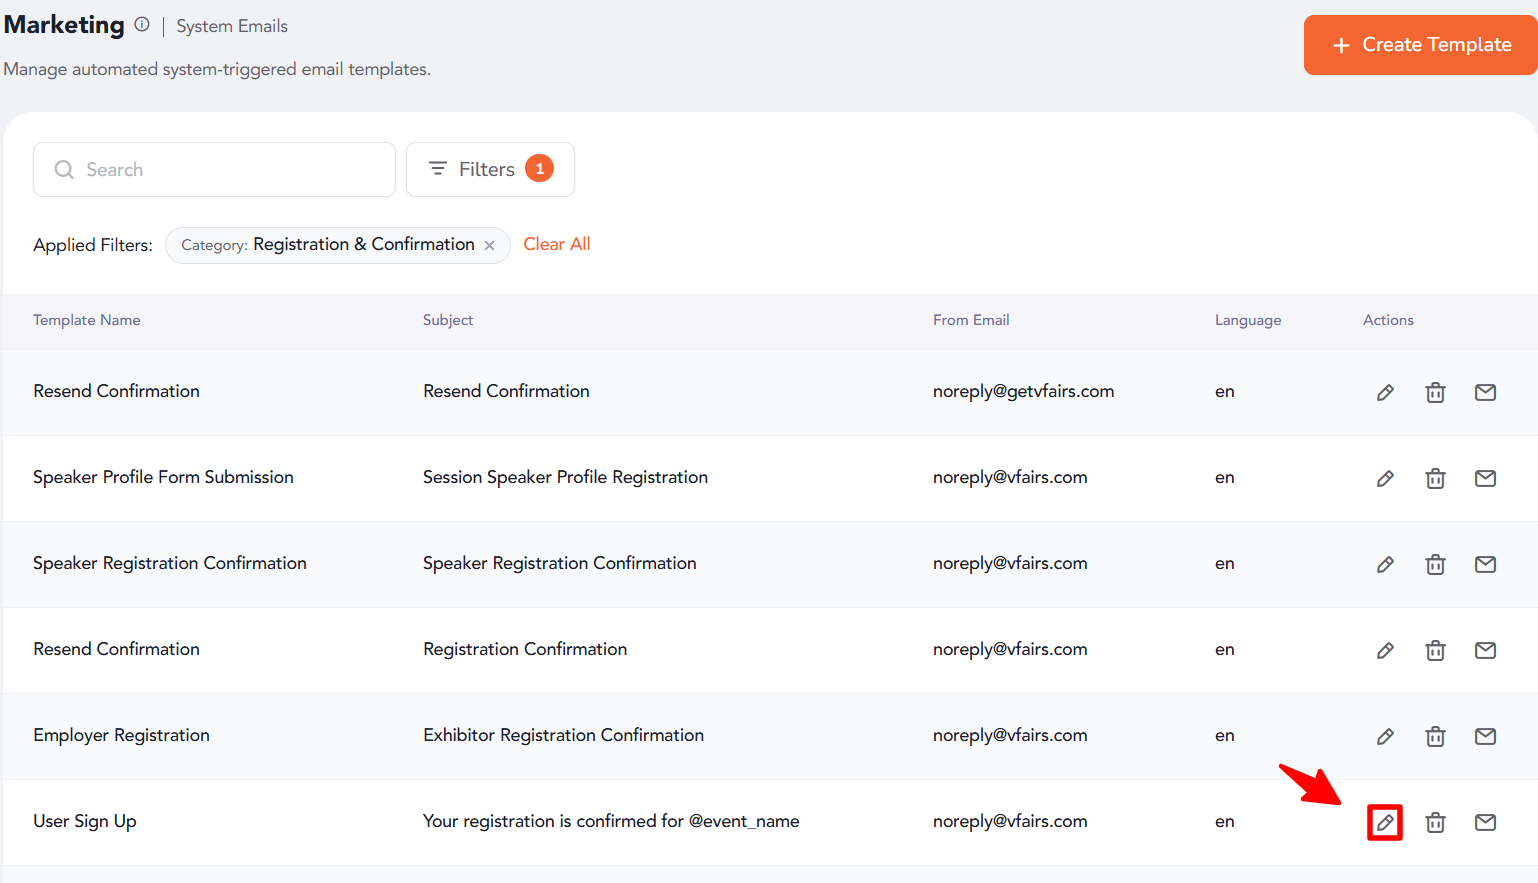
- Click the Continue button to edit the email template.
6. Add Session Details and Calendar Option
- Insert the following merge tags where session details should appear in the email:
- {{selected_sessions}} – This tag displays the attendee’s selected sessions along with timings.
- {{add_session_button}} – This tag adds a button to download the ICS file for calendar integration.
- {{selected_sessions}} – This tag displays the attendee’s selected sessions along with timings.

- Click Save to confirm the email updates.

Outcome
Attendees can now select their preferred sessions while registering.
Their confirmation email will display their selected sessions along with a button to download an ICS file. This file can be imported into calendar apps such as Google Calendar, Outlook, or Apple Calendar.
