How to Set Up and Design a Self-Serve Screen for the Badge Printing App
Learn how to configure and customize a self-serve screen in the vFairs Badge Printing App to enable attendees to check in, register, and print their badges independently
Steps to Design Your Branding Screen
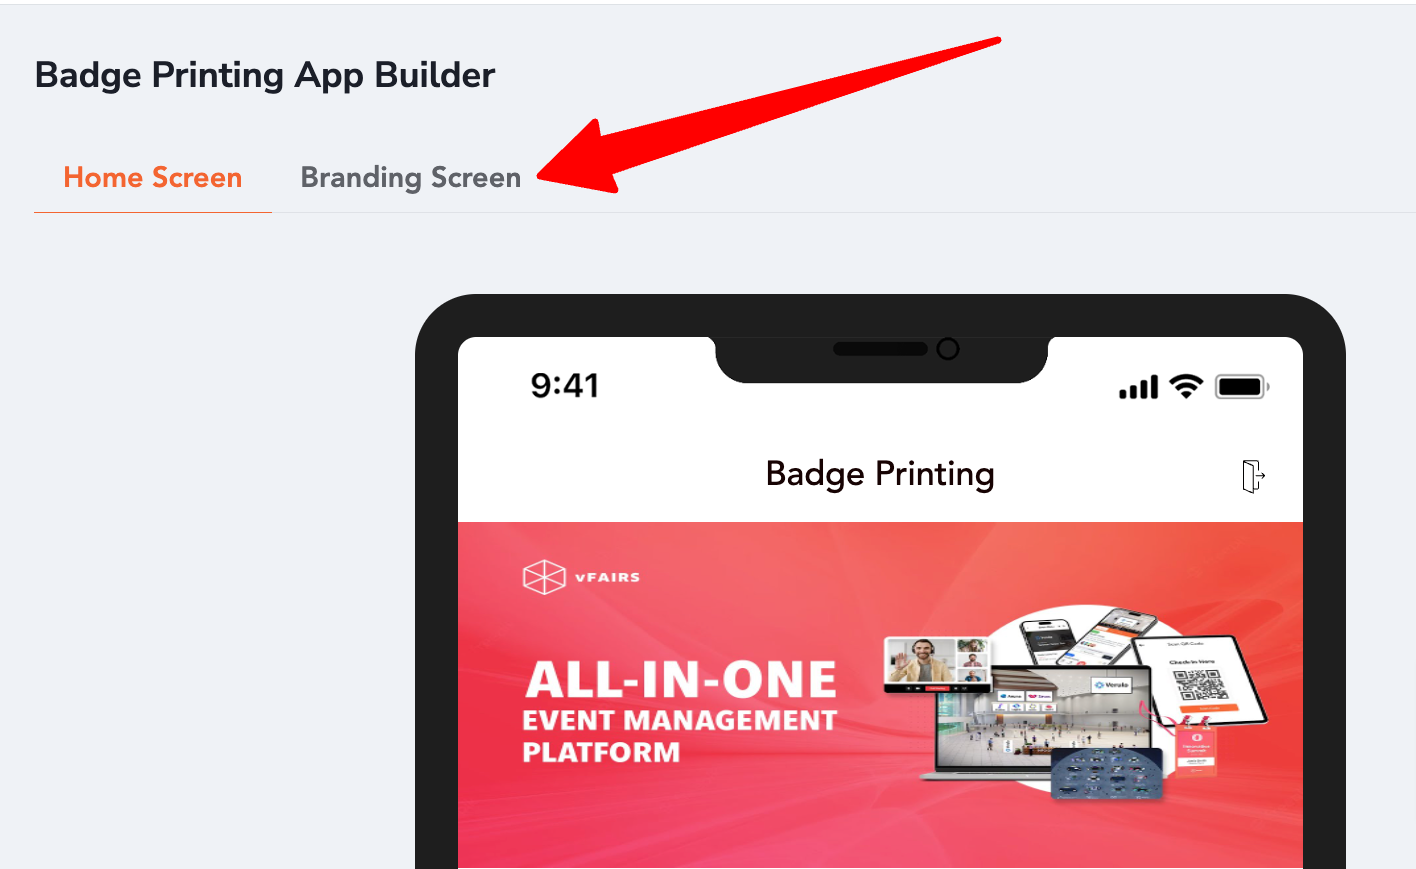
- Click on 'Badge Printing App' in the left navigation menu and then click App Builder under its drop down.

- Click the “Branding Screen” Tab to open the branding screen settings.

- This will take you to the next screen, where you’ll find a sidebar on the right with various options that allow you to create your own custom-designed self-serve screen.

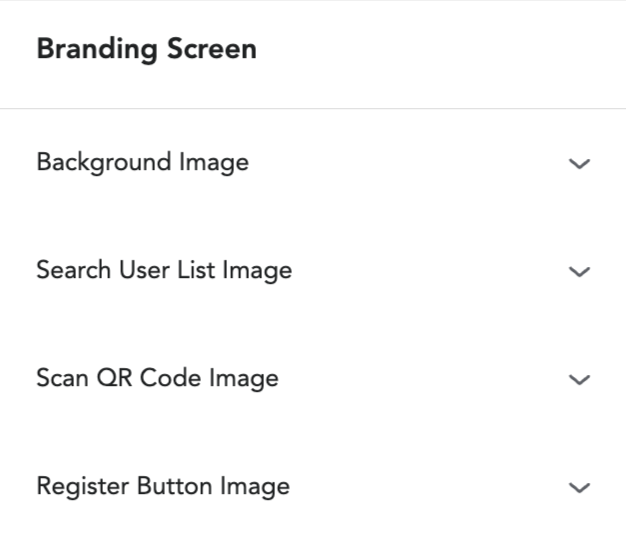
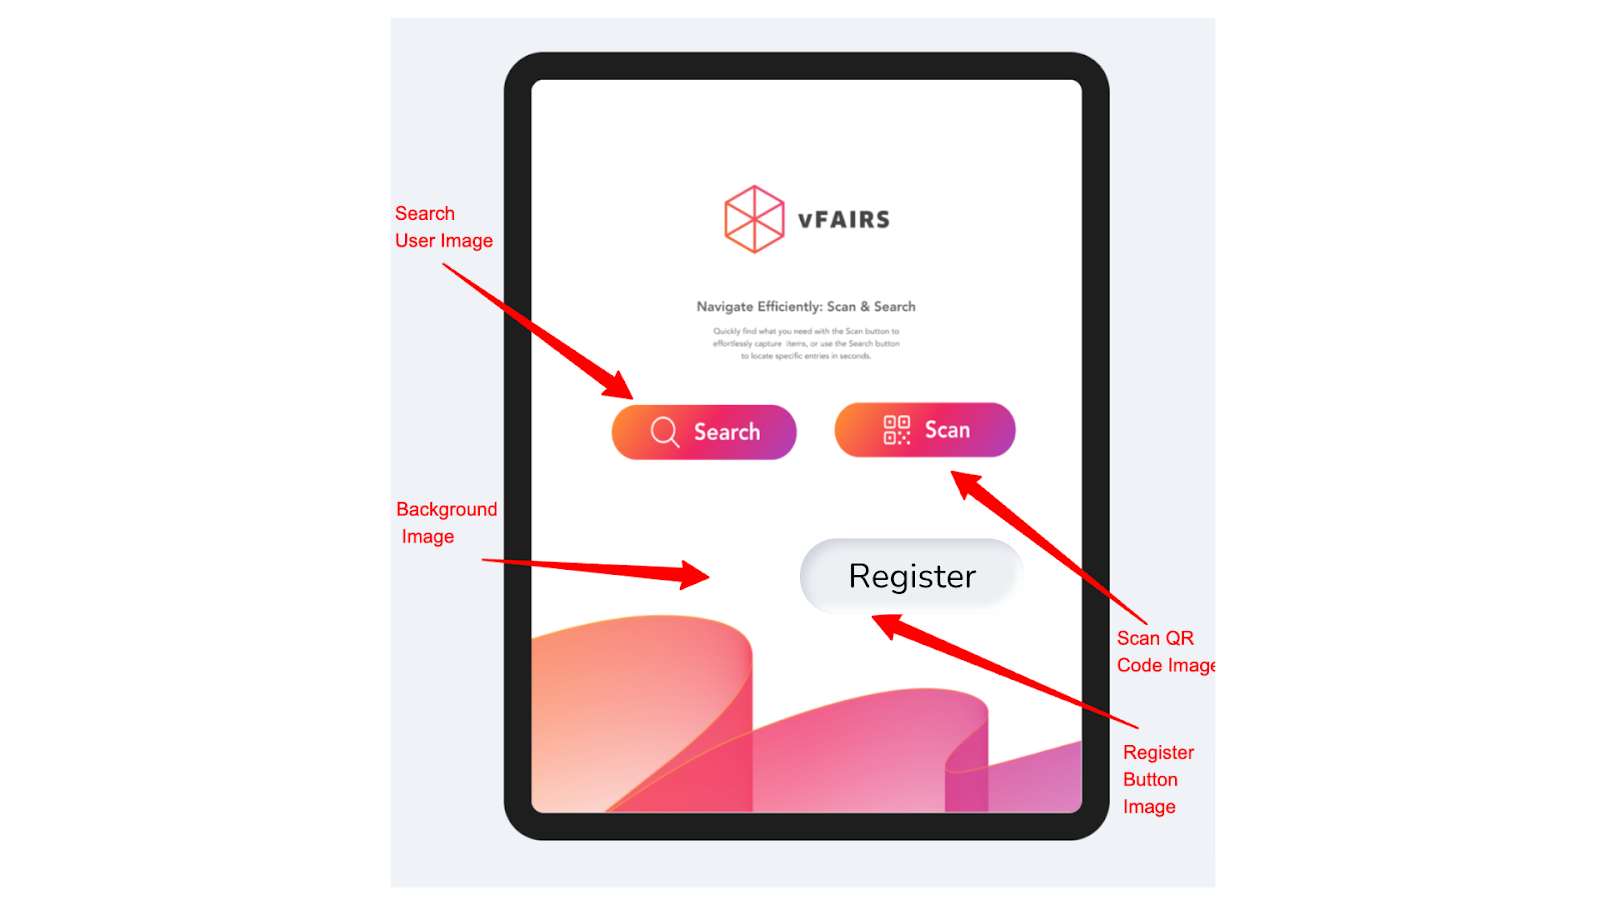
- The branding Screen consists of 4 parts:
-
- Background Image
- Search User List image (If attendees click on this image, it will open the user list for them). Think of this like a button for the user list.
- Scan QR Code image (If attendees click on this image, it will open the QR code scanner for them to scan their QR code). Think of this like a button to access the scanner.
- Register Button Image (If attendees click on this image, it will open the registration form within the app).

Uploading Images:
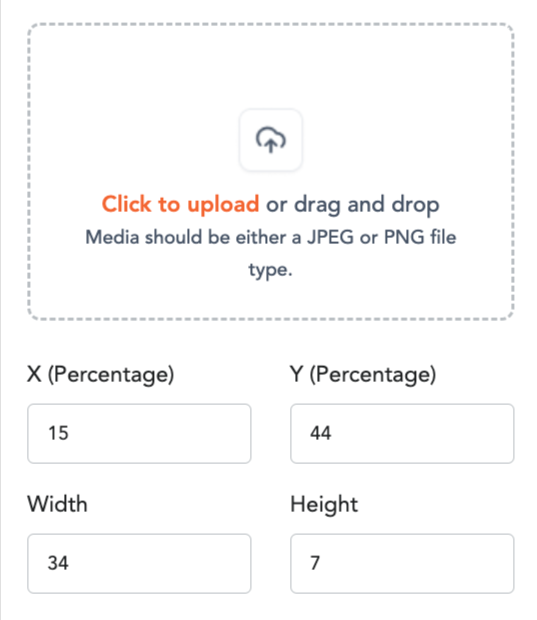
- To upload and position images, click on each of the sections to expand them. This will reveal the upload and positioning options for each.
- You can drag and drop to resize and position them.
- You can also use the axis controls to set their coordinates for the images and control their dimensions.

- Once you have set up the relevant images, click on “Publish Changes” to save the changes made.
- In order to exit the branding screen, you need to tap on the top left of the graphic for 2 seconds to go back to the default home screen.

