How to Show User Profile While Check-In Or Badge Printing
Learn how to enable and configure the User Profile pop-up to display attendee details during the check-in or badge printing. This feature helps streamline user verification and ensures accurate badge issuance.
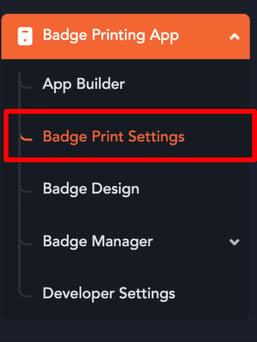
- In the left navigation menu of your event backend, locate and select "Badge Printing App" to reveal additional options. Then, proceed by clicking on "Badge Print Settings."

- In the badge print settings, look for the following toggle and turn it on:

- When you enable this toggle, a dropdown menu labeled "Select when and where you want the profile pop-up to appear" will become visible.

- The drop-down menu offers four distinct options, each designed to specify when and where the profile pop-up will be displayed. Here is a detailed explanation of each selection:
- Before Check-In/Print from scanner:
- The profile pop-up will be displayed prior to the completion of the badge printing or user check-in process when you scan their QR code.
- After Check-In/Print from scanner
- The profile pop-up will be displayed after the completion of the badge printing or user check-in process when you scan their QR code.
- Before Check-In/Print from the User List
- The profile pop-up will appear before completing badge printing or user check-in when searching for a user.
- After Check-in/Print from the User list
- The profile pop-up will appear after completing badge printing or user check-in when searching for a user.
- Click "Update Settings".

- From this point forward, whenever a user attempts to check in for the event or print their badge, the profile pop-up will display according to the option you selected above.


