Overview
Create and customize a registration form to collect attendee information and provide a smooth registration experience.
The Registration Form allows you to control the form structure, fields, appearance, logic, and translations from one place.
Access the Registration Form
To create a registration form:
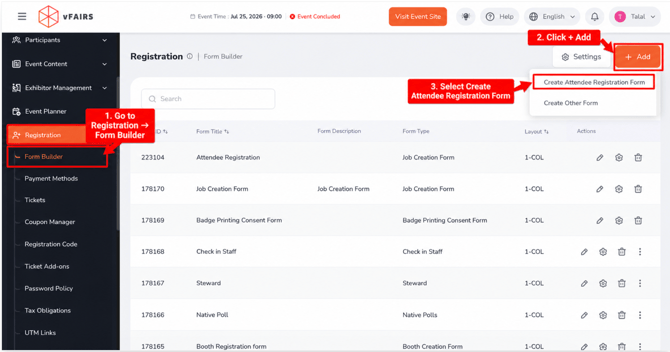
- Go to Registration → Form Builder in your event backend.
- Click + Add.
- Select Create Attendee Registration Form.
You will be taken to the form creation screen.
Step 1: Create the Registration Form
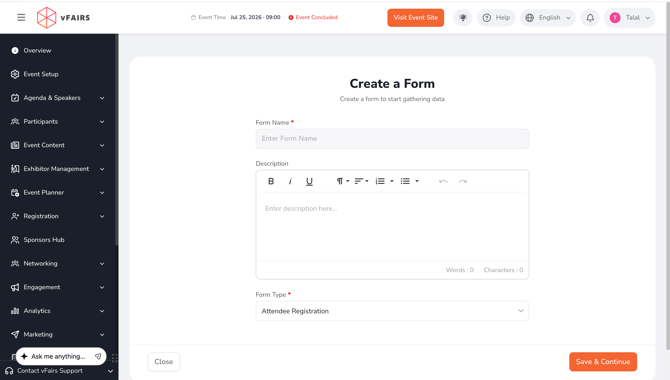
On the Create Form screen, enter the following:
- Form Name: Enter the name of the registration form. This field is required.
- Form Description: Add an optional description for internal use.
- Form Type: Select Attendee Registration.
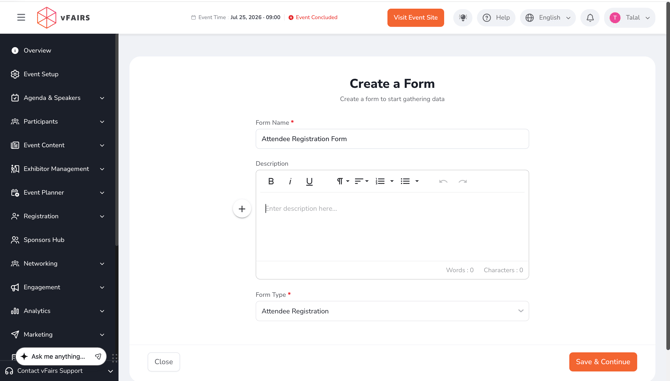
Click Save and Continue to open the form builder.
Default Fields
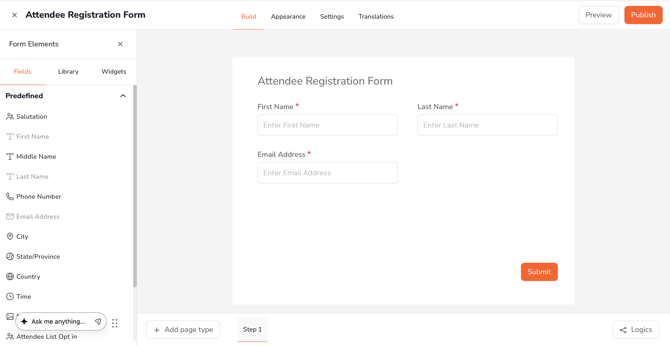
A registration form includes these required fields by default:
- First Name
- Last Name
- Email Address
You can add additional fields based on the information you want to collect.
Step 2: Build Your Form
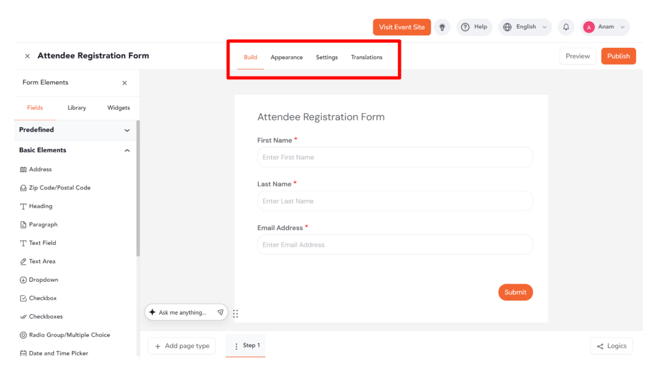
The form builder includes four main tabs:
- Build
- Appearance
- Settings
- Translations
Build
Use the Build tab to create and organize your registration form.
You can:
- Drag and drop fields from the left panel onto the form.
- Double-click a field to edit its text and apply formatting such as bold, italic, underline, alignment, and color.
- Click a field to access its settings.
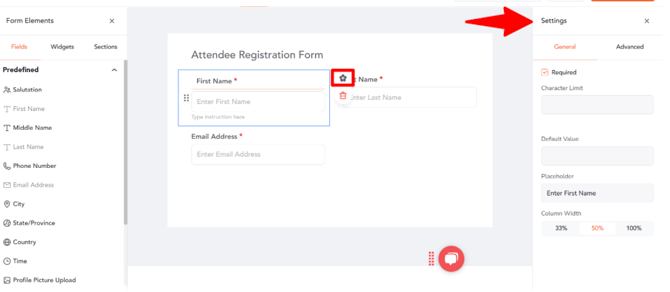
The field settings include:
- General Settings: Configure options such as whether a field is required and its placeholder text.
- Advanced Settings: Configure additional field options.
- Delete: Remove a field from the form.
Add Conditional Logic
You can use logic rules to create dynamic form experiences based on attendee responses.
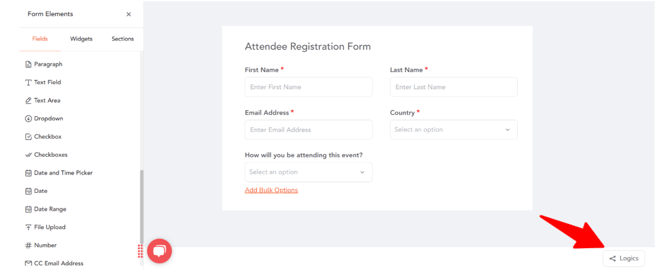
- Click Logics in the bottom-right corner.
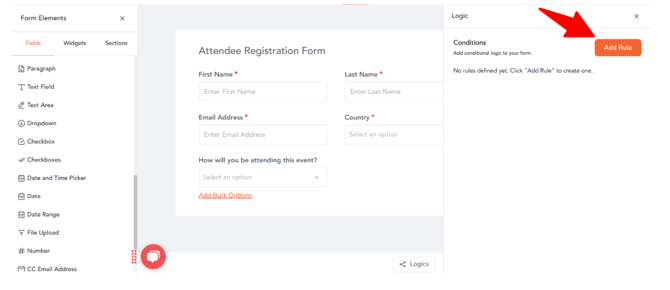
- Click Add Rule.
- Define the condition using an IF statement.
- Select the action to apply using the THEN section.
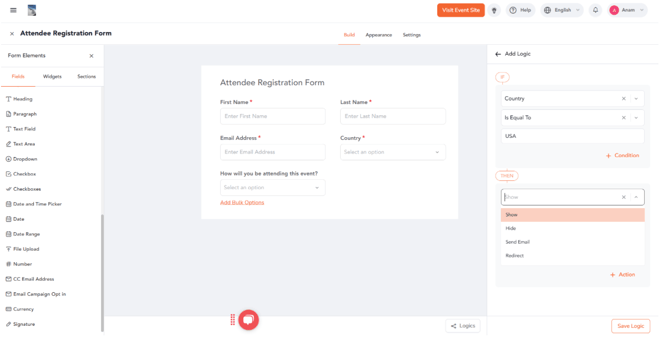
Available actions include:
- Show a field
- Hide a field
- Send Email
- Redirect attendees to a URL
You can add multiple conditions and actions to a single rule.
After configuring a rule, click Save Logic.
Step 3: Customize the Appearance
Use the Appearance tab to customize the look and feel of your registration form.
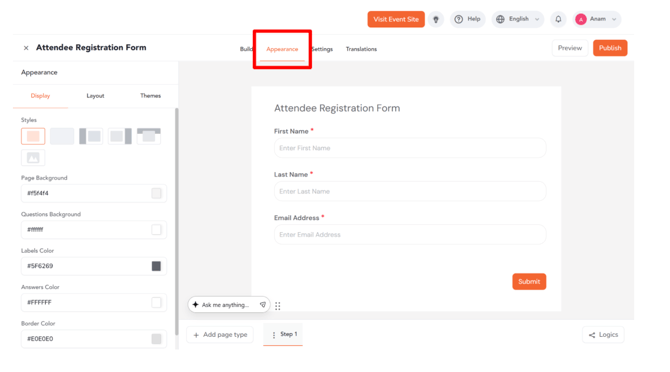
You can:
- Modify the layout
- Choose a theme
- Adjust fonts
- Customize the overall styling of the form
These options help you align the registration form with your event's branding.
Step 4: Add Translations (Optional)
For multilingual events, use the Translations tab to add translations for visible form fields and labels.
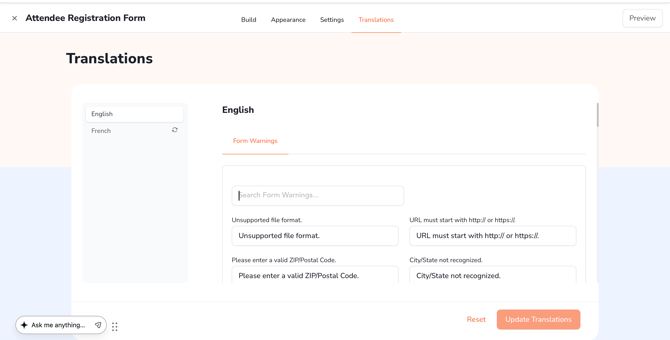
Select the required language and enter the translated content for the form elements.
Publish and Preview
Once you have completed your form:
- Click Publish in the top-right corner to save and activate the registration form.
- Click Preview to review the form from an attendee's perspective.
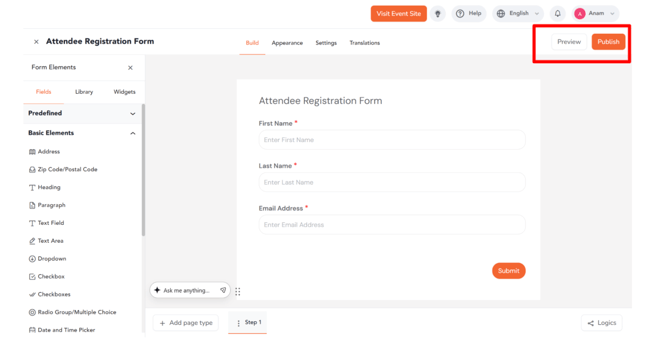
Your registration form is now ready to use.